PW-6000 (PW6K1IC) Installation and Configuration Guide, Document 800-00005V3 29
The PW-6000 web server’s host port configuration requires corresponding changes in
the way the Pro-Watch channels are configured. The PW-6000 web server host ports
and the Pro-Watch channel ports must have the correct values to communicate with
each other.
Follow these steps:
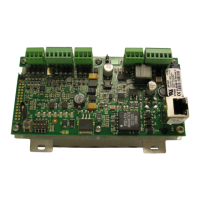
1. Set the PW-6000 hardware configuration:
a. On the controller board, set the jumpers J8, J9, J10 on Port1 to
RS-485.
b. On Port1, connect the pins as follows:
–pin1 = TR+
–pin2 = TR-
–pin5 = GND to RS-485 terminals of the Intelligent “Auto”
Converter PW5K1CVT1 (i.e., PW-5000 RS-232/RS-485
converter)
c. Connect the RS-232 terminal of the PW5K1CVT1 converter to the
serial port of your Pro-Watch application server.
2. Set the host port configuration of the PW-6000 web server:
a. Login to the Access Control Device Server Configuration Manager.
b. Set the Primary Host fields as follows:
– Connection Type = IP Server
–Port Number = 3001
– Data Security = Allow All
c. Set the Alternate Host Port fields as follows:
– Connection Type = Serial-RS-485
–Baud Rate= 38400
– Data Security = None
– Flow Control = RTS Toggle
d. Click OK.
A
PW-6000 Web Server and
Pro-Watch Channels
 Loading...