Copyright © 2022 Honeywell International Inc. All rights reserved.
4) Installation
Unlike other detectors, Honeywell's new generation gas detector—the RAEGuard Lite offers
a standard mount accessory and a fast,simple and efficient mounting plate kit fitting (to be
ordered separately).
4.1) Install using standard mount accessories:
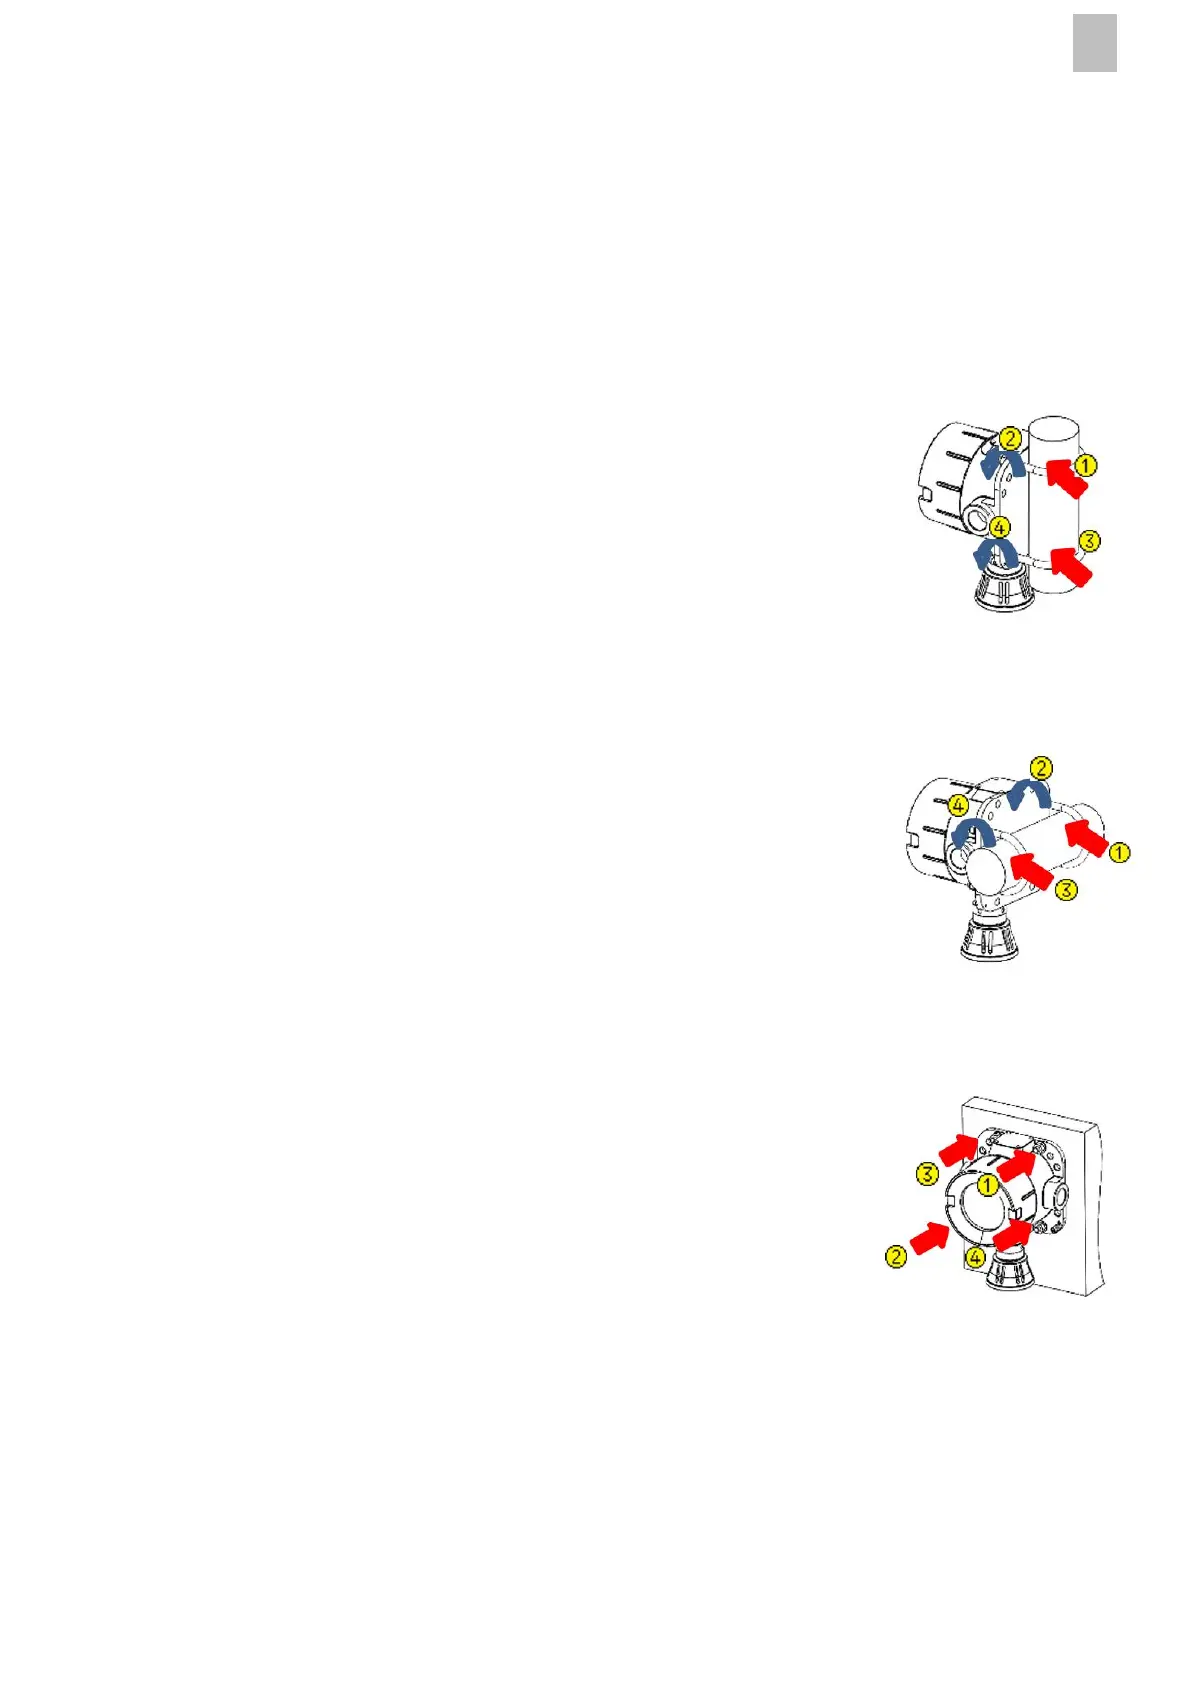
Vertical Pipe Mounted:
• Prepare the detector and 2 x U-type bolts.
• Find the suitable installation position and bury
the pipe (diameter: 38mm ~ 60mm) in advance.
• First, let one U-type bolt surround the pipe and
then pierce into the corresponding strip hole
on the detector. Fasten it clockwise with
self-contained combination nuts.
• Then, install another U-type bolt with the
same method.
Horizontal Pipe Mounted:
• Prepare the detector and 2 x U-type bolts.
• Find the suitable installation position and bury
the pipe (diameter: 38mm ~ 60mm) in advance.
• First, let one U-type bolt surround the pipe and
then pierce into the corresponding strip hole
on the detector. Fasten it clockwise with self-
contained combination nuts.
• Then, install another U-type bolt with the
same method.
Wall Mounted:
• Prepare the detector and four M8 expansion
screws (prepared by users according to the
actual installation conditions).
• Find the proper installation position.
• As shown in the right figure, tighten the
four expansion screws in turn.
 Loading...