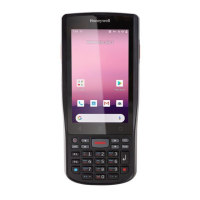
3 - 4
require a high to medium level of interface with the touch panel, such as signature capture for proof of
delivery.
Honeywell advocates the use of screen protectors on all ScanPal 5100 devices. We recommend
implementing a screen protector replacement program to ensure that screen protectors are replaced
periodically when signs of damage/wear are noticeable. Replacement screen protectors can be
purchased directly from Honeywell. Please contact a Honeywell sales associate for details.
Honeywell also mandates use of a proper stylus, which is one that has a stylus tip radius of no less than
0.8 mm. Use of the Honeywell stylus included with the terminal is recommended at all times.
Honeywell warranty policy covers wear on the touch panel for the first twelve (12) months if a screen
protector is applied and an approved stylus is used for the 12 month duration covered by the warranty.
Removing the Screen Protector
ScanPal 5100s ship with a touch screen protector already installed. To replace the screen protector, you
must remove the one already installed.
1. Press the Power key to put the terminal in Suspend Mode.
2. Using a strong, flat, plastic card wedge the edge of the card under the existing screen protector.
Catch the edge of the screen protector and pull it up and away from the touch panel.
Note: If you have one, you can also use the small plastic squeegees designed for touch panels.
3. Wipe the screen with a clean, non-abrasive, lint-free cloth.
Note: Use ionized air, if available, to blow additional dirt or particles off the touch panel.
Installing Your Screen Protector
When installing a new screen protector, use a flat plastic card to apply the screen protector smoothly and
remove any air bubbles.
Note: If you have one, you can also use the small plastic squeegees designed for touch panels.
1. Press the Power key to put the terminal in Suspend Mode.
2. Clean the touch panel thoroughly with a clean, non-abrasive, lint-free cloth. Make sure nothing is on
the touch panel.
3. Release the top edge of the backing paper on the screen protector.
4. Align the exposed edge of the screen protector along the top edge of the touch panel.
Make sure that it lies flush with edges of the touch panel.
Note: To reposition the screen protector, lift up gently and reapply.
5. Use the card on top of the screen protector to smooth it out as you pull on the backing paper.
6. Pull smoothly and evenly from top to bottom until the screen protector is applied. Press gently but
firmly. Use the card as necessary to smooth out any air pockets or bumps after application.
7. Press the Power key to wake the terminal and check the touch panel with the stylus.
8. Verify that the screen accepts input from the stylus as usual. If not, re-apply the screen protector.
9. Press the Power key to put the terminal back in Suspend Mode.
10. Clean the surface of the screen protector with a clean, non-abrasive, lint-free cloth.
 Loading...