STAND KITS
Assembly
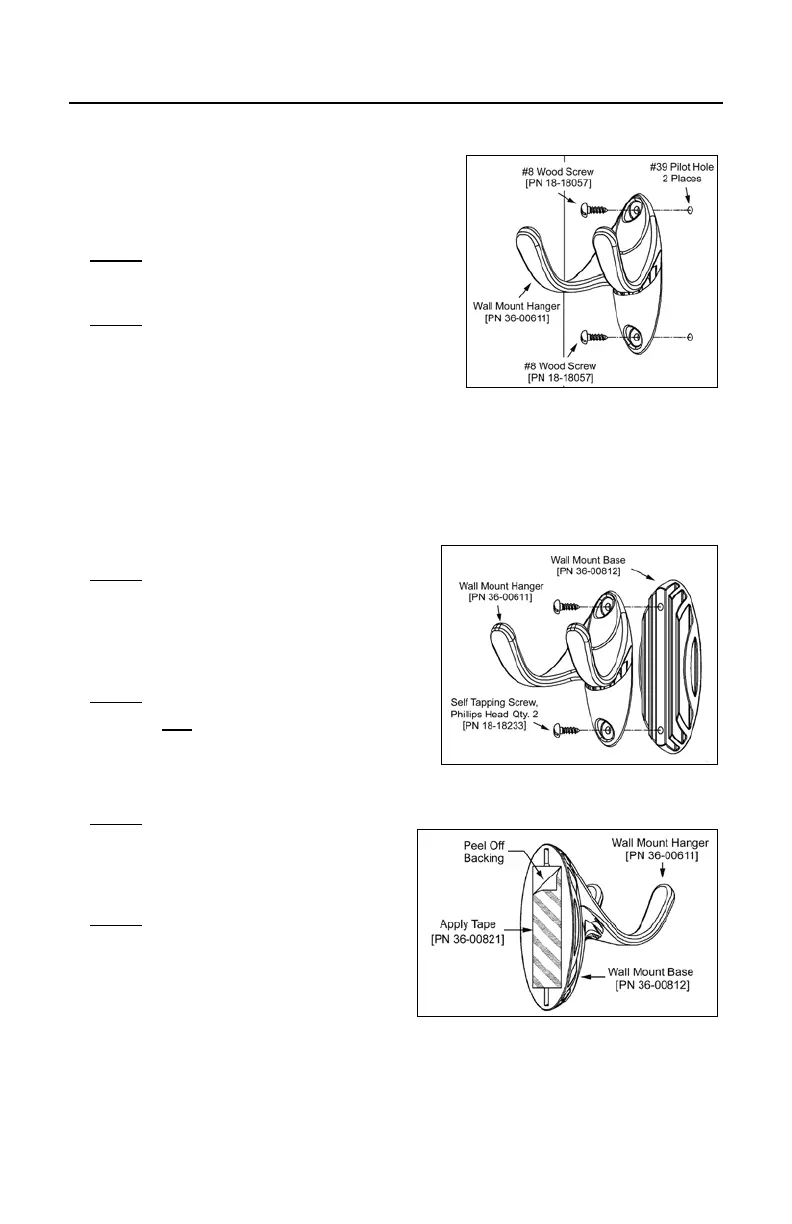
Wall Mount, Option 1:
For Kit #46-46508
Step 1
Drill two #39 pilot holes 3.00″ apart.
Step 2
Attach the Wall Mount Hanger to the wall
with the two #8 wood screws provided.
Wall Mount, Option 2:
Kit #46-46508
Step 1
Attach the Wall Mount Base to the
Wall Mount Hanger with the two
4.8 x 13 mm self-tapping screws.
Step 2
Remove one
side of the protective
backing from the double-sided
adhesive tape.
Step 3
Attach the tape to the back of the
Wall Mount Hanger as shown.
Step 4
Remove the protective backing from
the double-sided adhesive tape and
apply hook to the wall.
Figure 27.

 Loading...