System board
1. Prepare the computer for disassembly (Preparation for disassembly on page 16).
2. Remove the optical drive (Optical drive on page 22).
3. Remove the access panel (Access panel on page 18).
4. Remove the front bezel (Front bezel on page 26).
5. Remove the fan duct (Fan duct on page 32).
6. Remove the fan sink (Fan sink on page 33).
7. Remove the drive cage (Hard drive on page 24).
8. When replacing the system board, make sure that the following components are removed from the
defective system board and installed on the replacement system board:
● Memory modules (Memory on page 29)
● WLAN module (WLAN module on page 27)
● M.2 solid-state drive (Solid-state drive module on page 28)
● Expansion cards (Expansion card on page 19)
● Processor (Processor on page 34)
9. Disconnect the remaining cables from the system board, and note their locations for reconnection.
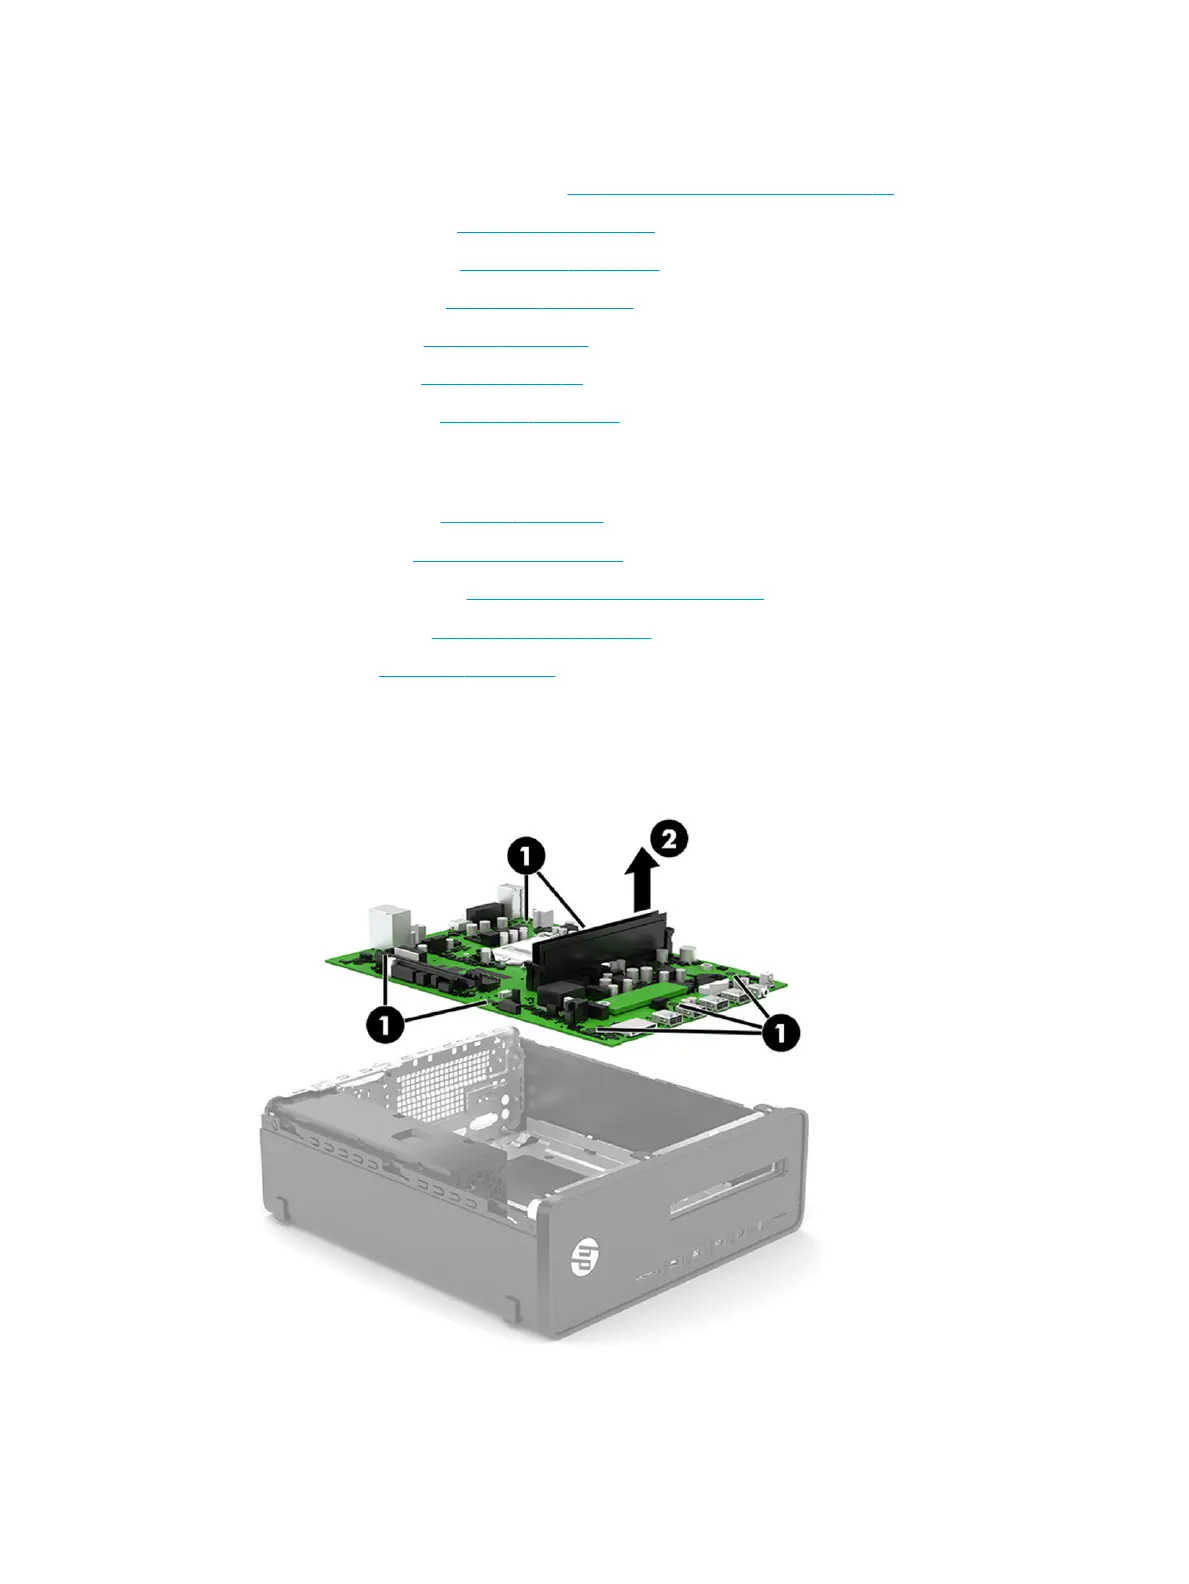
10. Remove the seven Torx screws (1) that secure the system board to the chassis.
11. Lift the front of the board up, and then pull it toward the front and out of computer (2).
To install the system board, reverse the removal procedure.
System board 37