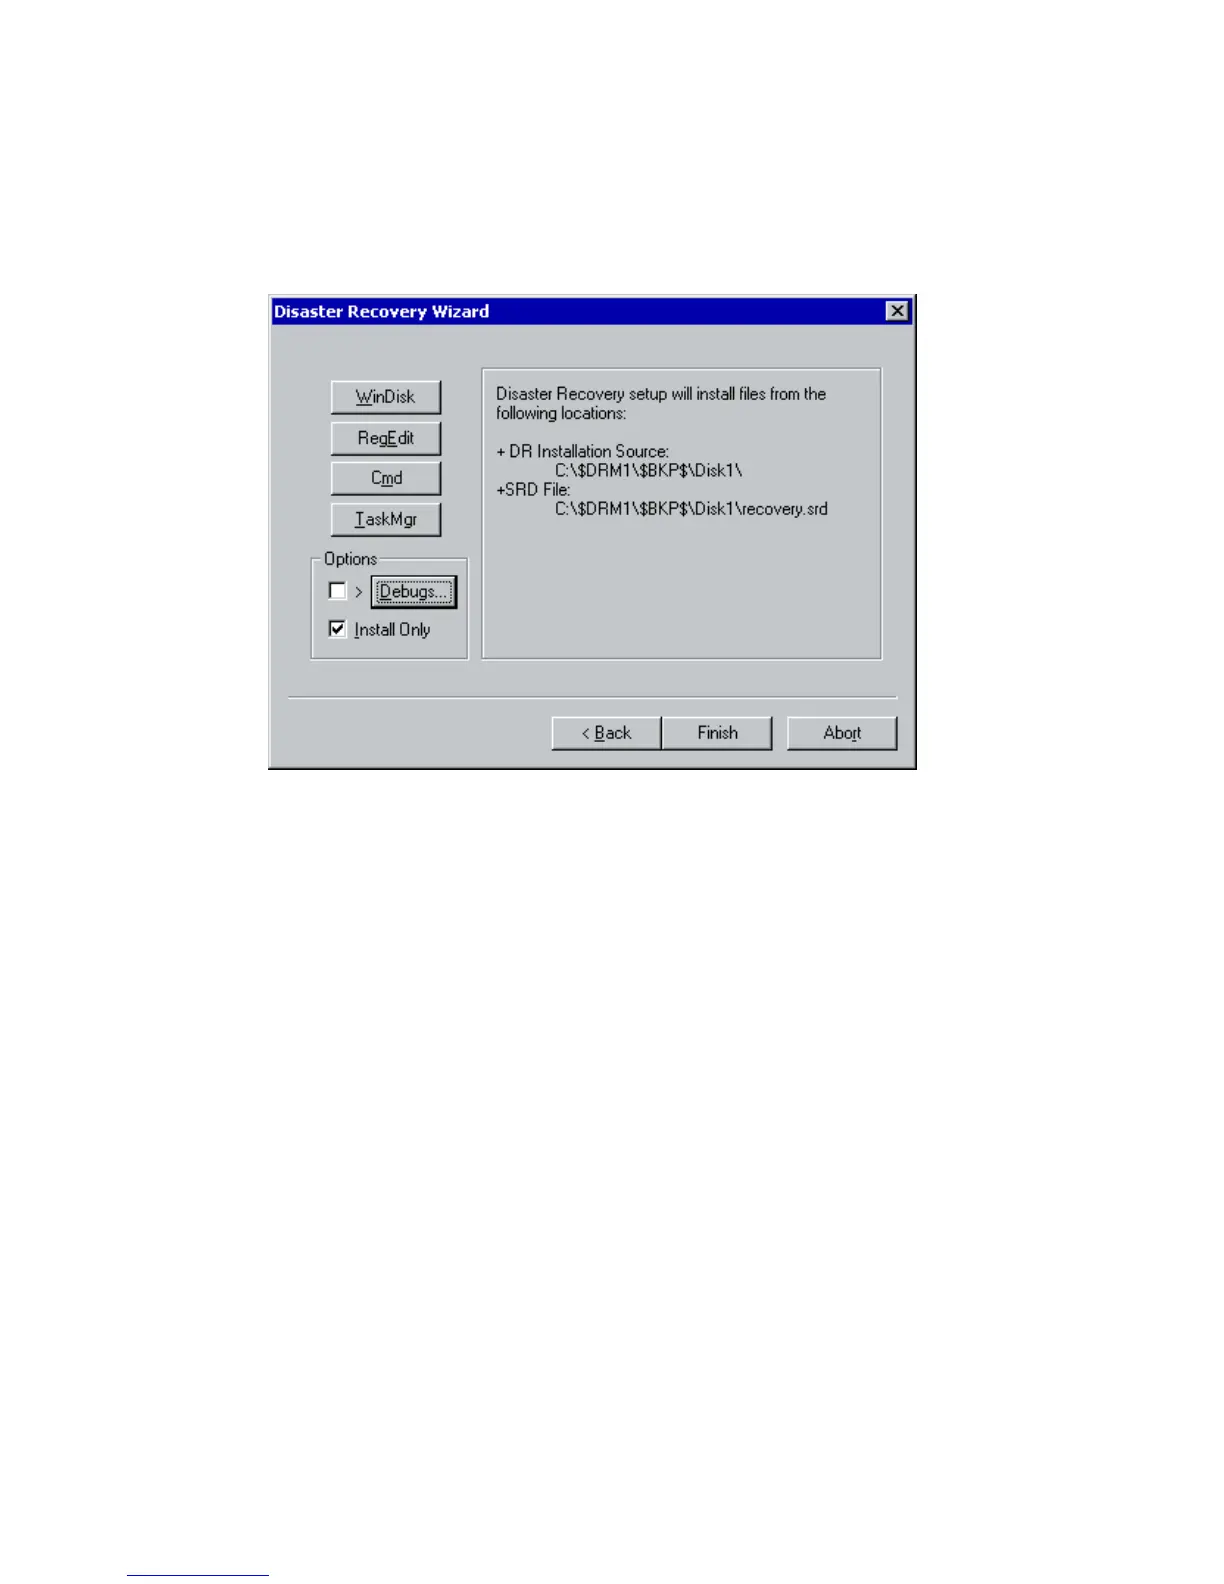
1. When the Disaster Recovery wizard appears, press any key to stop the wizard
during the countdown, select the Install only option and click Finish. This option
will install only the temporary operating system to the target system and thus
finish Phase 1 of disaster recovery. Phase 2 of disaster recovery will not start
automatically if the Install only option is selected.
Figure 9 Install only option in the Disaster Recovery wizard
2. Run Windows Task Manager (press Alt+Ctrl+Del and select Task Manager).
3. Click File and then New task (Run...). Type notepad
c:\DRSYS\system32\OB2DR\bin\recovery.srd and press Enter. The
SRD file will be opened in the Notepad.
4. Edit the SRD file. For details on how to edit it, refer to “Updating and editing
the system recovery data (SRD)” on page 36.
5. After you have edited and saved the SRD file, run the following command from
c:\DRSYS\system32\OB2DR\bin:
omnidr -drimini c:\$DRIM$.OB2\OBRecovery.ini
6. Proceed with the next step in the normal EADR/OBDR recovery procedure.
Disaster recovery guide 111