Installing an optical drive
The media bay supports a 95 mm slim-type SATA optical drive option. This option allows you to retrieve or store data on
optical discs like CDs and DVDs.
Procedure
1.
Power down the server.
2.
Disconnect the power cord from the AC source, and then from the server.
3.
Disconnect all peripheral cables from the server.
4.
Remove the chassis cover.
5.
Remove the front bezel.
6.
Install an optical drive.
7.
Install the front bezel.
8.
Install the chassis cover.
9.
Connect all peripheral cables to the server.
10.
Connect the power cord to the server power jack, and then to the AC source.
11.
Power up the server.
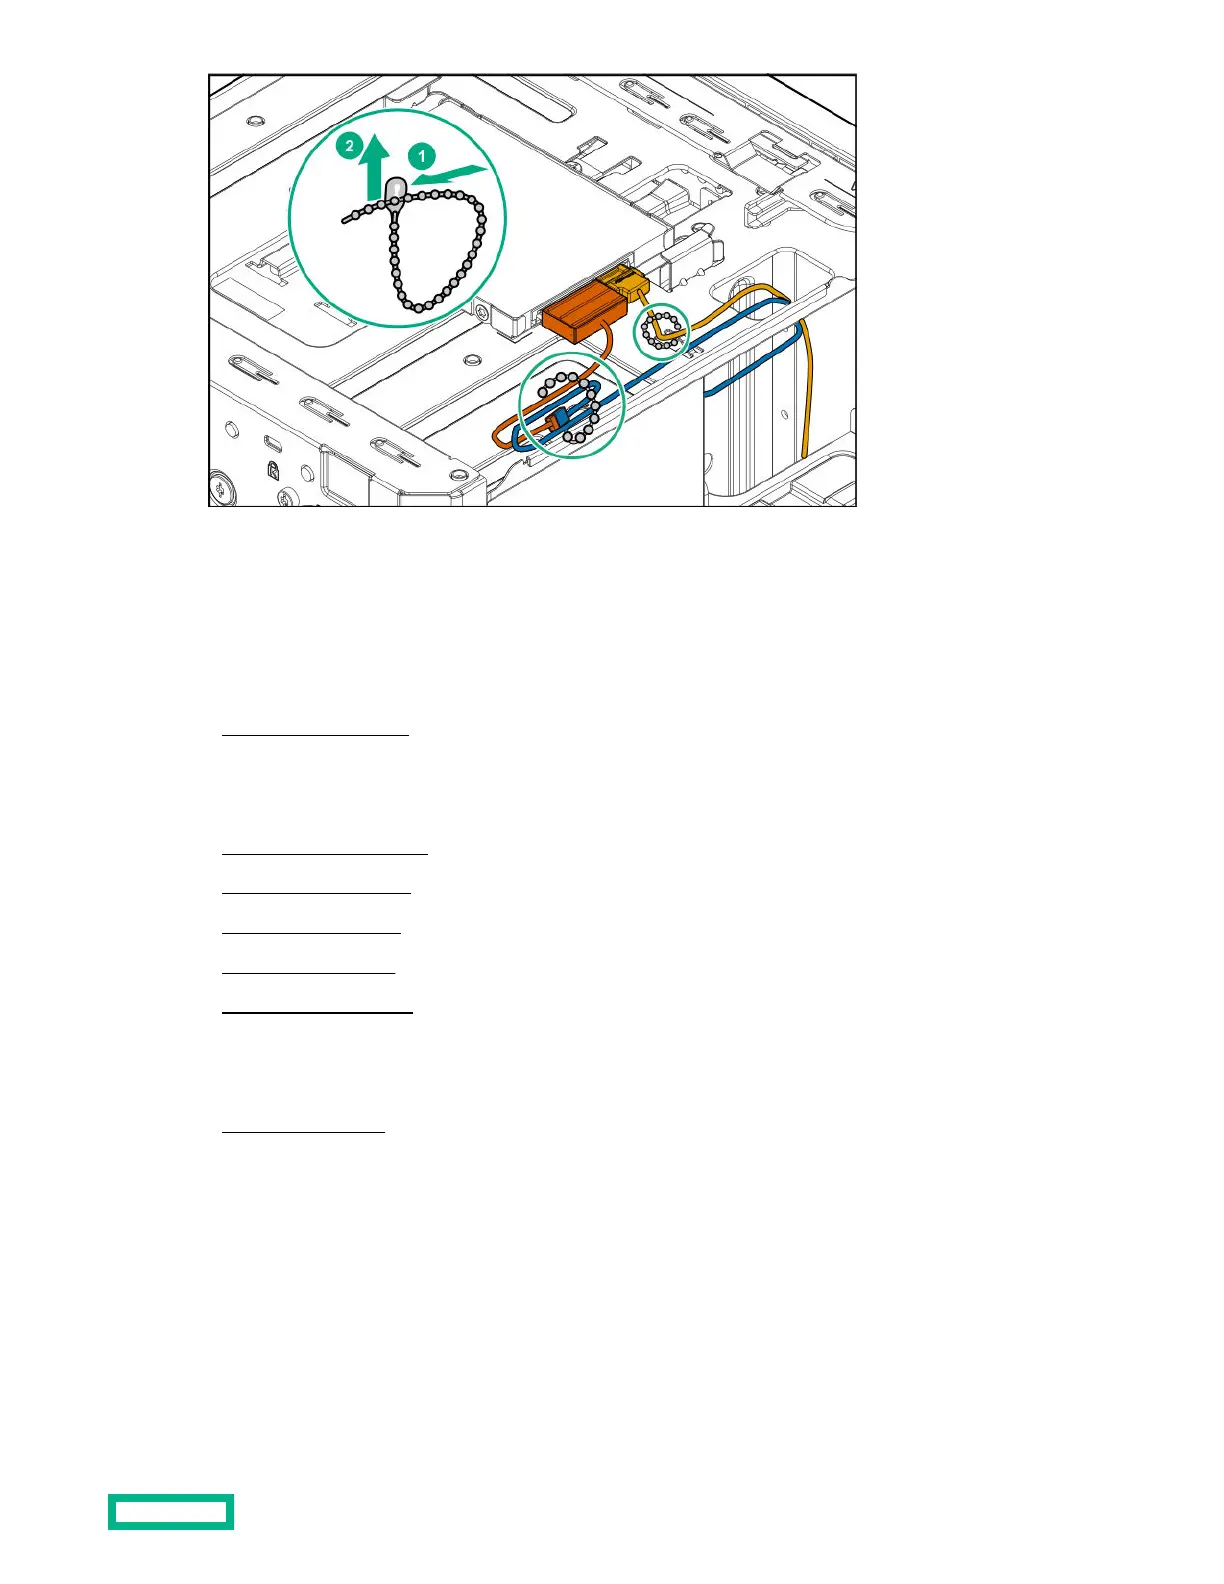
Install an optical drive
Prerequisites
Before you perform this procedure, make sure that you have the following items available:
• T-15 Torx screwdriver
• Phillips No. 2 screwdriver
• Optical drive option kit. This kit includes:
Hardware options installation
45
 Loading...