HP OmniBook XE2 Removal and Replacement 2-11
Removing the Display Assembly
(HP Authorized Service Providers Only)
Required Equipment
• Small Phillips screwdriver.
• Plastic knife or small flat-blade screwdriver.
Removal Procedure
1. Unplug the AC adapter, if present, and remove the battery.
2. Open the display completely (180 degrees).
3. Use a plastic knife or small flat-blade screwdriver to gently pry up the right side of the keyboard
cover.
4. Remove the cover by pulling it to your right.
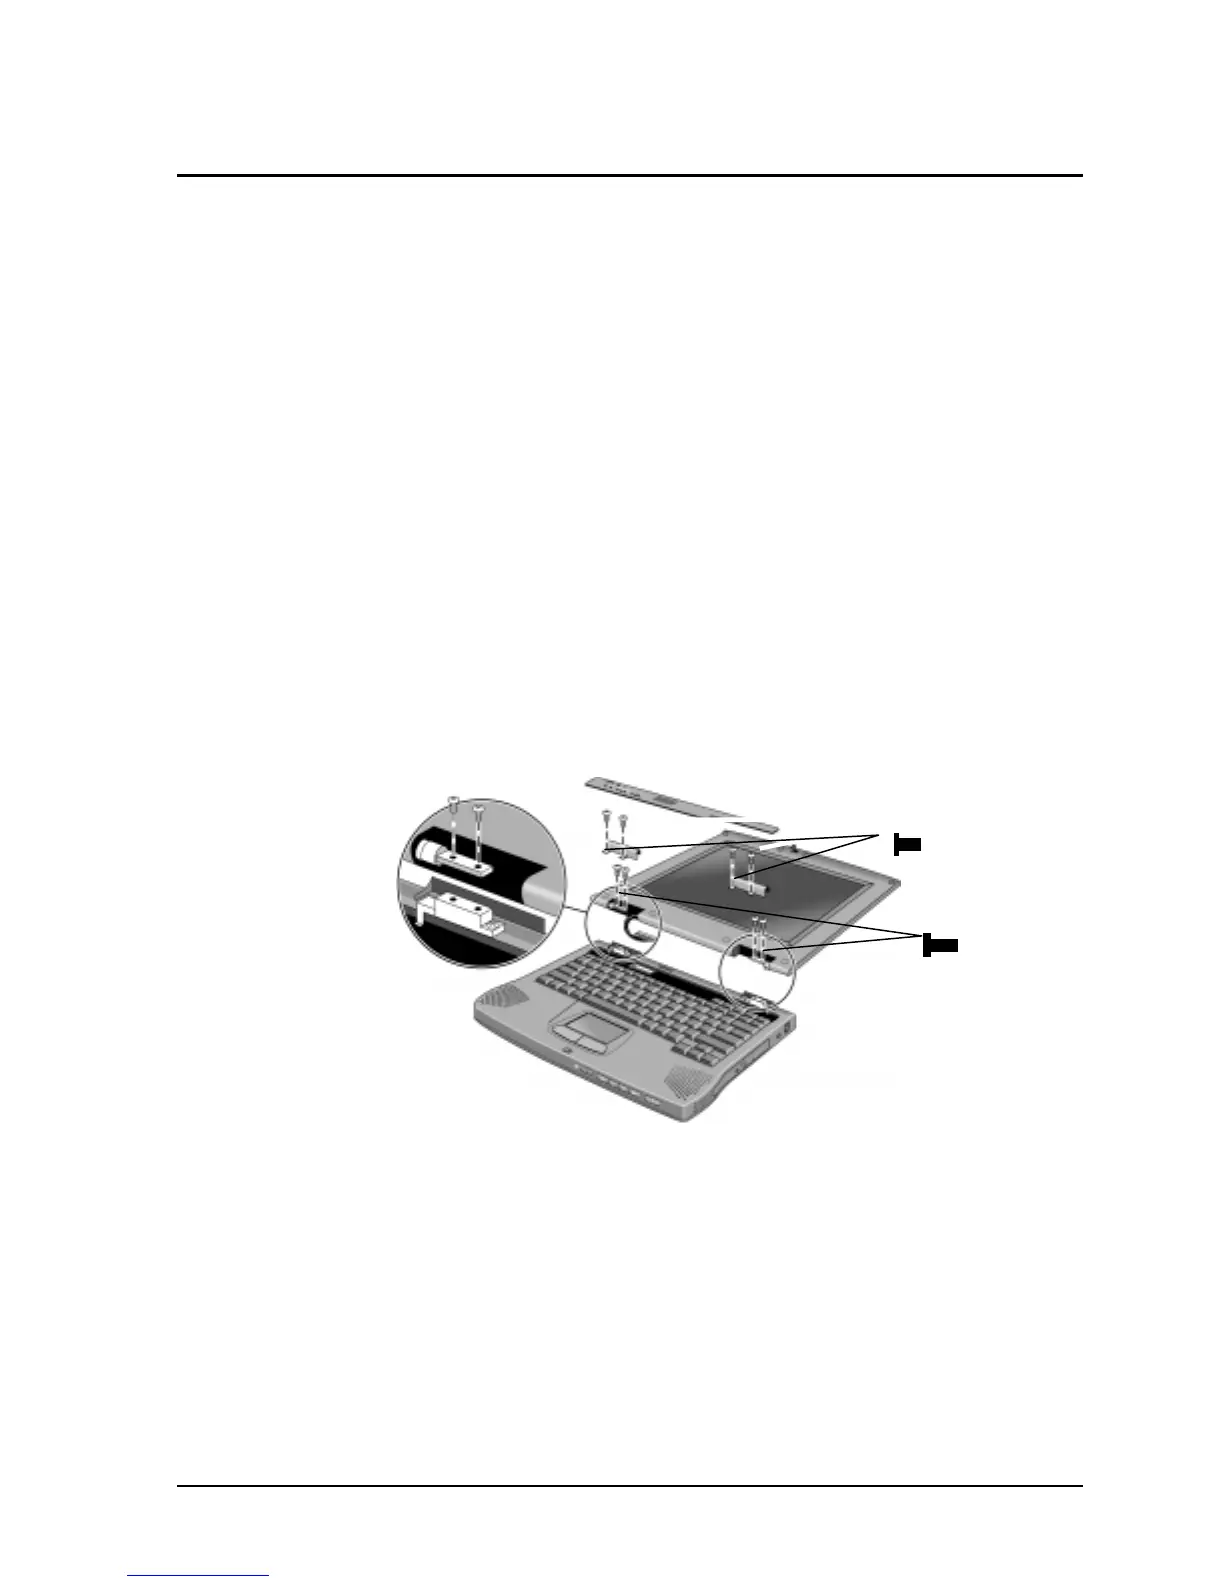
5. Use a Phillips screwdriver to remove the four screws from the hinge covers.
6. Remove the hinge covers with your fingers. Do not use a tool.
7. Unplug the cable by grasping both ends of the connector and pulling toward you.
8. Use a Phillips screwdriver to remove the four screws from the hinges.
Figure 2-7. Removing the Display Assembly
Reassembly Notes
• You may need to use a flat-blade screwdriver to reconnect the cable.
“Step 5” screws (4):
M2.5×4mm
“Step 8” screws (4):
M2.5×5mm
 Loading...


