2-16 Removal and Replacement HP OmniBook XE2
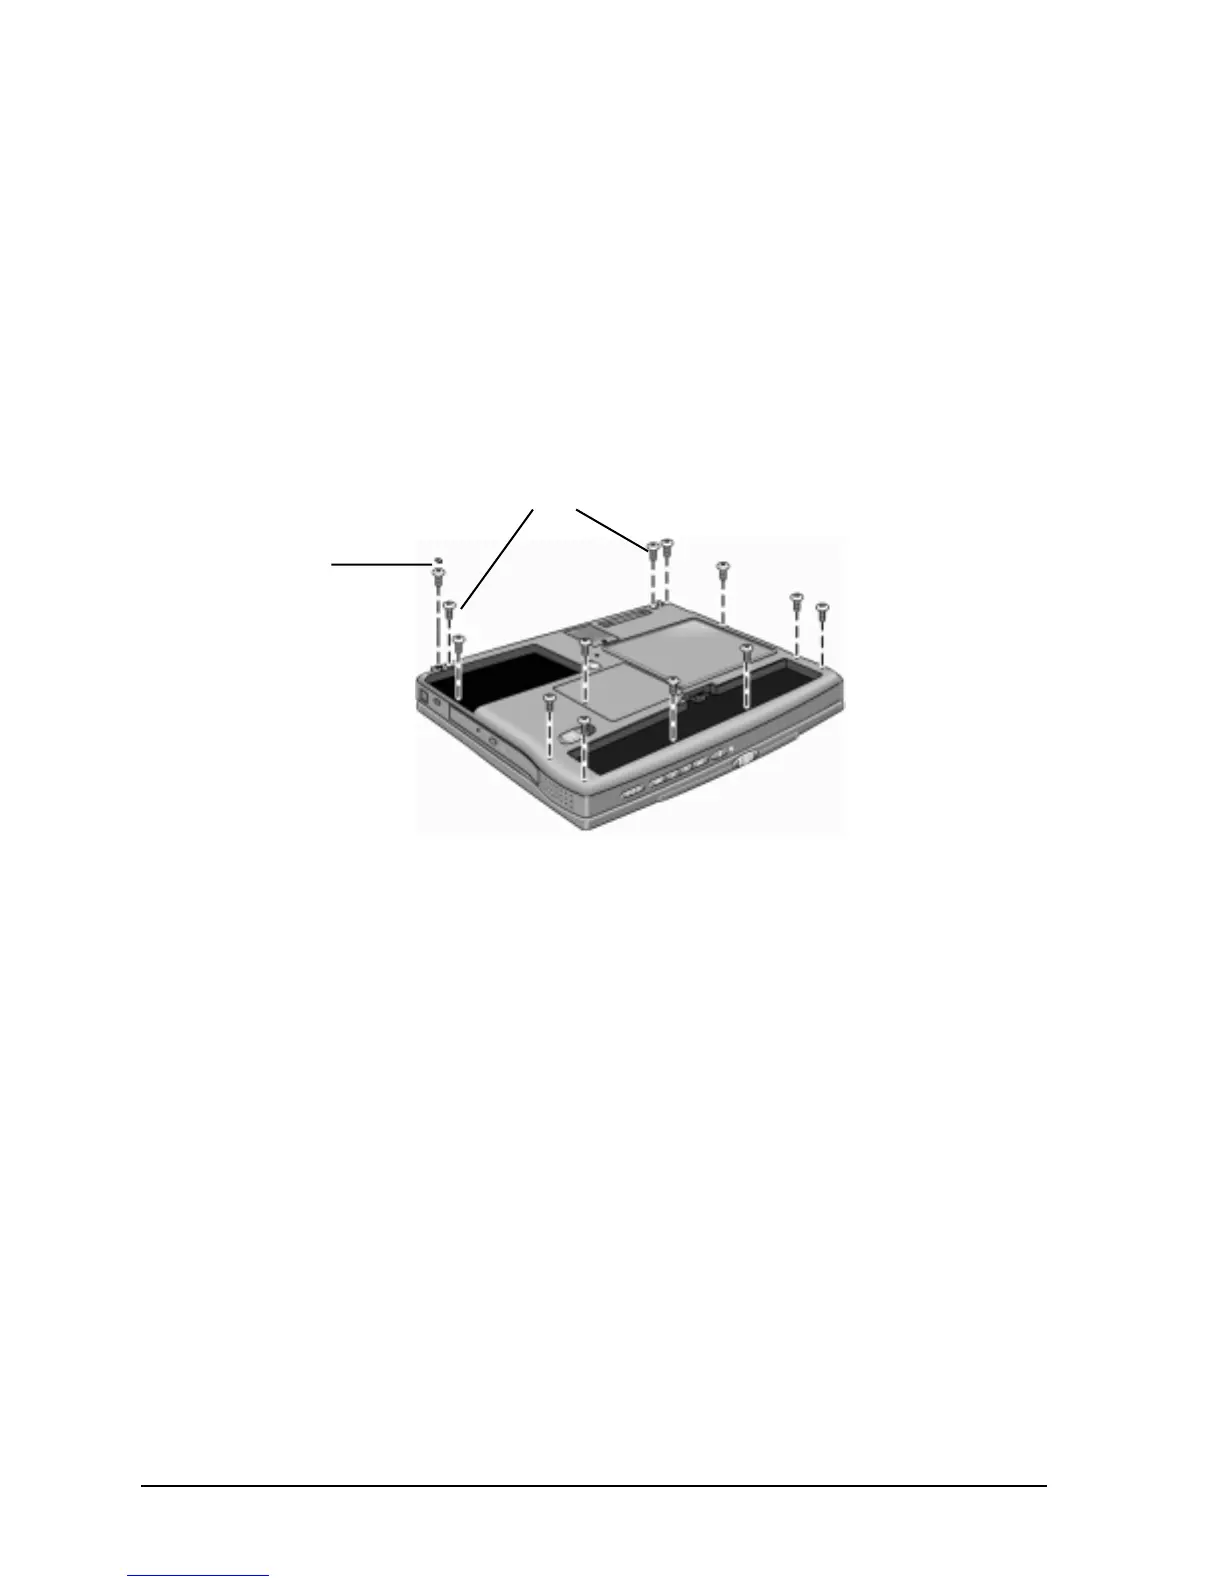
4. Turn the case bottom side up and, with the battery compartment toward you, using the Phillips
screwdriver, remove thirteen screws from the bottom case:
• four on the right side
• two in the battery compartment
• two to the left of the battery compartment
• one from the RAM module cover (also remove the RAM module cover itself)
• one in the hard disk drive compartment
• one under the upper left foot (first remove the foot with a pointed knife or probe)
• two recessed hinge screws
Figure 2-10. Detaching the Bottom Case
5. Turn the unit top side up.
6. Using a small flat-blade screwdriver, slide the two cable connectors up slightly and detach the
two cables from the motherboard.
7. Lift off the top case.
Reassembly Notes
• Insert the thin (touch pad) cable first, since it has more flexibility than the wide (CD control PCA)
cable.
• With the cable connectors opened slightly, insert the cables back in the cable connectors and push
the connectors shut.
Upper left foot
Recessed hinge screws
 Loading...


