Removal and Replacement Procedures
2-46 HP ProLiant ML150 Generation 2 Server Maintenance and Service Guide
HP CONFIDENTIAL Codename: Stone Soup 2 Part Number: 368148-003 Last Saved On: 6/10/05 4:28 PM
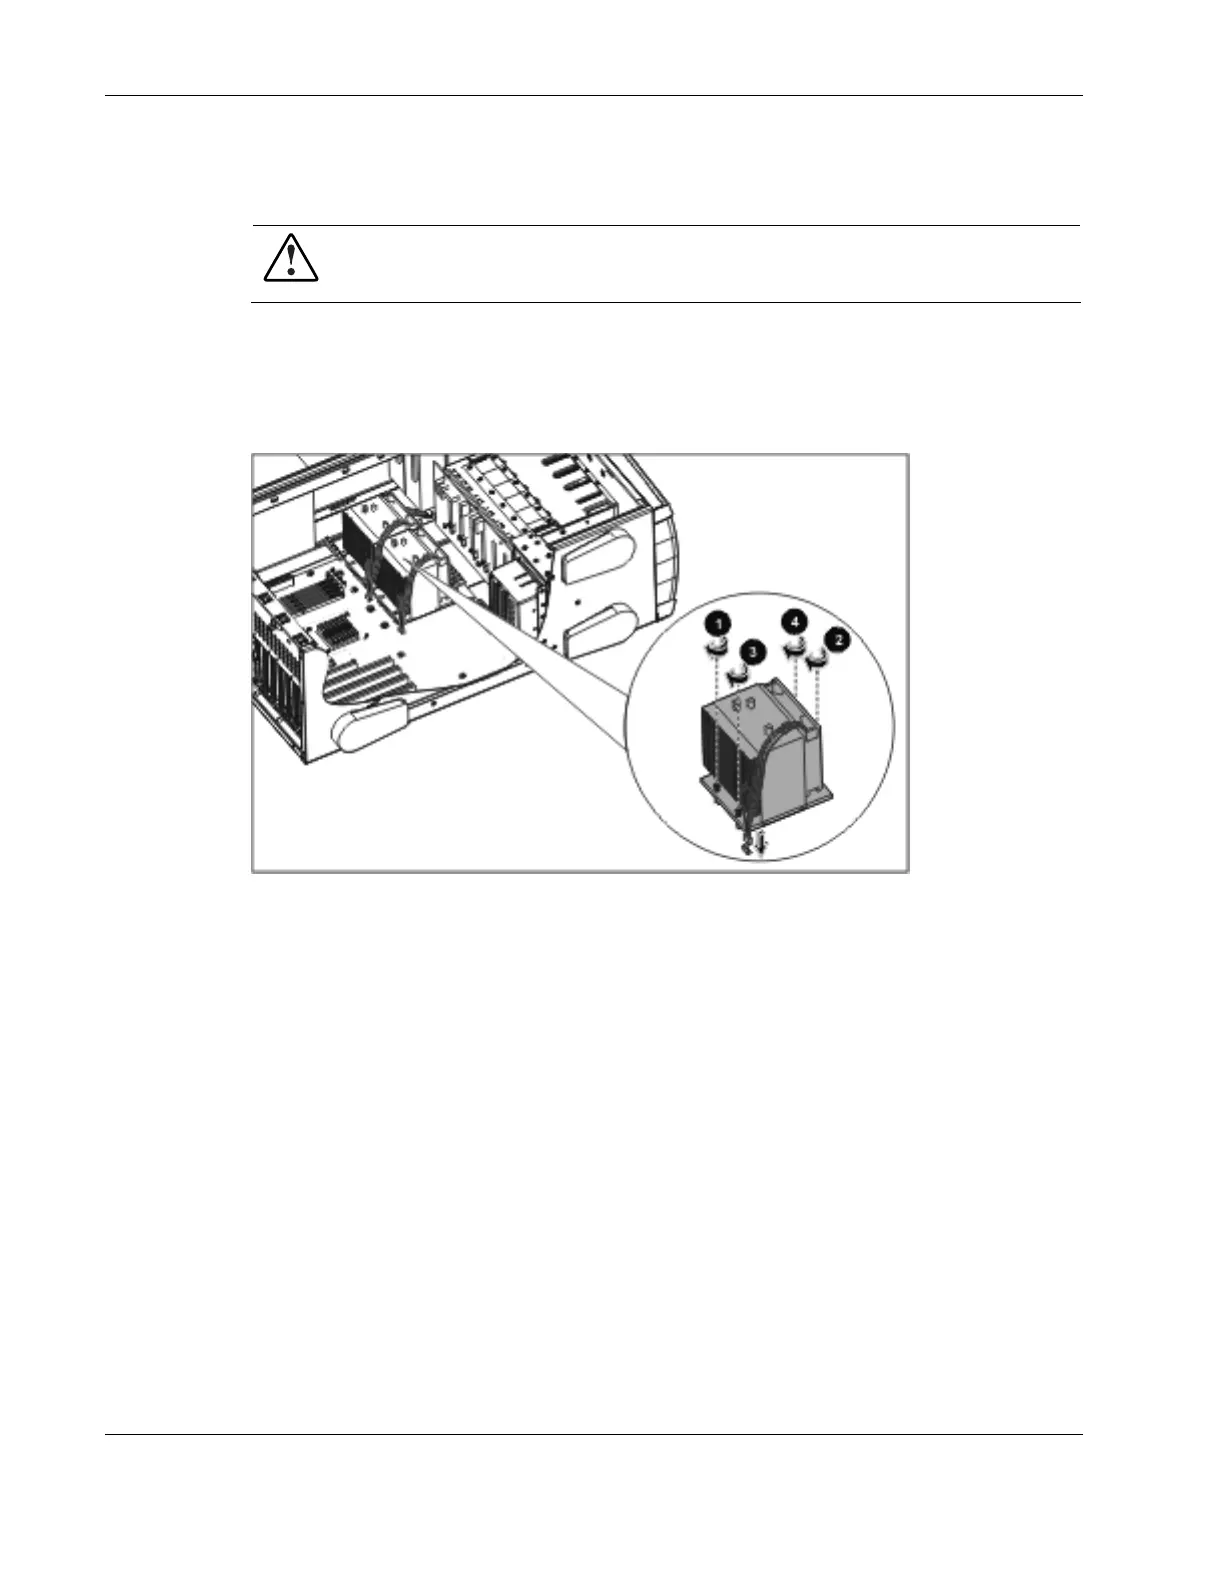
4. Place a new thermal pad on the processor.
5. Align the heatsink to the holes around the processor socket.
WARNING: Be sure that the processor heatsink sits squarely on the processor and is
aligned with the fan facing towards the front of the server. Failure to install the heastink
as directed may result in overheating or damage to the processor.
6. Tighten the four screws on the heatsink.
NOTE: Secure the screws in a diagonal, instead of clockwise or counterclockwise, order.
7. Connect the heatsink’s cooling fan connector to the system board.
Figure 2-45: Installing the heatsink
8. Replace the access panel.
9. Carefully lift the server back to its upright position.
10. Reconnect all power cords.