If You Have a Problem
35 Troubleshooting Guide
Accessing Components in the PC
This section provides basic information on accessing internal components in your PC. More detailed
information is available in the HP Vectra XE310 Upgrade Guide, a PDF document that can be
downloaded from the HP PC support website (
www.hp.com/go/vectrasupport
).
Removing and Replacing the Side Panel
WARNING
For your safety, disconnect the power cord and all external cables.
1 Switch off the monitor and PC, disconnect all power cords and any telecommunication cables.
2 Place the PC on a flat surface and stand behind it.
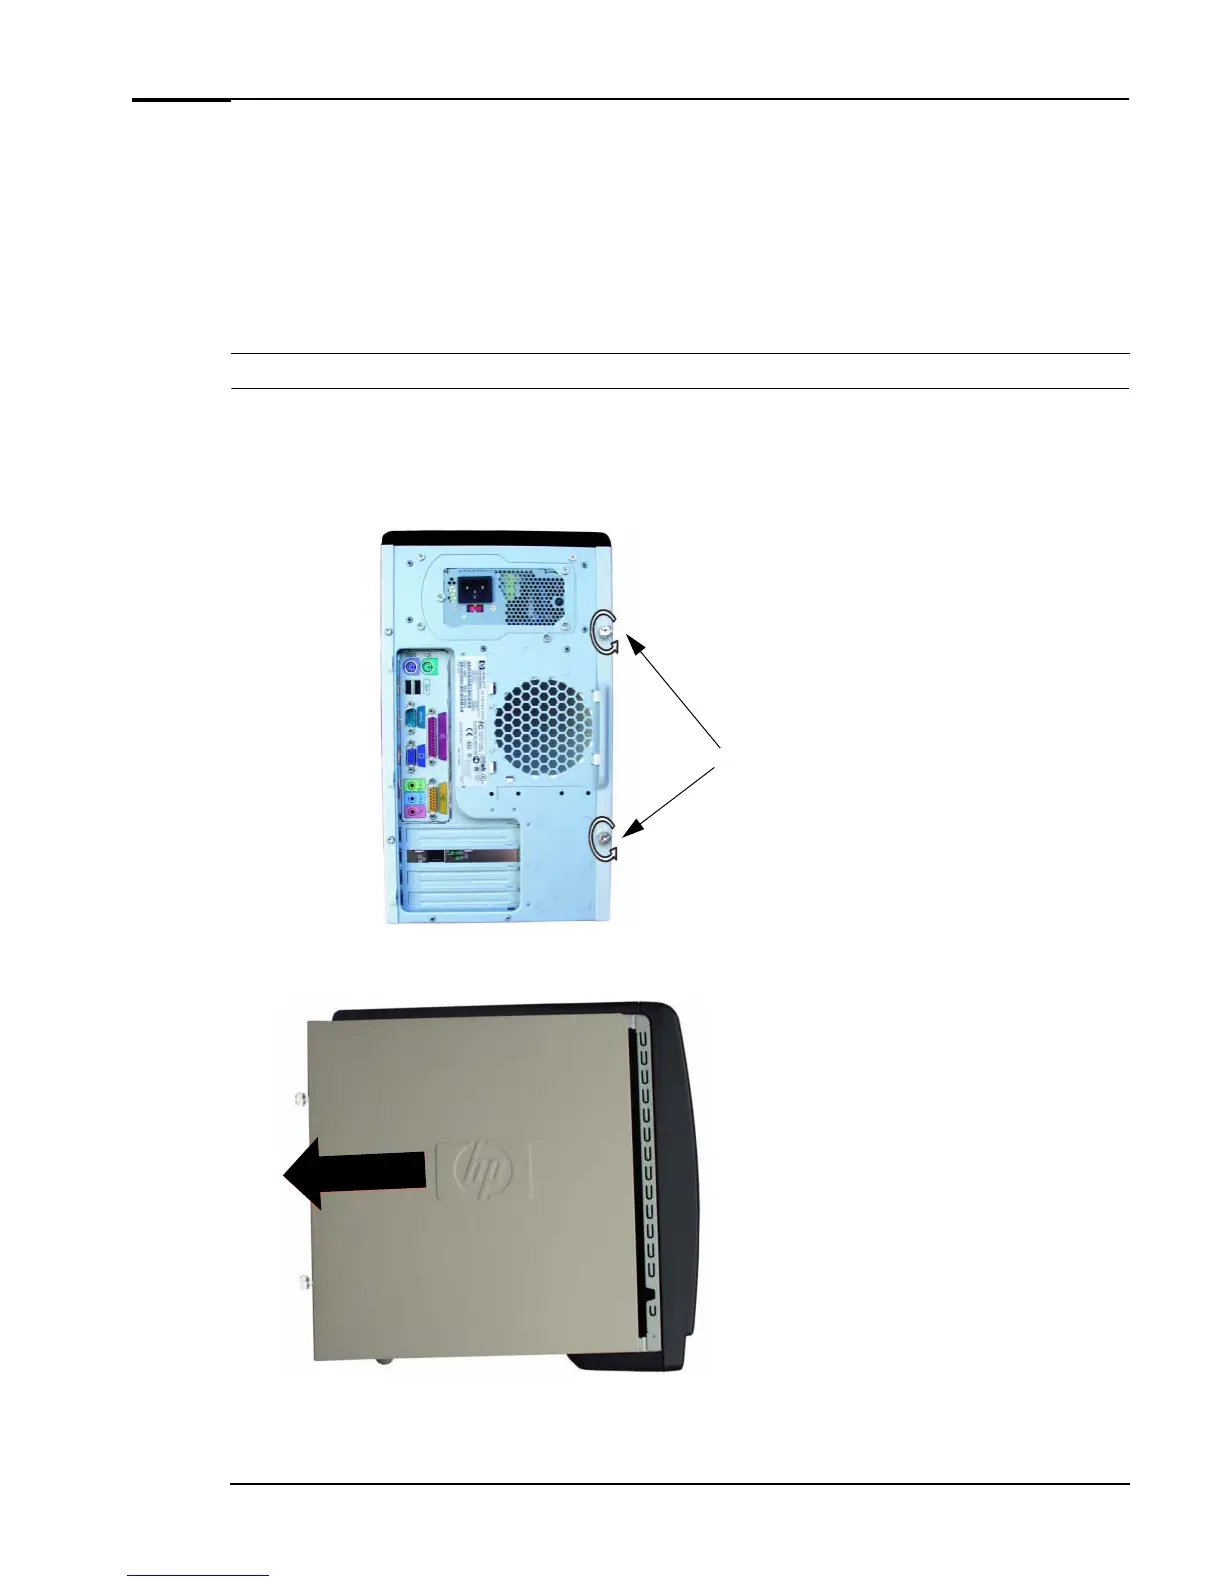
3 Undo the thumb screws on the back of the PC, then slide back and lift off the side panel.
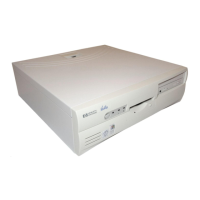
4 Slide back and lift off the side panel.
5 To replace the side panel, engage the catches on both sides of the panel in the holes provided, then
slide the panel back in place. Replace the thumb screws.