27
Mapping Input Control and Masking
Any CX Panel input can be mapped to any relay, group or preset. All inputs on a relay are defaulted to control that specic relay
with a Momentary NO switch station. All Auxiliary inputs default to un-congured. If a relay space does not have a relay installed,
the input will not be available to select. If an input is already programmed, it will show a solid box between the input number and its
name. The CX panel user interface will present all possible inputs based on lled relay slots, size of panel and whether there is a
secondary panel present.
Use the following process to program panel Inputs to control a relay or group:
• From the Main Menu, select Inputs. Then press the ENTER key.
• Select Input – Scroll to an Input to program. Select any of the Inputs available based on the Panels in the CX Panel
system. NOTE that the all Inputs that are connected to the system will be present and visible by continuously scrolling up
and down. When highlighted, press the ENTER key or the F1 key to select an Input.
• From the EDIT INPUT Screen, after deciding and editing the Name, Scroll to Type: and choose, (left or right), the type of
Input that will be controlling the relay, Group or Preset.
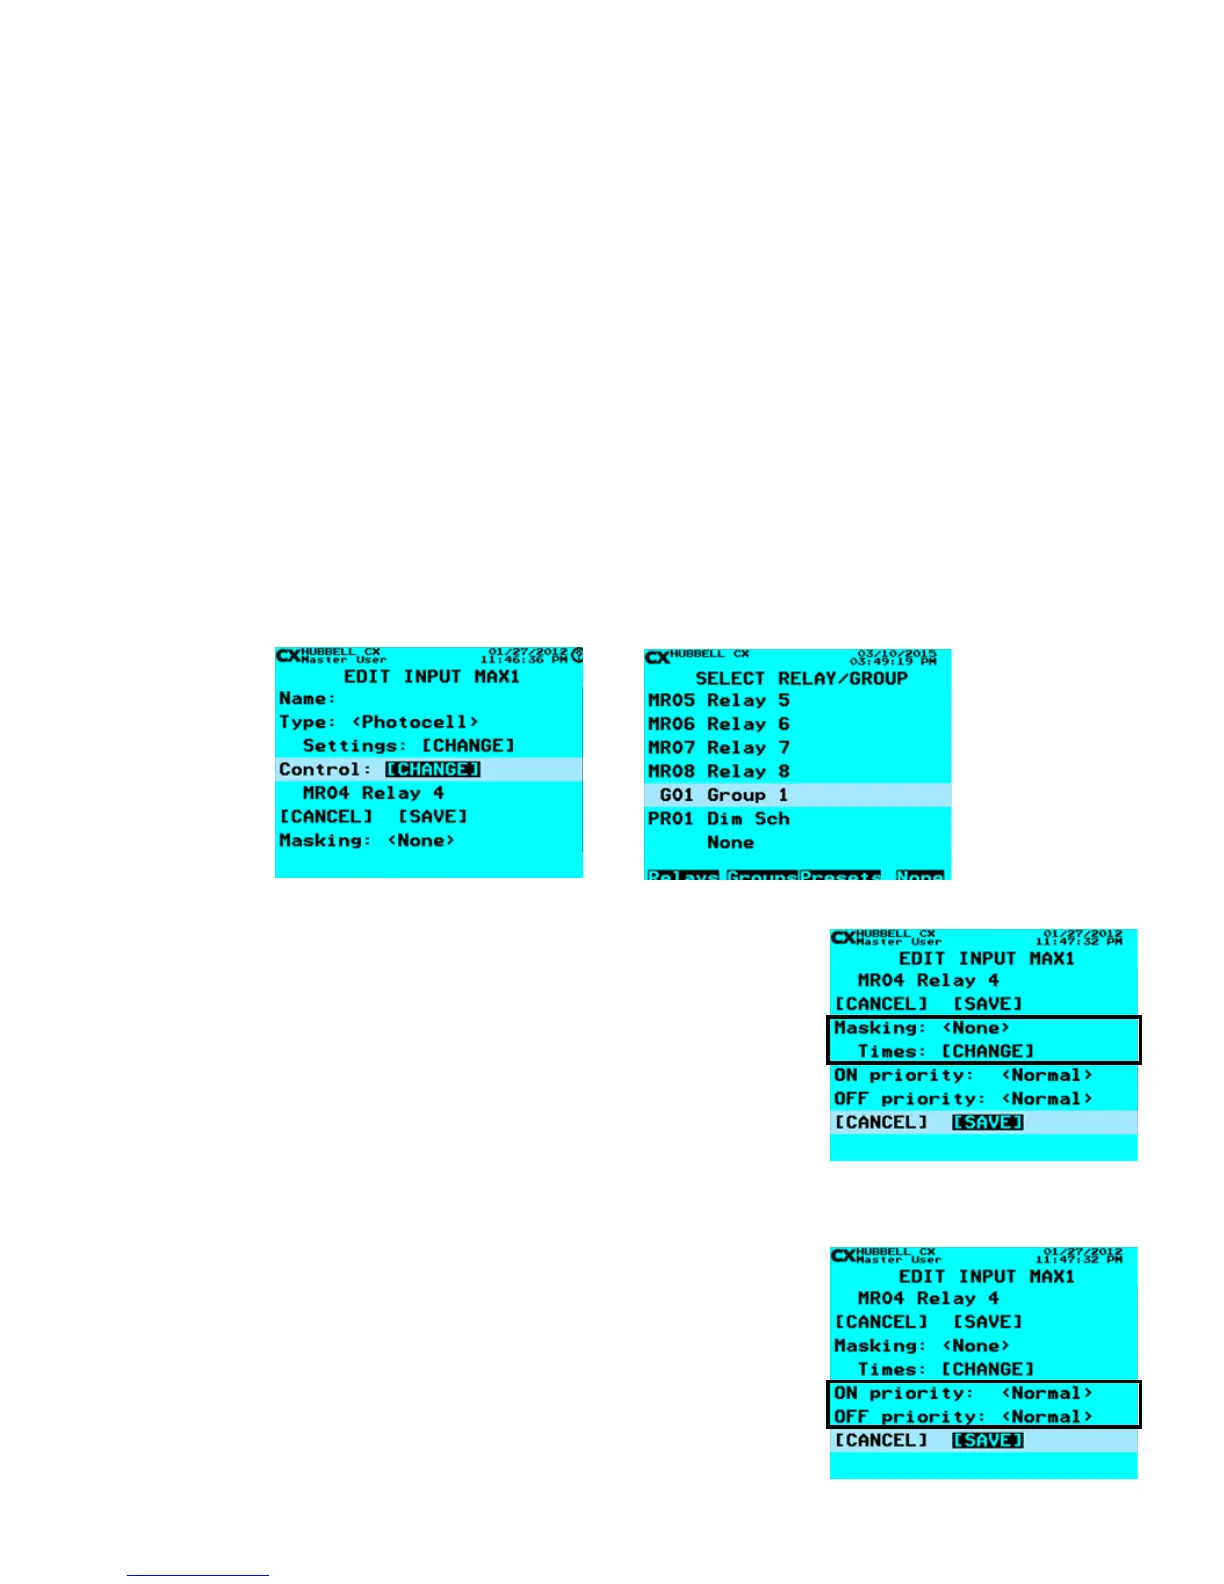
• Scroll to Control: [CHANGE], then press the ENTER key.
• Scroll to the desired Relay, Group or Preset to control, press the ENTER key. Note that any programmed Groups or
Preset will appear at the end of the relay list. Use the F2 key to skip down to the Groups list. If no Groups have been
created, none will appear. See the “Groups” section for instructions to create Groups. Use the F3 key to skip down to
the Presets list. If no Presets have been created, none will appear. See the “Presets” section for instructions to create
Groups.
• When nished, press ENTER to save your changes
Edit Input – Map Control Select Relay/Group/Presets – Map Control
• Masking: This eld allows for an input to be masked (ignored) for a select time
period. Masking is used to program a device so that it does not function for
the programmed time period. Masking can be applied to ON, OFF or ON/OFF
functionality.
• From the EDIT INPUT Screen, scroll to Masking: use the right/left arrow keys to
select masking options.
• Scroll to Times: [CHANGE]. This eld allows for setting of the specic masking
times. This function is the same as for selecting times in schedules. Refer the
“Schedules” section for instructions to input Masking Times.
Inputs – Applying Prioities
Input ON and OFF actions may have Priorities applied to them. Priorities allow for different
inputs to affect the way they interact with each other to provide a desired programming
Scenario to occur. The best way to apply Priorities with the CX system is to use the
Scenarios programming tools. Refer to the “Scenarios section of this manual for detailed
instructions about using Scenarios.
• Apply Priorities to an Input - In the EDIT INPUT screen, scroll to the ON Priority:
or OFF priority: line. Right/Left scroll through the priority choices to the desired
selection.
• When nished, scroll down to highlight [SAVE], and then press ENTER to save
your changes.
Edit Input – Masking

 Loading...