35
Rev 1.0 9/21
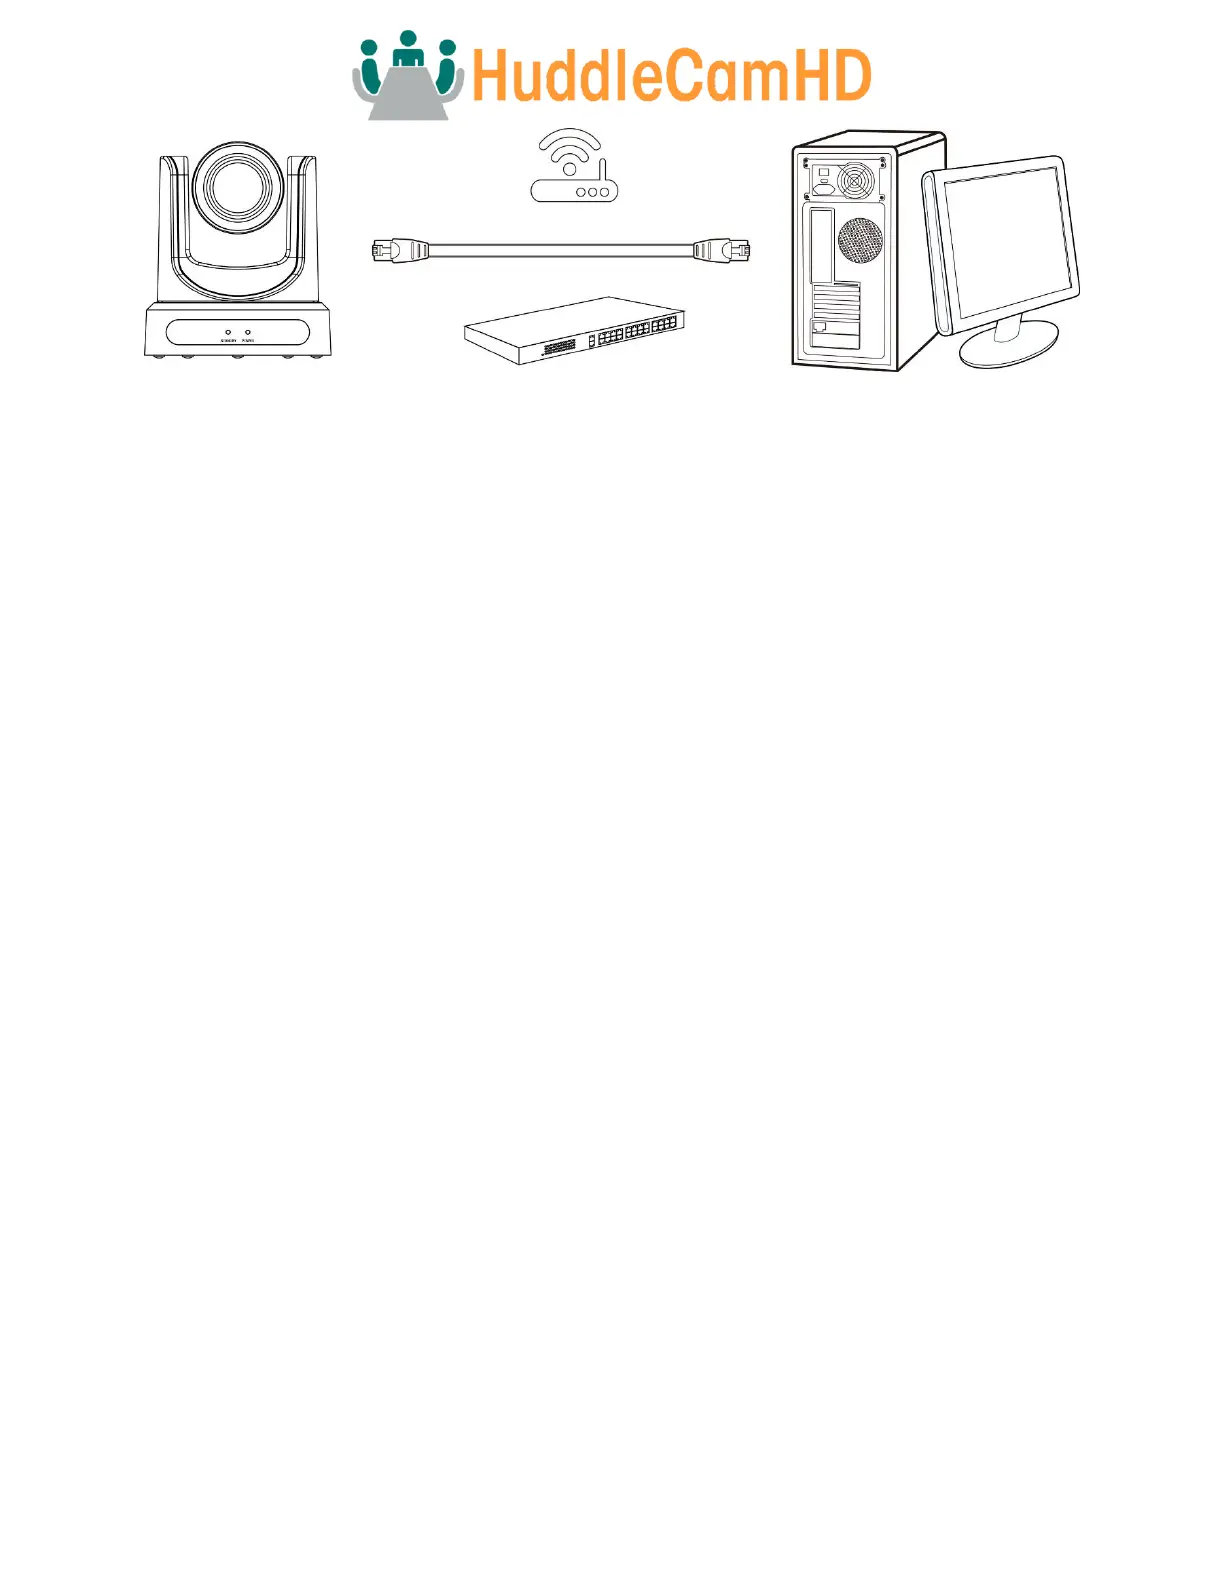
Connections to LAN via CAT5 or CAT6 cable
Assigning an IP Address
By default, the camera is set to DHCP, meaning it will automatically obtain an IP address from your DHCP server, if available. If
your network doesn’t utilize a DHCP server, the camera will fallback to it’s static IP address of “192.168.1.180”. To change this IP
address to an IP address on your network range, follow the steps below.
DHCP
By default, the camera is set to DHCP. If your camera ever comes out of DHCP mode, you can quickly set it back by using the IR
remote shortcut: [F1] > [0] > [0] > [1]: Sets the IP address to DHCP
Static Address
If your network doesn’t support DHCP, or you want to give your camera a more permanent IP address, assign the camera a static
IP address. You have two (2) options to assign this address.
1. Tracking Software – Assign a static IP address from the Modify Netinfo Interface.
2. Tracking Software – Assign a static IP address from the Remote Configuration > Network interface.
3. IR Remote – Press [F1] > [*] > [#] > [number 0~9]: Sets the camera’s IP address to 192.168.100.8(number 0~9).