13
Rev 1.0 9/21
• Display Time Checkbox – Enable / Disable whether time is displayed in video feed.
o Default value: Off (unchecked).
• Time Format – Adjust the format in which time is displayed.
o Options include: YYYY-MM-DDDD hh:mm:ss, MM-DD-YYYY hh:mm:ss, DD-MM-YYYY hh:mm:ss, YYYY-MM-DD
week hh:mm:ss, MM-DD-YYYY week hh:mm:ssDD-MM-YYYY week hh:mm:ss
• Enable NTP Checkbox – Enable / Disable the Network Time Protocol.
o Default value: Off (unchecked).
• TimeZone – Adjust the time zone for your location.
o Range: +14:00 ~ -12:00
• NTP Server – Type in the NTP Server address you wish to utilize, then click “OK”
o Default value: (blank)
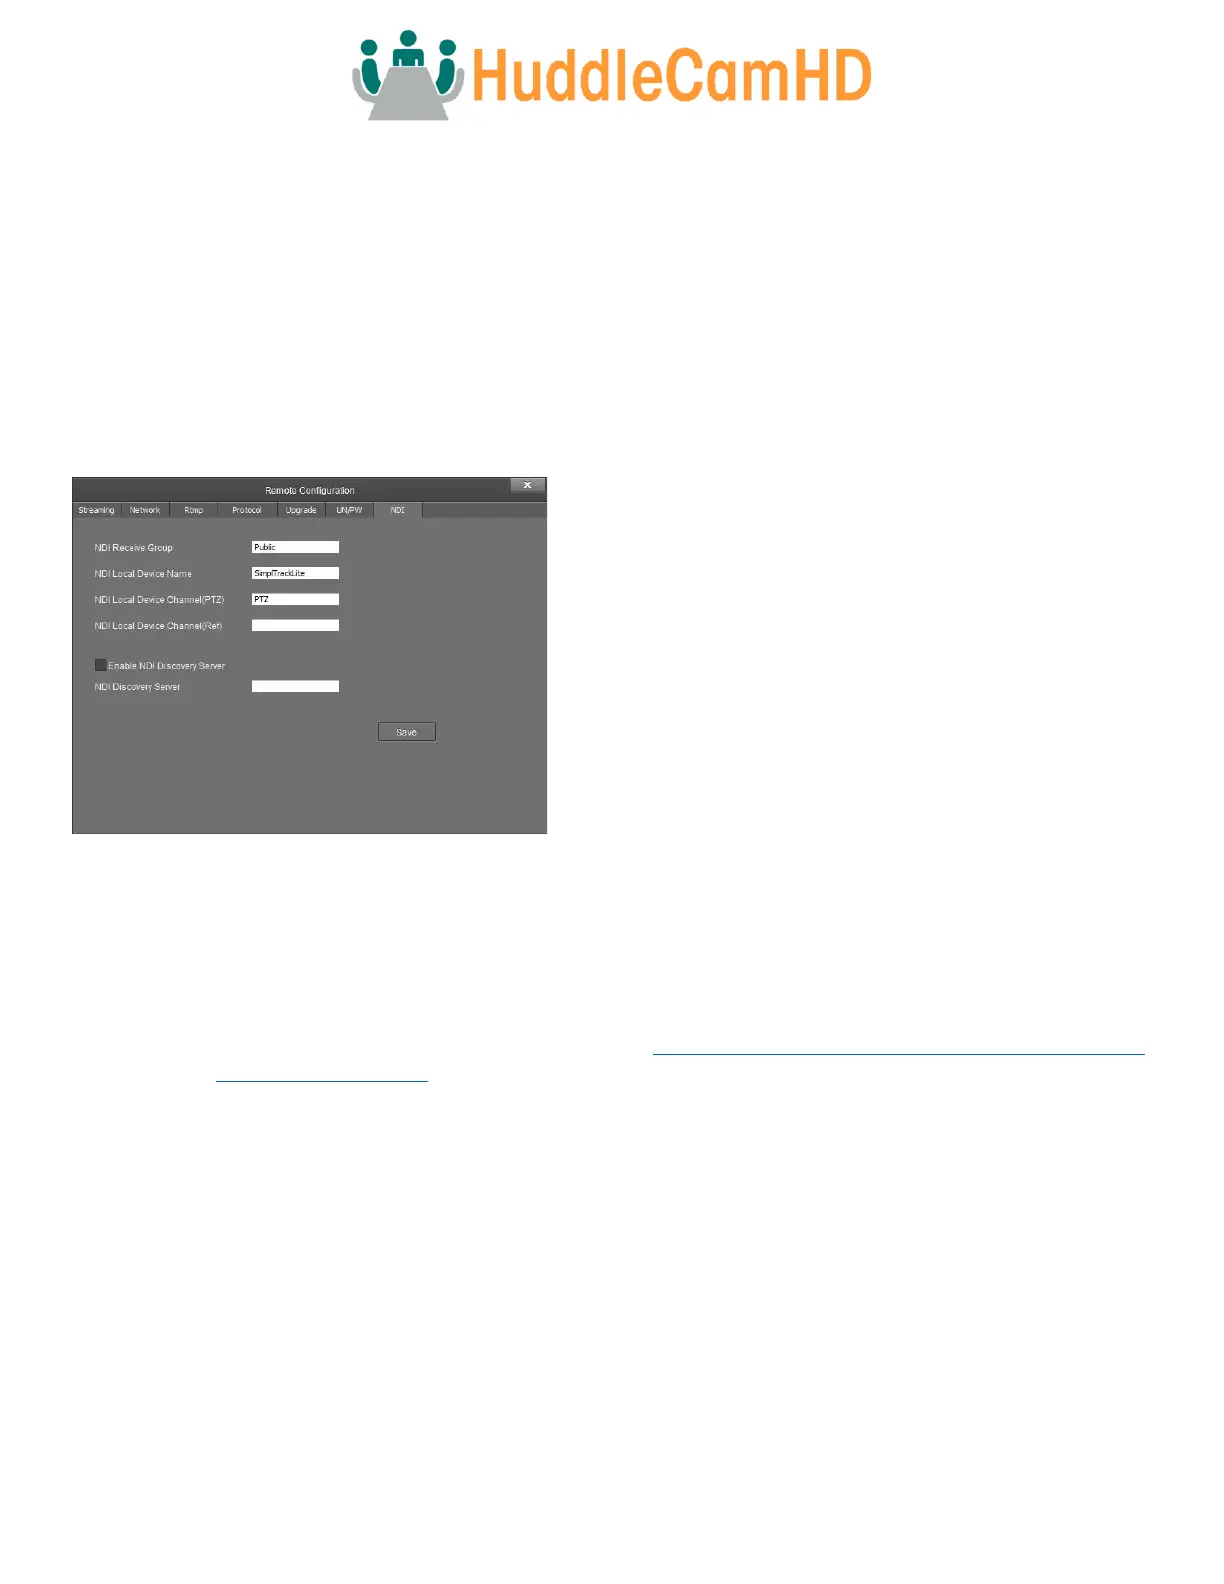
NDI – The NDI tab allows you to adjust the NDI protocol settings.
• NDI Receive Group – The NDI
®
Receive Group allows you to
limit which users on your LAN can see the NDI
®
source
o Default value: Public
For best results, the Receive Group should remain
“Public”. Once the Receive Group is changed, you will
need to join the Receive Group through NDI
®
Access
Manager.
• NDI Local Device Name – The friendly name the camera will
show up as within NDI
®
devices.
o Default value: SimplTrack Lite
For best results, give all ‘like’ cameras the same Local
Device Name. e.g. “Tracking cams” or “Framing Cams”
• NDI Local Device Channel (PTZ) – The channel name the camera
will utilize within NDI
®
devices.
o Default value: PTZ
For best results, set a unique Local Device Channel for each camera. e.g. “Wide Shot” or “Tight Shot”
• NDI Local Device Channel (Ref) – This field is unused on this camera as it does not have a reference camera.
• Enable NDI
®
Discovery Server Checkbox – Enable / Disable connectivity to a NDI
®
Discovery Server.
o Default value: Off (unchecked)
• NDI
®
Discovery Server Textbox – This field allows you to define the IP address of the NDI
®
Discovery Server.
o Default value: (blank)
For information on the NDI Discovery Server, check out https://support.newtek.com/hc/en-us/articles/218109477-NDI-
Discovery-and-Registration.
Removing the Camera
To remove a camera, you will need to select it from the Device Management section. From there, click the “Delete” button, then
select “OK”.