INSTALLATION
5
Width
of Blind
Number of
Brackets
Under
60 Sq. Ft.
Number of
Brackets
60 Sq. Ft.
and Over
Up to 60" 2 3
60
1
⁄
8
" – 120" 3 4
Over 120" 4 5
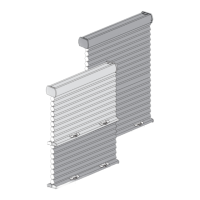
Mount the Hidden Installation Brackets
— Inside or Ceiling Mount (Residential Applications)
Bracket Shims (Optional)
Bracket shims are used to gain clearance for
inside or ceiling mount blinds.
NOTE: Bracket shims may also be used
to level the blind whenever the mounting
surface is uneven.
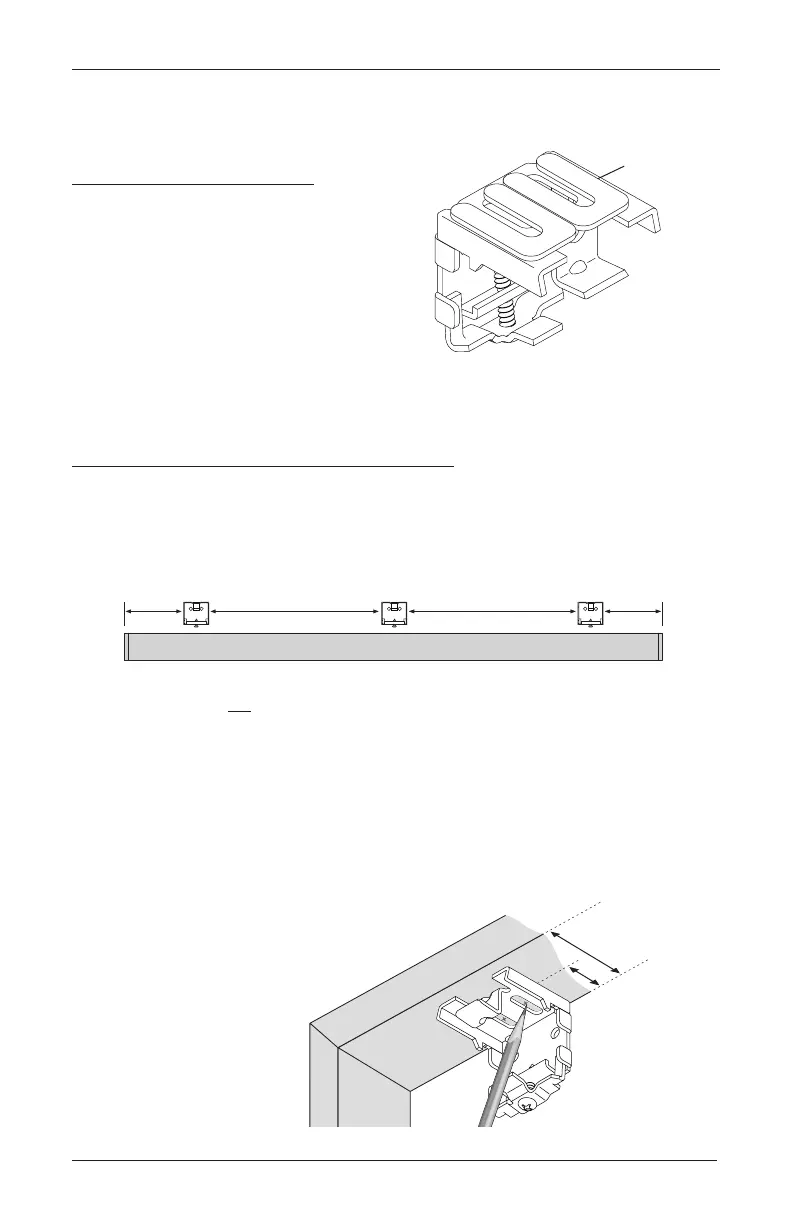
Attach the Hidden Installation Brackets
Mark 2" to 6" from each end of the headrail.
If more than two hidden installation brackets came with your order, space additional
hidden installation bracket(s) evenly between the two outer hidden installation
brackets and mark their location.
IMPORTANT: Do not position any hidden installation bracket where it will be located
directly above a cable tape ladder, cordlock, or wand tilter. Allow 1" space on each side
whenever possible.
If the blind is larger than 60 square feet, position an extra hidden installation bracket at
the cordlock end for added support when raising the blind. With Two-On-One Headrail
blinds, position an extra hidden installation bracket near each cordlock.
Center the hidden installation brackets on your marks and mark the location of the
screw holes.
The minimum casement depth
for mounting the hidden installation
brackets is
1
⁄
2
".
The minimum casement
depth for a fully recessed
mount is 1
5
⁄
8
".
Drill the screw holes using
a
3
⁄
32
" drill bit.
2" to 6" 2" to 6"Space EvenlySpace Evenly
Headrail
1
∕
2
"
Minimum Depth
Hidden Installation
Bracket Attachment
1
5
∕
8
" Depth
Fully Recessed
Hidden
Installation
Bracket
Shim

 Loading...