INSTALLATION
5
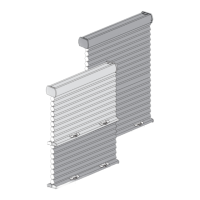
■ Center the installation brackets on your marks and mark the location of the screwholes.
➤ Allow sufficient rear clearance when positioning the
brackets. The bottom tab provides the necessary clearance
(
1
/
4
") for all systems except PowerView with battery wand,
which requires
7
/
8
" rear clearance. (Rear clearance is the
distance between the back of the installation bracket and
the glass or frame.)
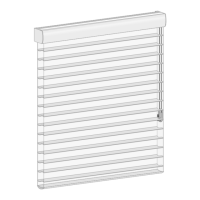
■ Use a level to check that the mounting surface is level. Shim
(not provided) the brackets, if necessary.
■ Use a
3
/
32
" drill bit to drill holes for the mounting screws.
CAUTION: Use drywall anchors when mounting into drywall.
■ Attach the installation brackets using the screws provided.
NOTE: Do not overtighten the screws. Check to ensure the lever
can be moved easily side to side. If the lever is not moving easily,
loosen the screws one-eighth turn increments until it can be
moved easily.
IMPORTANT: The front edges of the installation brackets must
be level and aligned to each other.
Proceed to “STEP 2 — PowerView
®
Only: Connect the Power Cables” on page 8 or
“STEP 3 — Install the Shading” on page 9.

 Loading...