INSTALLATION
8
STEP 2 — PowerView
®
Only: Connect the Power Cables
■ Refer to the appropriate page based on your order.
➤ For a battery wand, see below.
➤ For an optional satellite battery pack or 18V DC power supply, see page 11.
Battery Wand
Install the Battery Wand Clips
■ Attach the battery wand clips to the headrail.
IMPORTANT: Position the clips close to the power cable.
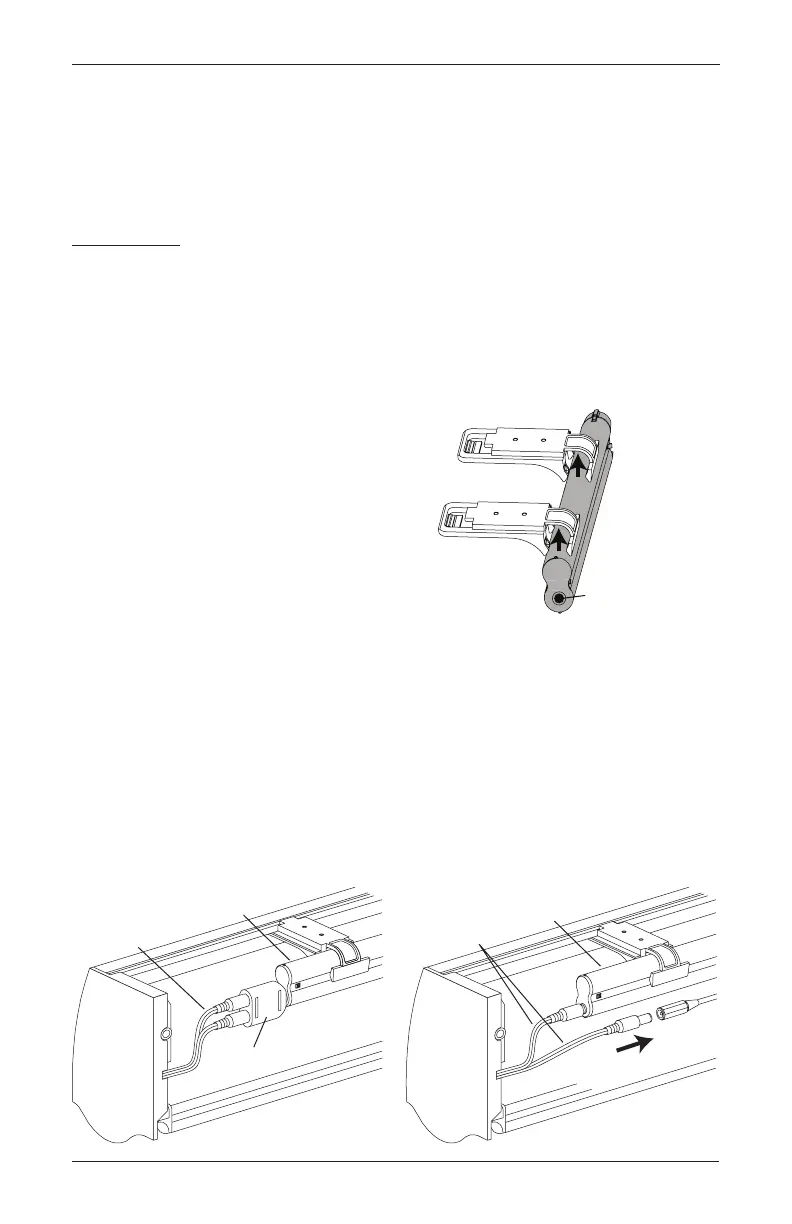
Mount the Battery Wand into theBattery Wand Clips
■ Position the battery wand with its socket toward
the motor end of the shading.
■ Push the battery wand straight up into the
battery wand clips until it snaps into place.
Check to make sure the battery wand is secure.
CAUTION: Be sure the cables do not become
pinched by the installation brackets or
battery wand clips. Damage or overheating of
components could result.
Plug the Power Cables into the Battery Wand(s)
NOTE: When power is connected to the motor, a green LED inside the programming button
housing will flash to indicate the shading is ready for operation.
■ If there is one battery wand: From the back of the shading headrail, plug the “Y” connector
into the socket on the battery wand. Then plug each power cable into a socket on the “Y”
connector.
■ If there are two battery wands: Plug each power cable into the socket on the battery
wands. An extension cable is provided for the second wand.
Place the socket
Power
Cables
“Y” Connector
Wand
Battery
Wand
To Second
Wand
Extensio
Cable
Two Battery WandsOne Battery Wand
Power
Cables

 Loading...