INSTALLATION
6
Mount the Installation Brackets — Outside Mount
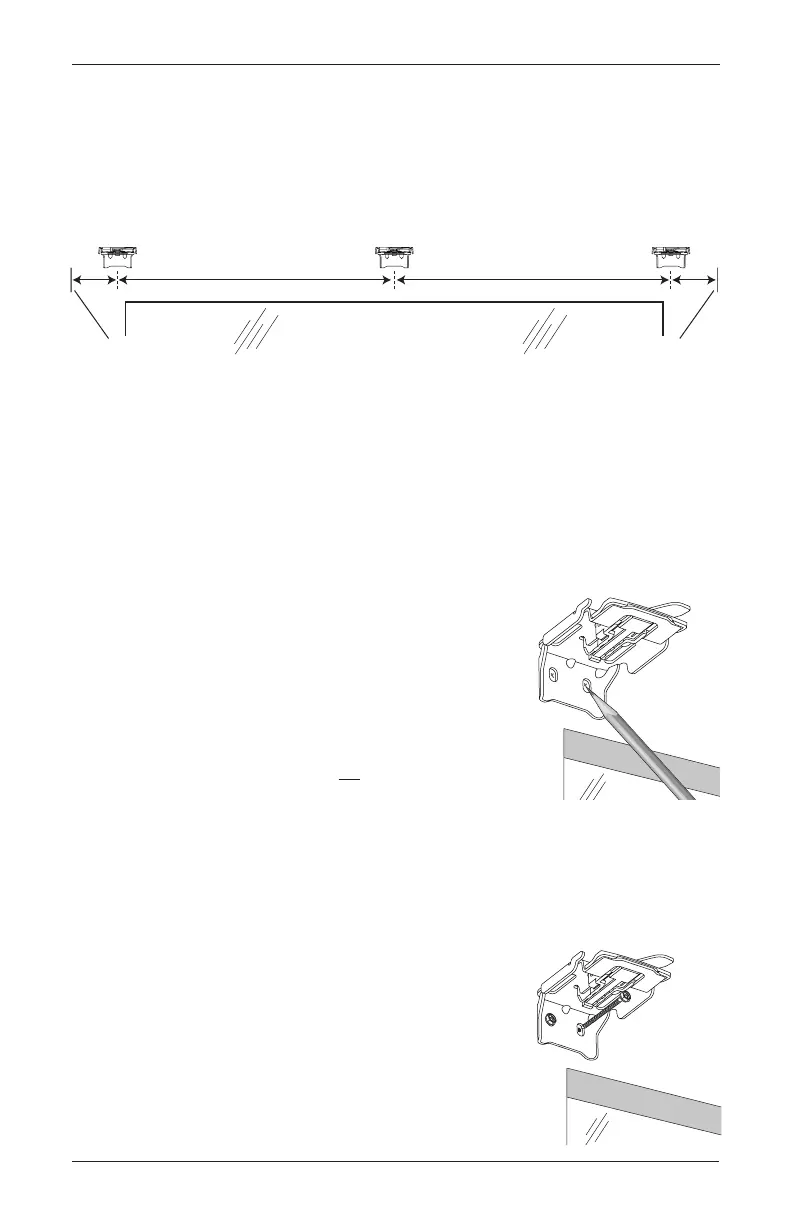
■ Center the headrail over the window opening at the desired height. Use a pencil to lightly
mark each end of the headrail.
➤ Alternatively, measure the width of the headrail and use that width to mark the headrail
end points over the window opening.
■ Mark 2" from each of the headrail end marks for bracket location.
➤ If more than two installation brackets came with your order, space additional bracket(s)
between the two end brackets and mark their location. Mount into wood whenever
possible.
➤ For PowerView
®
shadings with battery wand, allow a minimum of 17" between bracket
centerlines for the battery wand(s). A shading may have one or two battery wands.
■ Center the installation brackets on your marks and mark the location of the screw holes.
➤ A minimum 1" flat vertical height is required to mount the
installation brackets.
➤ Position the top of the installation brackets at the desired
height of the shading. The brackets must be level and
aligned.
CAUTION: The rear of the blocks/brackets must be flush
against a flat mounting surface. Do not mount brackets on
curved molding.
IMPORTANT: Additional clearance is required for PowerView shadings with battery wand.
See “Additional Clearance with Spacer Blocks” on page 7.
■ Use a
3
/
32
" drill bit to drill holes for the mounting screws.
CAUTION: Use drywall anchors when mounting into drywall.
■ If no additional clearance is required, attach the installation
brackets directly to the mounting surface using the screws
provided.
IMPORTANT: The front edges of the installation brackets
must be level and aligned to each other.
Window Opening
2" Space Evenly Space Evenly
Minimum 17" for Battery Wand Minimum 17" for Battery Wand
2"
Headrail End Mark Headrail End Mark

 Loading...