45 46
Learn more. Visit hunterindustries.com/golf
TABLE OF CONTENTS I INLET VALVE INSTALLATION
INLET VALVE INSTALLATION I TABLE OF CONTENTS
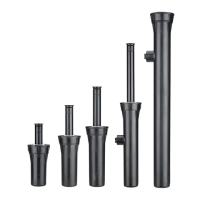
Check to make sure that the pointer arrow on
the tool is directly above the communication
port on the inlet valve and that the valve is
securely hooked to the tool (FIGURE 121). Once
the white lower snap ring and inlet valve have
been properly secured to the tool, rotate the
snap ring so that the snap ring’s open ends are
180 degrees away from the pointer arrow (to the
opposite side of the tool).
Next, insert the assembled tool, white lower
snap ring and inlet valve into the rotor’s body
cavity. To do so, it is necessary to align the
pointer arrow on the G900 Valve Tool with the
alignment dot on the rotor’s ange (FIGURE 122).
The alignment dot is centered on the ange
compartment lid adjacent to (next to) the body
cavity opening. A second alignment dot is
located below the lid in case the ange
compartment lid has been removed. Align the
pointer arrow on the tool with the alignment
dot and lower the assembled tool, white lower
snap ring and inlet valve into the rotor’s body.
As the G900 Valve Tool is lowered into the
rotor’s body, recessed areas on the black plastic
part on the tool will engage vertical rails inside
the body wall. The tool must engage these rails
or the inlet valve’s communication port will not
align with the communication port in the body
cavity below. Continue pressing the assembled
tool, white lower snap ring and inlet valve
downward into the rotor’s body. Once the tool
reaches the bottom, continue pressing rmly
to securely seat the inlet valve and snap ring
(FIGURE 123).
A distinct “click” sound should be heard as the
snap ring is released and engages the snap ring
groove in the rotor’s body cavity. Aer the inlet
and white lower snap ring have been properly
seated, press down on the tool then rotate
counter-clockwise to disengage the tool’s
metal hooks from the inlet valve. Next, raise the
G900 Valve Tool out of the body. Finally, take
whatever time is necessary to visually conrm
that every part of the white lower snap ring is
securely seated into the snap ring groove.
Caution! If snap-ring is not fully seated in the snap-ring groove, the valve may be expelled from
the rotor when the piping is re-pressurized. Serious bodily injury can occur. Keep head and body
parts way from the rotor when piping is being re-pressurized.
Next, place the snap ring on top of the G900 valve as shown (FIGURE 117). Make sure that the
snap ring’s upper side (thinnest side) is facing upwards. Now rotate the snap ring so that the open
ends of the snap ring are directly over the valve’s communication port (FIGURE 118). This prevents
the metal bar on the valve tool from interfering with the seating of the snap ring in the body.
With the white lower snap ring resting on top of the valve as shown, load the inlet valve and snap
ring to the valve installation tool. To do so, hold the inlet valve and snap ring in one hand with the
top facing toward you. Rotate the inlet valve in your hand so that the communication port (located
on the side of the inlet valve) is at the 12:00 position while holding it in your hand (FIGURE 119).
In the other hand, hold the G900 Valve Tool by the handle. The tool needs to be held so that the
pointer arrow (FIGURE 120) located on the inside of the ring at the top of the tool, is also oriented
to the 12:00 position.
Next, slightly rotate the valve installation tool counter-clockwise to the 11:30 position. This alignment
will allow the two metal hooks on the G900 valve tool to pass through the two correct openings
around the outside of the inlet valve. Press the metal hooks through the openings. Continue
pressing the inlet valve and G900 Valve Tool together compressing the spring on the tool. While
holding the tool down with the spring compressed, turn the tool’s handle clockwise until it stops
(FIGURE 121). Next, release the spring’s compression by liing the handle slightly on the G900
Valve Tool. This action hooks and locks the inlet valve to the tool.
FIGURE 117
FIGURE 120
FIGURE 118
FIGURE 121
FIGURE 119
FIGURE 122 FIGURE 123