INSTALLATION
11
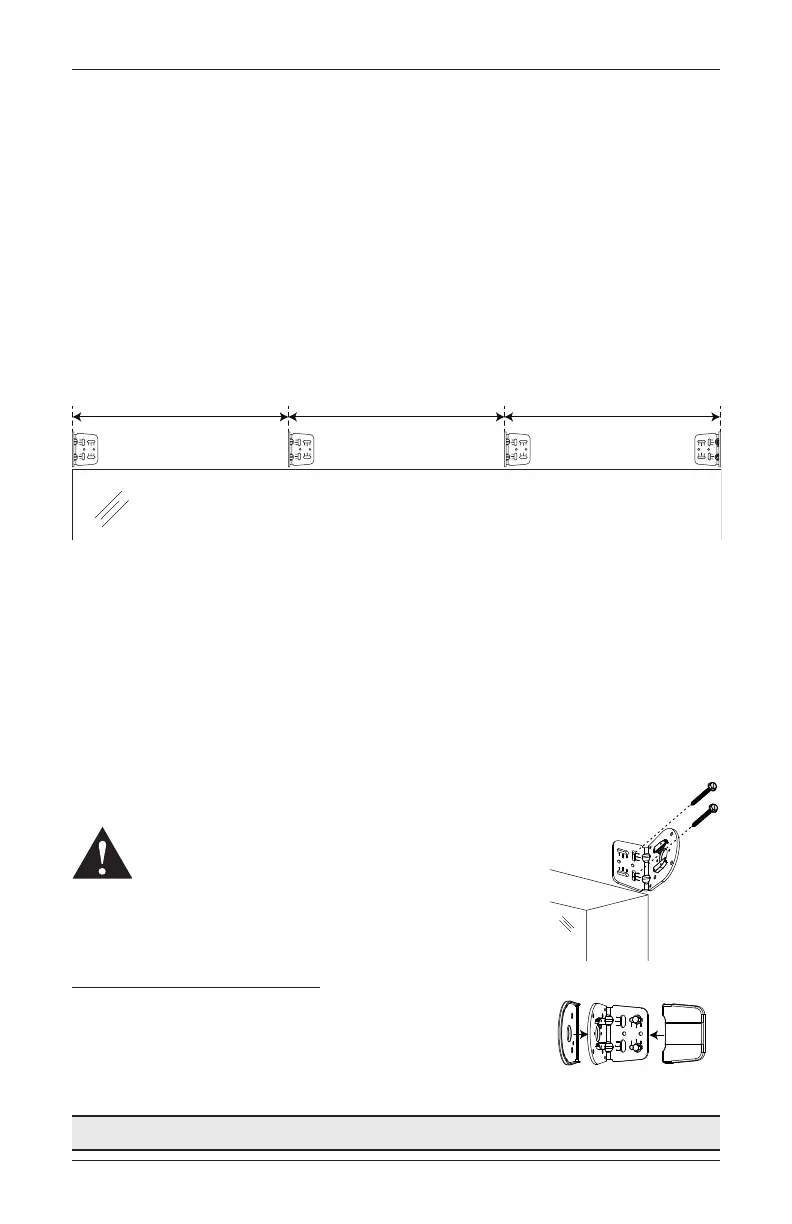
Outside Mount — Coupled Shades
■
Center the total coupled ordered width over the window casement and mark each end.
■
To mark the location for your intermediate brackets, measure from the end mark near the
motor the motor panel ordered width and make a mark.
■
For three or more coupled shades, the remaining intermediate brackets will be marked
using the middle panel(s) ordered width.
➤
Measure the middle panel(s) ordered width from the outside edge of the first
intermediate bracket and mark. This mark will be the outside edge of the next
intermediate bracket.
➤
After the last intermediate bracket is marked, the distance from that bracket to the
idle end window jamb should be the end panel ordered width.
■
Place the end brackets
1
⁄
16
" in from the end marks and place the intermediate bracket(s) on
the previously made mark(s).
➤
A minimum 3¼" flat vertical surface is required to mount the installation brackets.
➤
The top of the installation brackets should be at the desired height of the shade.
■
Drill the screw holes using a
1
⁄
8
" drill bit.
■
Use a level to check that the mounting surface is level. Shim the brackets if necessary.
■
Be sure all the intermediate brackets are mounted so they face the motor bracket. See
bracket image above.
■
Attach the installation brackets using the screws provided.
WARNING: Product is heavy. Mount into wood/metal
studs or into concrete with concrete anchors. Drywall
anchors are not recommended.
Install the Bracket Covers
■
Install the bracket covers by aligning the bracket cover
channels with the bracket and sliding it onto the bracket.
Proceed to “STEP 2 — Install the Shade” on page 15.
Idle
Bracket
Motor Panel Ordered WidthMiddle Panel Ordered WidthEnd Panel Ordered Width
Motor
Bracket
Intermediate
Bracket
Intermediate
Bracket
Window Opening
Bracket
Cover
Bracket
Cover