EasyManuals Logo

HunterDouglas PowerView User Manual

HunterDouglas PowerView
32 pages
To Next Page IconTo Next Page
To Previous Page IconTo Previous Page
Page #18 background imageLoading...
Page #18 background image
INSTALLATION
16
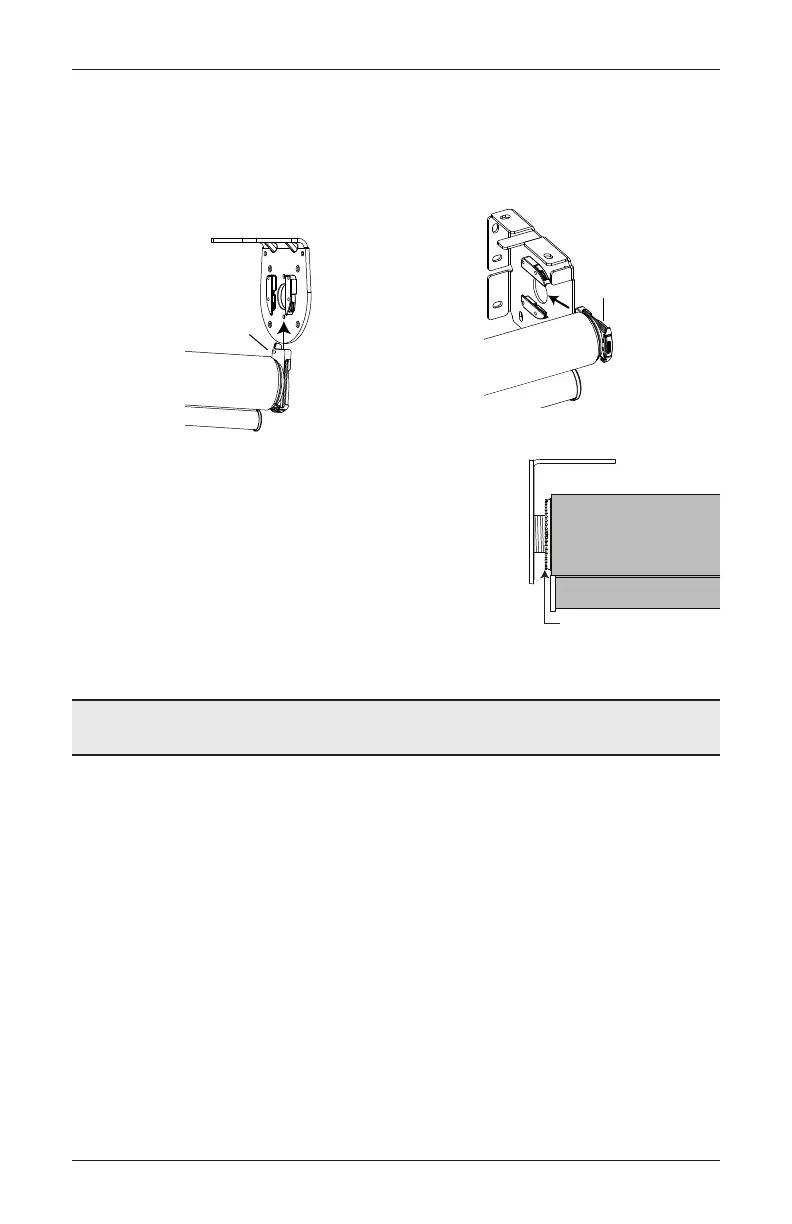
Slide the shade into the motor bracket until it clicks into place. Refer to the images below
for how to orient your shade. Gently pull back on the shade to ensure it is secure.
CAUTION: Be sure the power cable and antenna are not pinched or caught in the
brackets.
Tighten the nut completely towards the shade to
secure idler.
The antenna should be placed towards the back and down.
Ensure the antenna does not touch metal.
For Coupled shades, proceed to “Coupled Shades” on page 17. Otherwise, continue to
“STEP 3 — Connect the Power Source” on page 18.
Motor
End
Motor
End
Standard/Coupled
Shade
Nut Tightened

Other manuals for HunterDouglas PowerView

Questions and Answers:

Question and Answer IconNeed help?

Do you have a question about the HunterDouglas PowerView and is the answer not in the manual?

HunterDouglas PowerView Specifications

General IconGeneral
Power SourceBattery
TypeRemote Control
TechnologyRadio Frequency (RF)
Battery TypeCR2032
CompatibilityHunter Douglas motorized shades and blinds
ConnectivityRF
ButtonsMultiple
DimensionsVaries by model
WeightVaries by model

Related product manuals