INSTALLATION
17
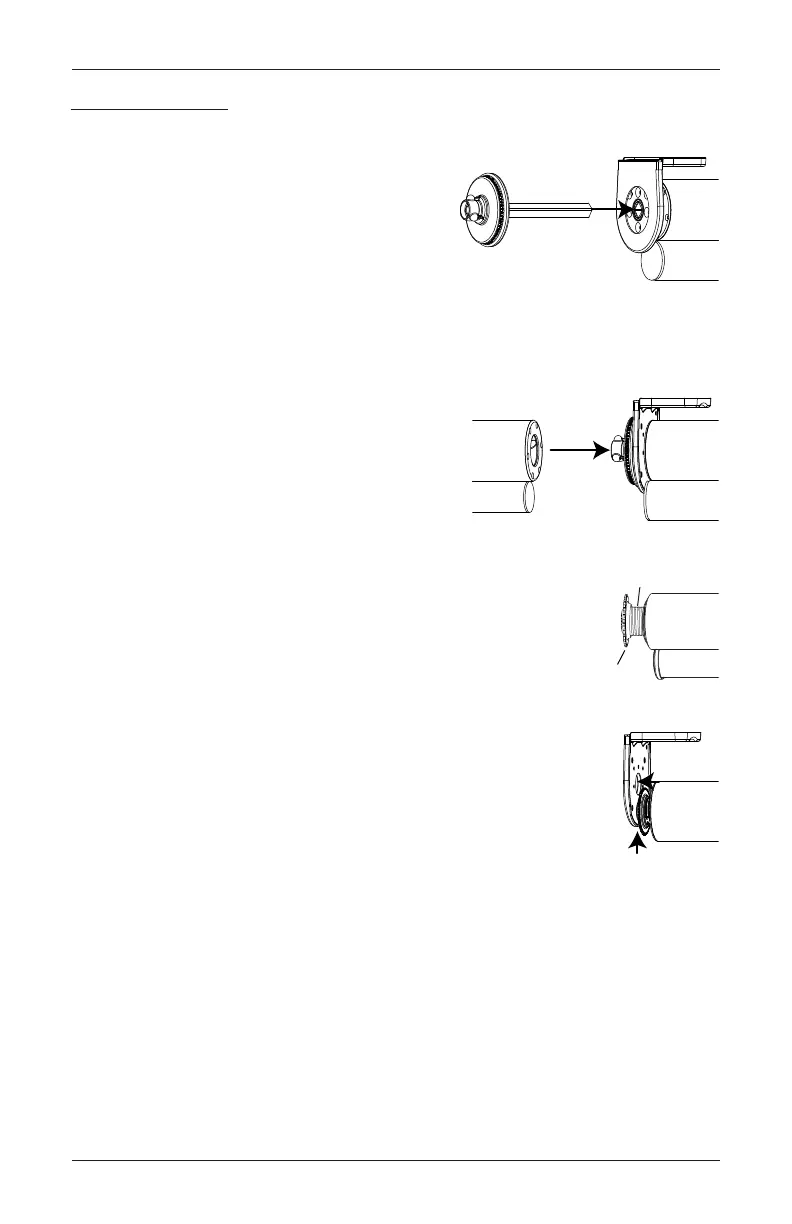
Coupled Shades
NOTE: Follow the steps on “STEP 2 — Install the Shade” on page 15, the remaining
coupled shades follow these steps.
■
Insert the coupled aligner from the second shade
into the idle end of the installed shade.
■
Make sure the bottom bar of the installed shade is in the desired position. Hold the
installed shade in position, rotate the coupled aligner so that the features match the
coupling plug.
■
Install the next shade.
➤
Make sure the bottom bars of all the shades are
aligned.
➤
Mount the plug end of shade onto the aligner.
➤
Ensure the nut is in the install position, at the end of
the idler.
➤
Push in the spring idler to compress. Bring up the idle end of the
shade into the idle bracket until it snaps into place.
■
Test the shades to be sure both are running together and bottom bars
are even.
■
If coupled shade needs to be adjusted for bottom bar alignment, remove
coupled shade and repeat the step above "Install the next shade".
■
Tighten the nut completely towards the shade to secure idler.
■
Repeat the steps on this page for remaining coupled shades.
Insert
Coupled
Aligner
Install the
Next Shade
Idler
Nut
Install
Position
Nut