4. Push the body suspension part into the hole in the
lower chassis.
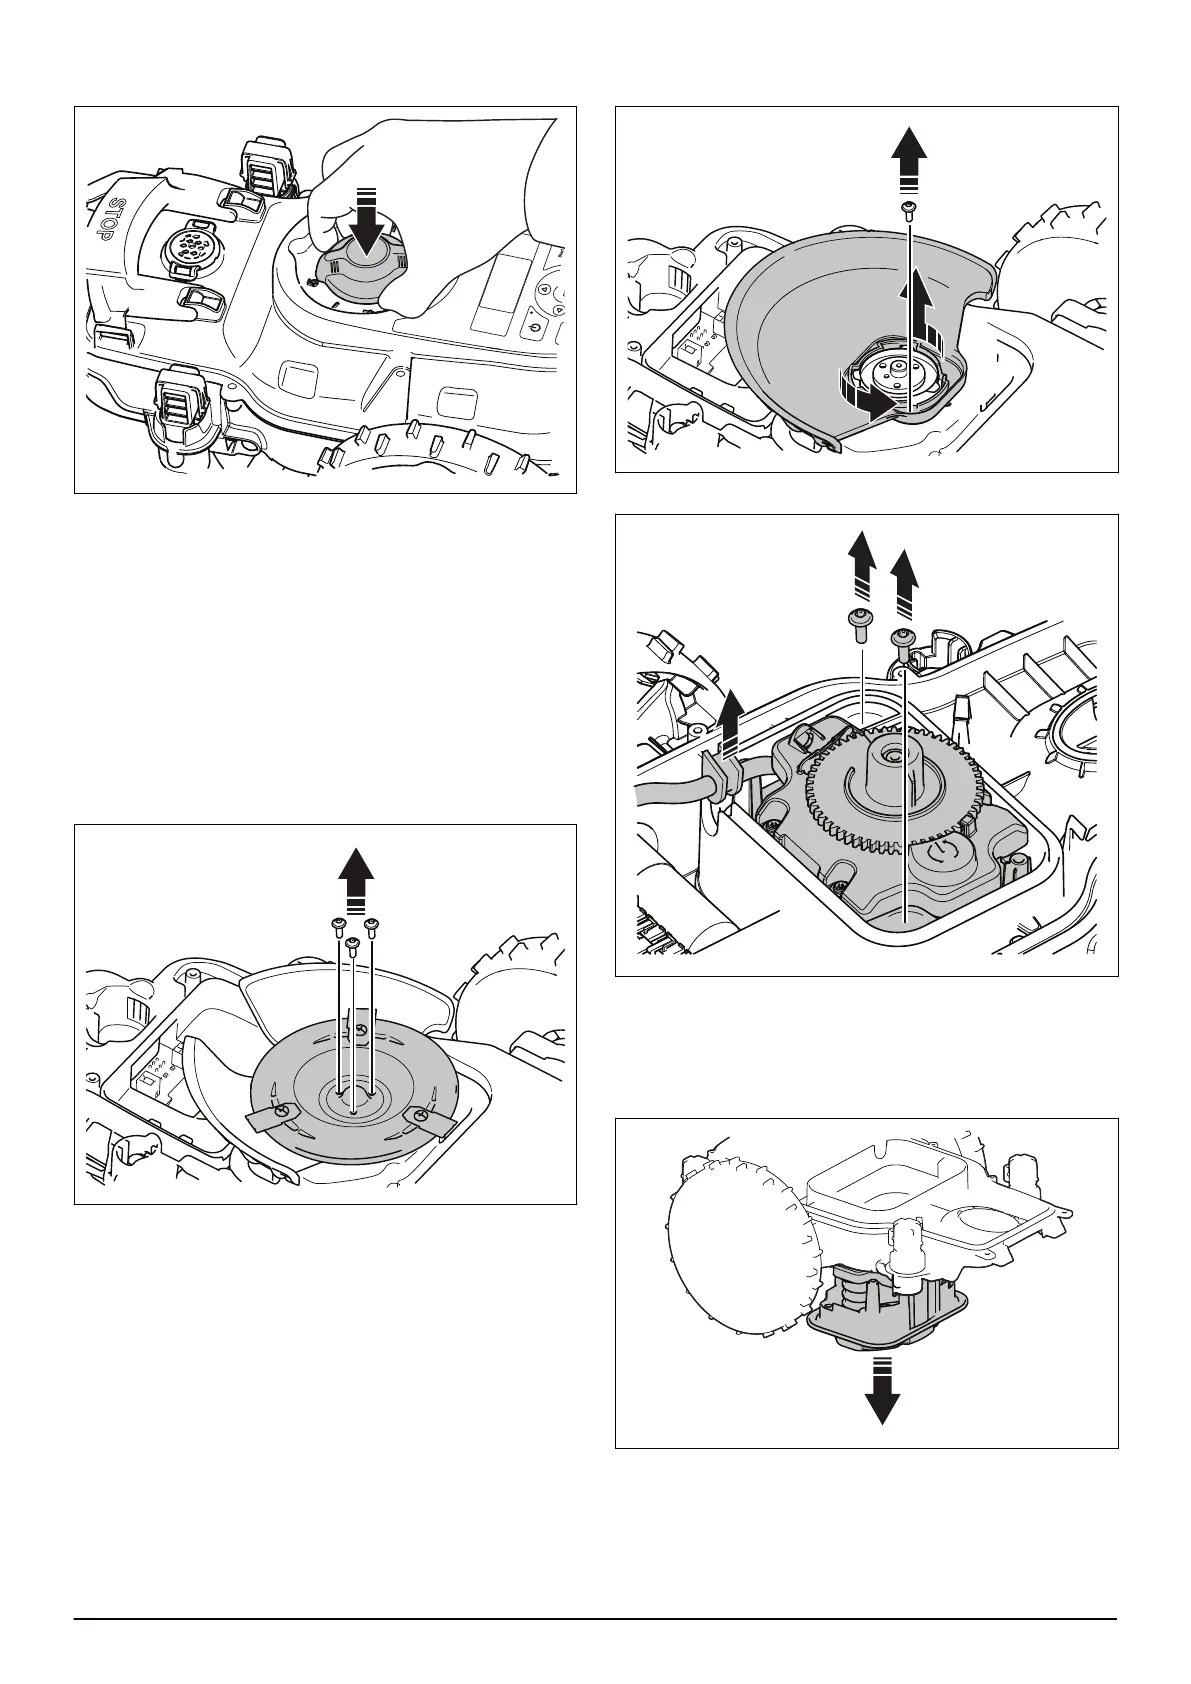
6.13 To replace the cutting module
1. Set the cutting height adjustment to MAX. Refer
to
Operation - Adjust the cutting height
in the
Operator's manual.
2. Disassemble the body system. Refer to
To
disassemble the body system on page 16
.
3. Disassemble the upper chassis. Refer to
To
disassemble the upper chassis on page 18
.
4. Loosen the 3 screws (torx 20) and pull the blade
disc up.
5. Loosen 1 screw for the cutting guard and turn the
guard counter-clockwise to remove it.
6. Remove the sealing strip and the cable gland.
7. Loosen the 2 screws holding the cutting module.
8. Disconnect the cutting motor cable from the main
circuit board.
9. Remove the cutting module.
10. Fit the new cutting module and connect the motor
cable to the main circuit board.
26 - Repair instructions 1413 - 003 - 17.01.2022

 Loading...