5 Autocheck service tool
Autocheck 3 is a PC tool developed for the service
of the robotic lawn mowers from Husqvarna Group.
It is a tool for troubleshooting as well as a database
of sold products and service history. Autocheck also
includes technical documentation and service bulletins.
Autocheck 3 supports all G3 (Generation 3) and
G4 (Generation 4) products. Autocheck EXP is still
applicable for G2 (Generation 2).
The product is connected to the computer using a USB
service cable.
5.1 Installation and login
Autocheck 3 supports Windows OS 7 and later.
Compatibility with other operating systems cannot be
guaranteed.
5.1.1 Getting log in credentials
The log-in credentials determine the set of capabilities
available within Autocheck 3.
To get Autocheck log-in credentials, either contact your
local sales support, or order Autocheck through the
Dealer Portal (requires access).
Note: Distributors can request access to Autocheck
through the Husqvarna IT service portal. Access to
Husqvarna IT service portal can be ordered through the
Husqvarna sales representative.
5.1.2 Installing Autocheck 3
Autocheck 3 is available for downloading from the
manufacturer's support site.
1. Select
AFTER SALES – Autocheck 3
follow link to
SW installation
.
2. Download Autocheck 3 according to the instructions
on the Support site.
3. Run the installation file.
5.1.3 Log in to Autocheck 3
1. Start Autocheck.
2. Enter your username and password, refer to
Getting
log in credentials on page 12
.
3. Select country and select
OK
.
Note: At the first log-in after installation, Autocheck
requires access to internet for user and password
validation.
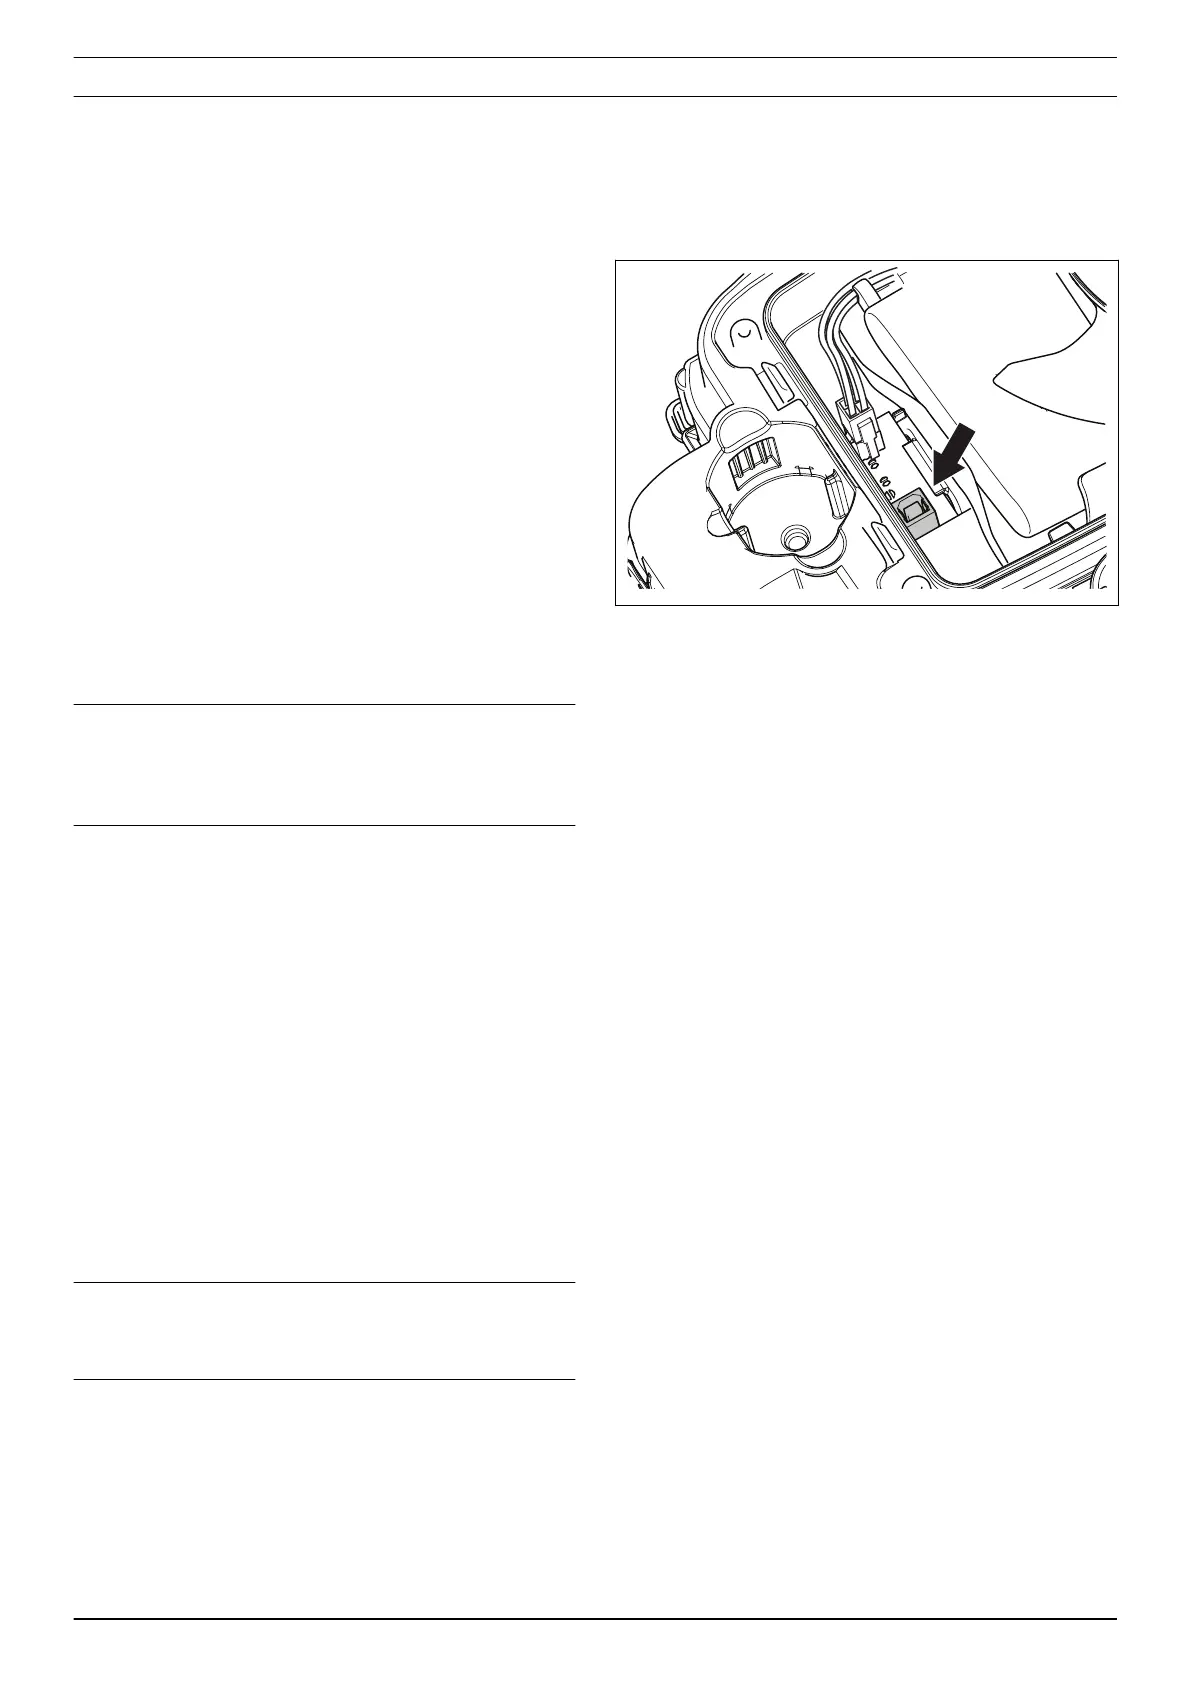
5.2 Connect the product
1. Remove the battery cover. Refer to
To replace the
battery on page 24
.
2. Connect the service cable between your computer
and the product:
3. Start Autocheck on your computer.
4. Switch on the product with the ON/OFF button.
5. After finishing the work in Autocheck, disconnect the
cable.
6. Refit and fasten the battery cover. Refer to
To
replace the battery on page 24
.
Contact between Autocheck and the product is usually
established automatically and confirmed through the
product's unique identification number.
If the text
Mower status: Not connected
is shown in
Autocheck, there is no connection with the product:
• Check that the cable is correctly connected both in
the computer and in the product.
• Check that the ON/OFF button is switched on.
5.3 How to use Autocheck 3
The program’s main functions are grouped in a number
of menus:
•
Home
•
Auto test
•
Manual test
•
Firmware
•
Actions
•
Log book
•
Documents
•
Customers
•
Help
•
Settings
5.3.1 Home
When the product is connected to Autocheck
an overview is presented in the
Home
menu.
12 - Autocheck service tool 1413 - 003 - 17.01.2022
 Loading...


