OPERATION
4-32 HySpeed HT2000LHF Instruction Manual
7
Replacement
1. Before installing the electrode, be sure to lubricate the O-ring lightly with a very thin film of the lubricant
provided in the consumable parts kit. Replace the electrode and tighten it with the wrench. Do not
overtighten.
2. Before installing the swirl ring, be certain to lubricate the O-rings lightly with a very thin film of the lubricant
provided in the consumable parts kit. Install the swirl ring with the bottom O-ring facing the inside of the
torch. Push it into place. Be sure to hold the swirl ring in place until the nozzle is installed to avoid dropping
it into the water of the water table.
3. Install the nozzle and tighten by hand. Finish tightening it with the wrench. Do not overtighten
4. Screw on the shield to the retaining cap and tighten by hand. Screw on the retaining cap to the torch and
tighten by hand. Make sure that it is tightened snugly; if it is loose, it can affect the shield gas flow.
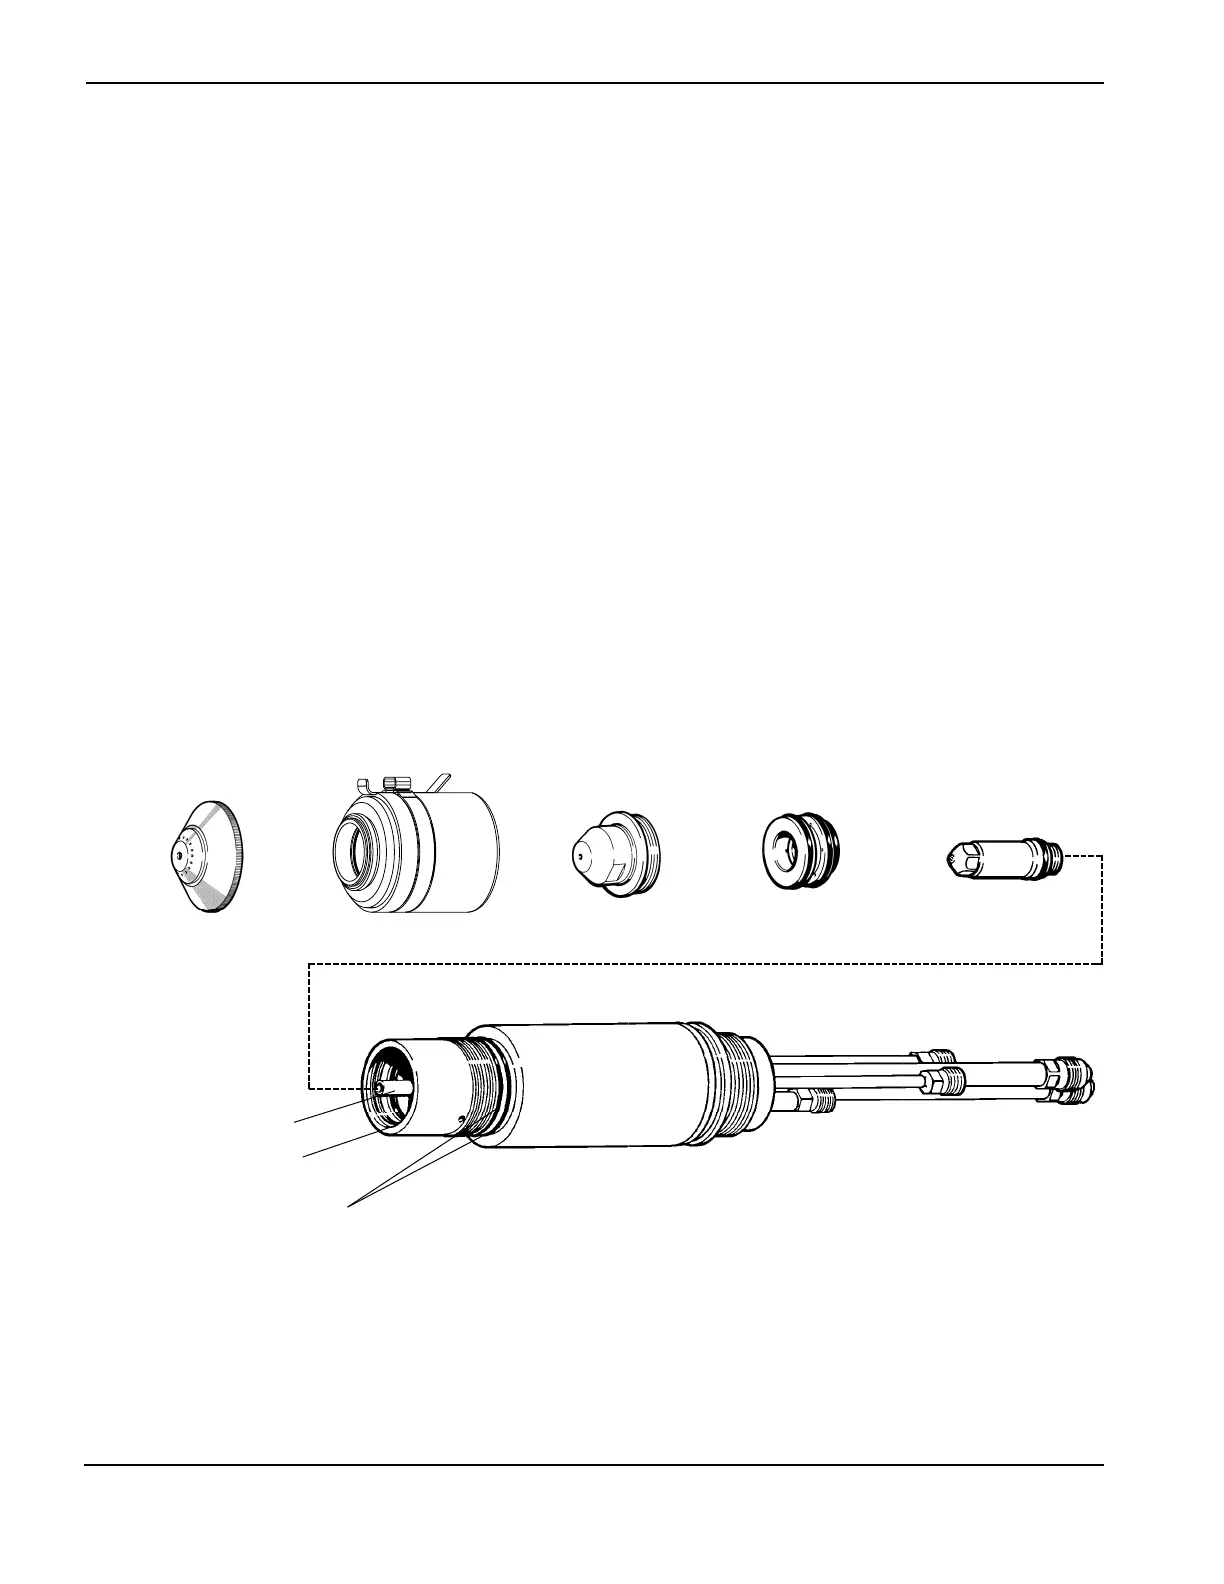
Figure 4-7 Changing Consumable Parts
Shield Retaining cap Nozzle Swirl ring Electrode
Current ring
O-rings
Water tube
Torch body (shown without off valve SA and sleeve)
 Loading...