8000 SRM 707 Lift Chain Adjustments
Legend for Figure 40
1. OUTER WELDMEN
T
2. INNER WELDMENT
3. INTERMEDIATE WELDMENT
4. FIRST INTERMED
IATE WELDMENT
5. HOOK
6. FREE-LIFT CYLINDER
7. CROSSMEMBER
8. CROSSMEMBER
Hood Latch Che
ck
WARNING
The hood, hood latch, and latch striker must be
correctly adjusted for the correct operation of
the operator restraint system.
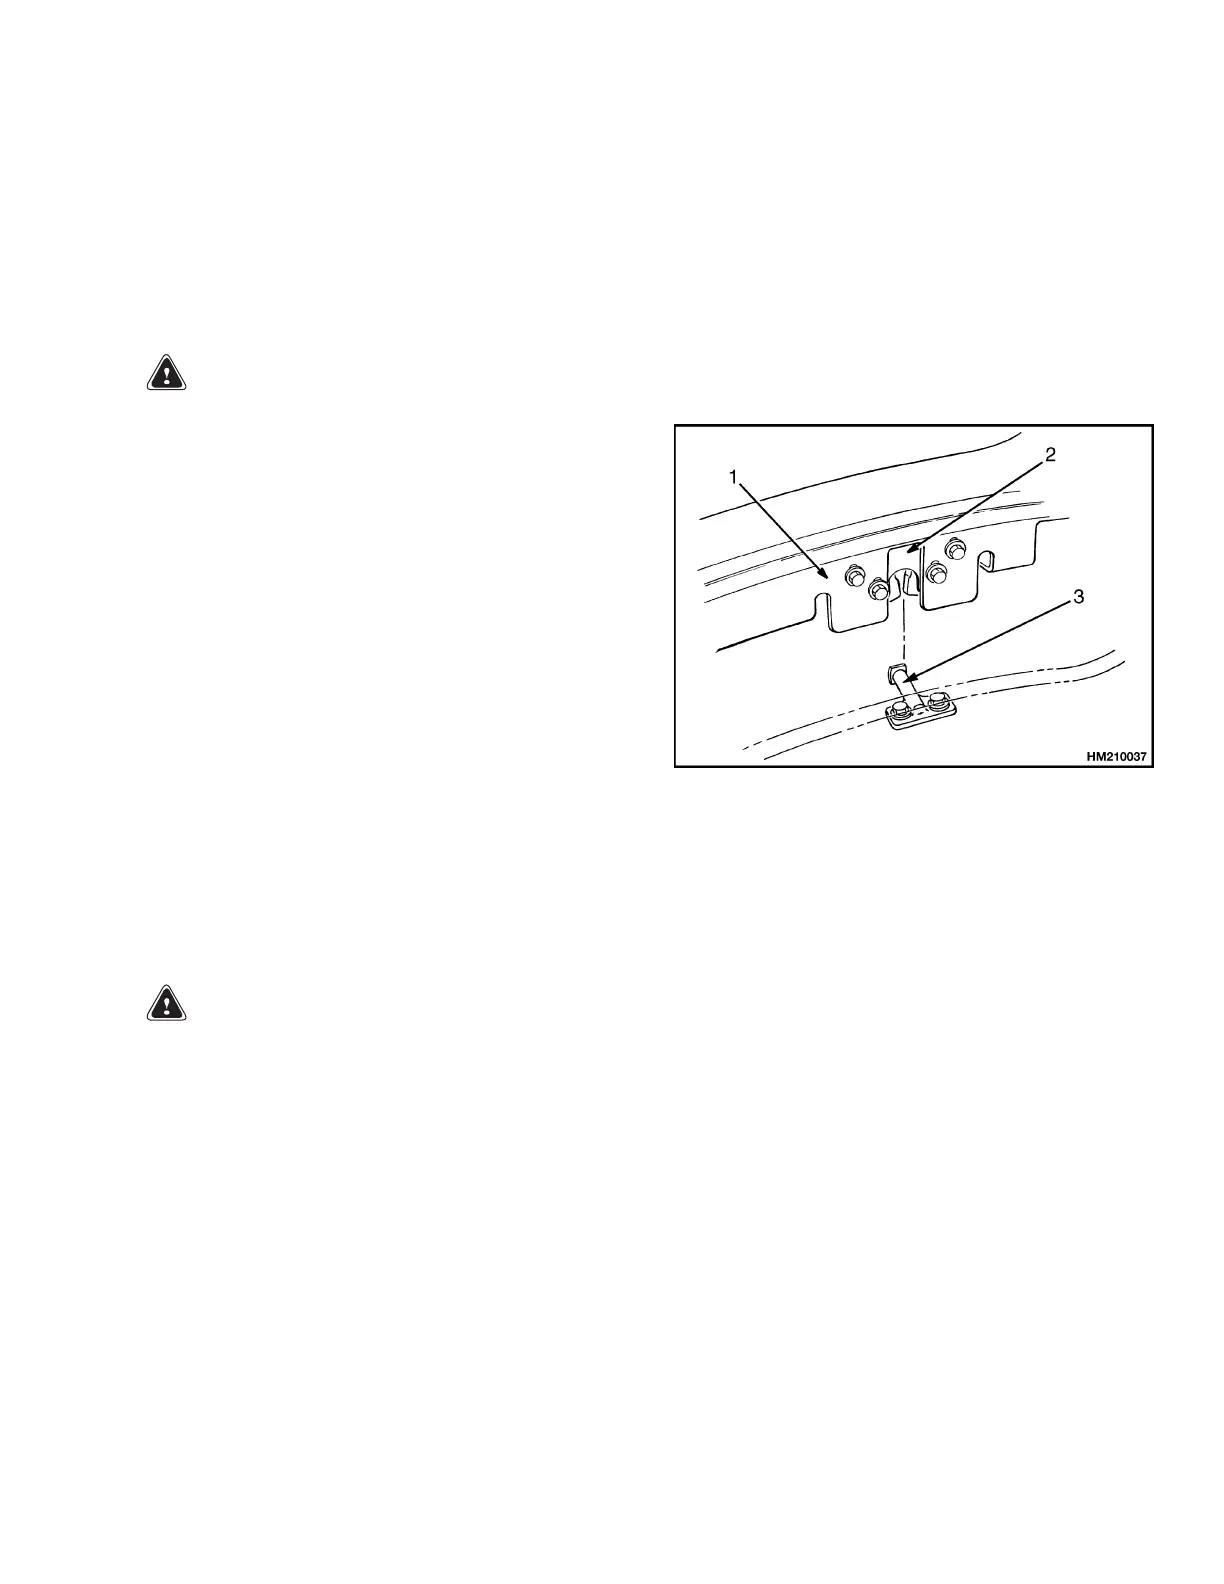
1. Install hood latch in lowest slot position on frame
of hood. See Figure 41. Tighten capscrews so
hood latch can still move when hood is closed.
2. Install latch striker. Check that latch striker is
in center of jaws of hood latch when hood closes.
3. Carefully close hood to fully closed position. The
hood latch has two positions. The hood is fully
closed after two clicks of the latch.
4. Push hood down until hood just touches rubber
bumpers. Make sure latch striker is still in cen-
ter of hood latch. Open hood and tighten cap-
screws for latch.
5. Check operation of hood latch. Have an operator
sit in the seat. Make sure hood is fully closed
(two clicks). Also check that hood touches rubber
bumpers. If necessary, repeat Step 4.
1. HOOD FRAME
2. HOOD LATCH
3. LATCH STRIKER
Figure 41. Hood Latch
Lift Chain Adjustments
WARNING
When working on or near the mast, see Safety
Procedures When Working Near Mast in this
section.
Never allow anyone under a raised carriage.
Do not put any part of your body in or through
the lift mechanism unless all parts of the mast
are completely lowered and the engine is
STOPPED.
Do not try to find hydraulic leaks by putting
your hand on hydraulic components under
pressure. Hydraulic oil can be injected into
the body by the pressure.
During test procedures for the hydraulic sys-
tem, fasten the load to the carriage with chains
to preven
t it from falling. Keep all personnel
away from
the lift truck during the tests.
When the l
ift chains are correctly adjusted:
• The tensi
onwillbethesameoneachchainofthe
chain set
. Check tension by pushing on both chains
at the sam
etime.
• The chain
length will be correct.
• The chain
s must travel freely through the complete
cycle.
NOTE: Whe
n the chain adjustments are complete,
make sur
e the threads on the nuts of the chain an-
chors ar
e completely engaged. Make sure all of the
adjustm
ent is not removed from the chain anchors.
The chai
nanchorsmustbeabletomoveontheir
mountin
g.
55
 Loading...