Charging Procedure
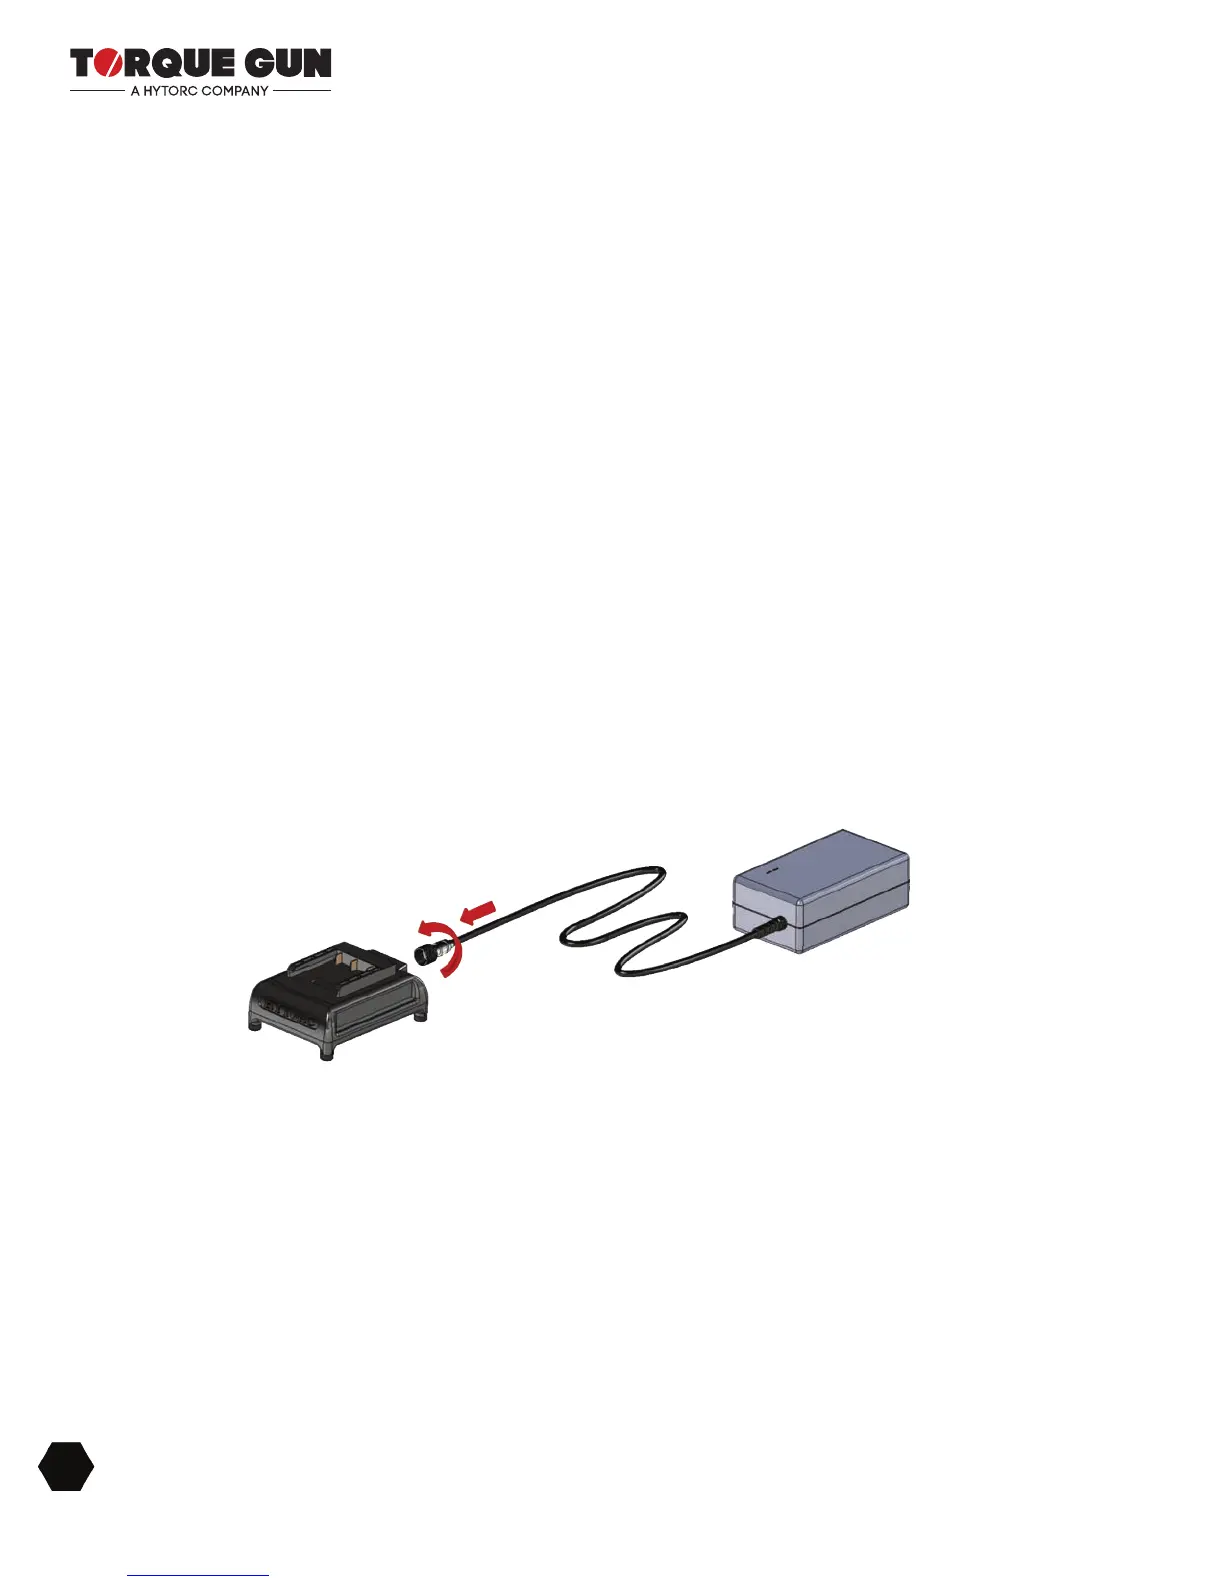
1. Plug the charger power supply into the charger cradle using the three pin plug, then tighten the
retaining collar on the plug.
2. Plug the charger power supply into an appropriate outlet before inserting a battery pack.
3. Insert the battery pack into the charger cradle. The charger is equipped with a two light charge
indicator that will be either red or green according to the charged level of the battery pack.
4. The completion of the charge is indicated by a green light which also indicates an idle state. The
pack is fully charged and may be used at this time or left on the charger.
LED Indicators:
• No Battery Solid Green Light
• Charging Solid Red Light
• Fully Charged Solid Green Light
• Short Circuit Flashing Red Light
• Reverse Polarity Flashing Red Light
• Damaged Battery Flashing Red Light
Figure 12 - Charger Power Supply to Battery Cradle Connection
Power
The LITHIUM gun battery charger can operate at 110V or 220V AC. The plug is congured for North
American outlets, so other regions may require adapters.
Reaction Arm
Each LITHIUM gun is equipped with a universal reaction arm. The reaction arm is used to absorb and
counteract any opposing forces created by the operation of the torque gun. Use the appropriately sized
reaction arm or HYTORC Washer based on your application.
20
BREAKTHROUGH PRODUCTS FOR INDUSTRIAL BOLTING
 Loading...