4. Repeat steps “2” on page 87 and “3” on page 87 on the other end of the SAS cable.
Replacing a SAS cable
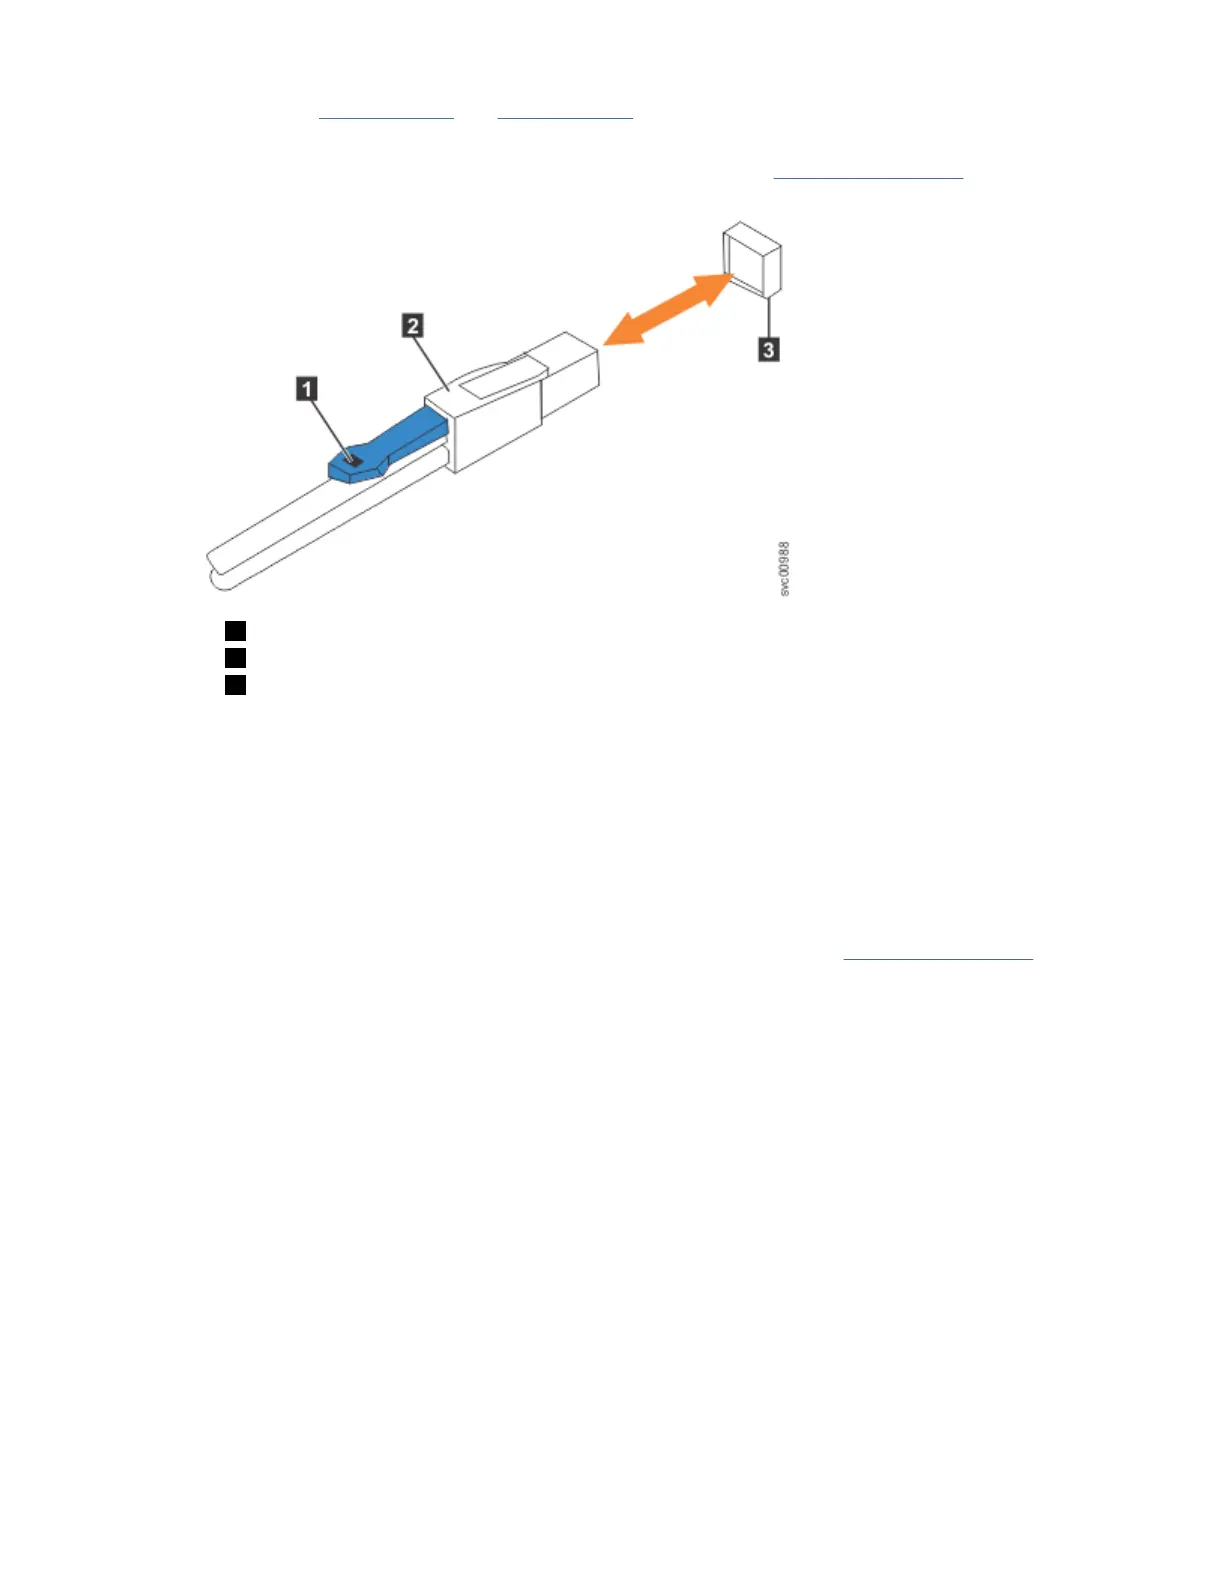
5. Ensure that the SAS connector is oriented correctly, as shown in Figure 98 on page 88. The blue tab
must face towards the top of the enclosure canister.
1 Blue pull tab
2 SAS cable
3 SAS port
Figure 98. Correct orientation for SAS cable connectors
6. Insert the SAS cable into the SAS port until you hear or feel a click. When the cable is successfully
inserted, you cannot disconnect the cable without pulling on the blue tag.
Connecting to a SAN Volume Controller node
7. Connect the SAS cable to the SAS port with blue tab above the connector (that is, facing towards the
top of the node).
You hear or feel a click when the cable is successfully inserted. You cannot disconnect the cable
without pulling on the blue tag.
8. Route the SAS cables through the cable management arms, as shown in Figure 99 on page 89.
88
SAN Volume Controller : Model 2145-SV1 Hardware Installation Guide
 Loading...


