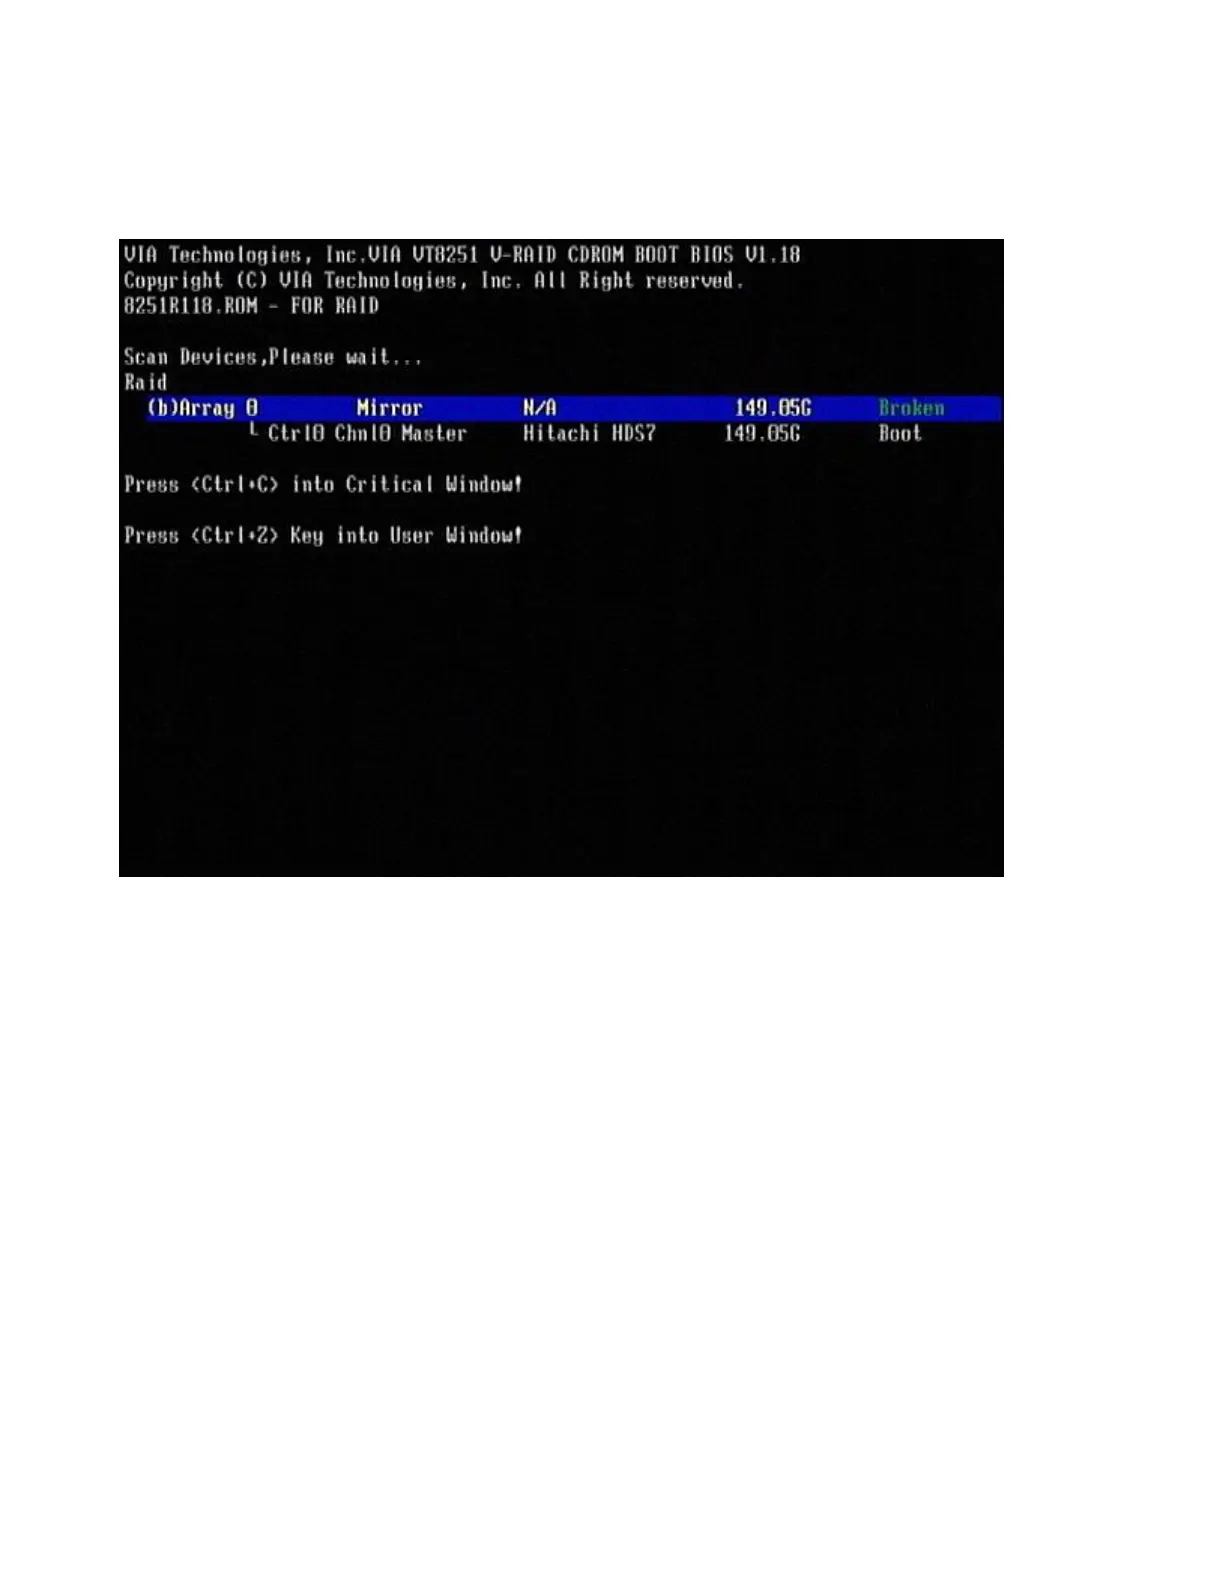
2. During the reboot, Figure 46 displays information about the failing disk. Make
note of which drive is the failing disk. Failing drives are indicated with a Broken
status.
3. Power off the machine.
4. Continue with the steps described in “Replacing and rebuilding a hard drive
(Models xx3).”
Replacing and rebuilding a hard drive (Models xx3)
Note: Before beginning these procedures, you should have completed one of the
two methods on determining the failed hard disk drive.
1. Follow the steps in “Replacing a hard disk drive” on page 38 to remove and
replace the failing hard disk drive.
2. Reassemble the machine and power on.
After the operating system loads, the RAID application rebuilds the hard disk drive
automatically. During this process, you can use the machine normally. Rebuilding
time varies depending upon the size of the partition, the amount of data and the
system activity during the rebuild.
Accessing the RAID setup menu (Models xx3)
After enabling the RAID function from the BIOS setup menu, you can enter the
RAID setup menu before the Windows OS starts by pressing Ctrl+C or Ctrl+Z on
Figure 46. Boot up warning
66 SurePOS 700-723/743/783/784 Hardware Service Guide
 Loading...
