Cabling the optional ServeRAID-8s controller
When you install the optional ServeRAID-8s controller card, follow the instructions
in the following sections to route the cables in the server (depending on your
model).
Installing the simple-swap SATA cable
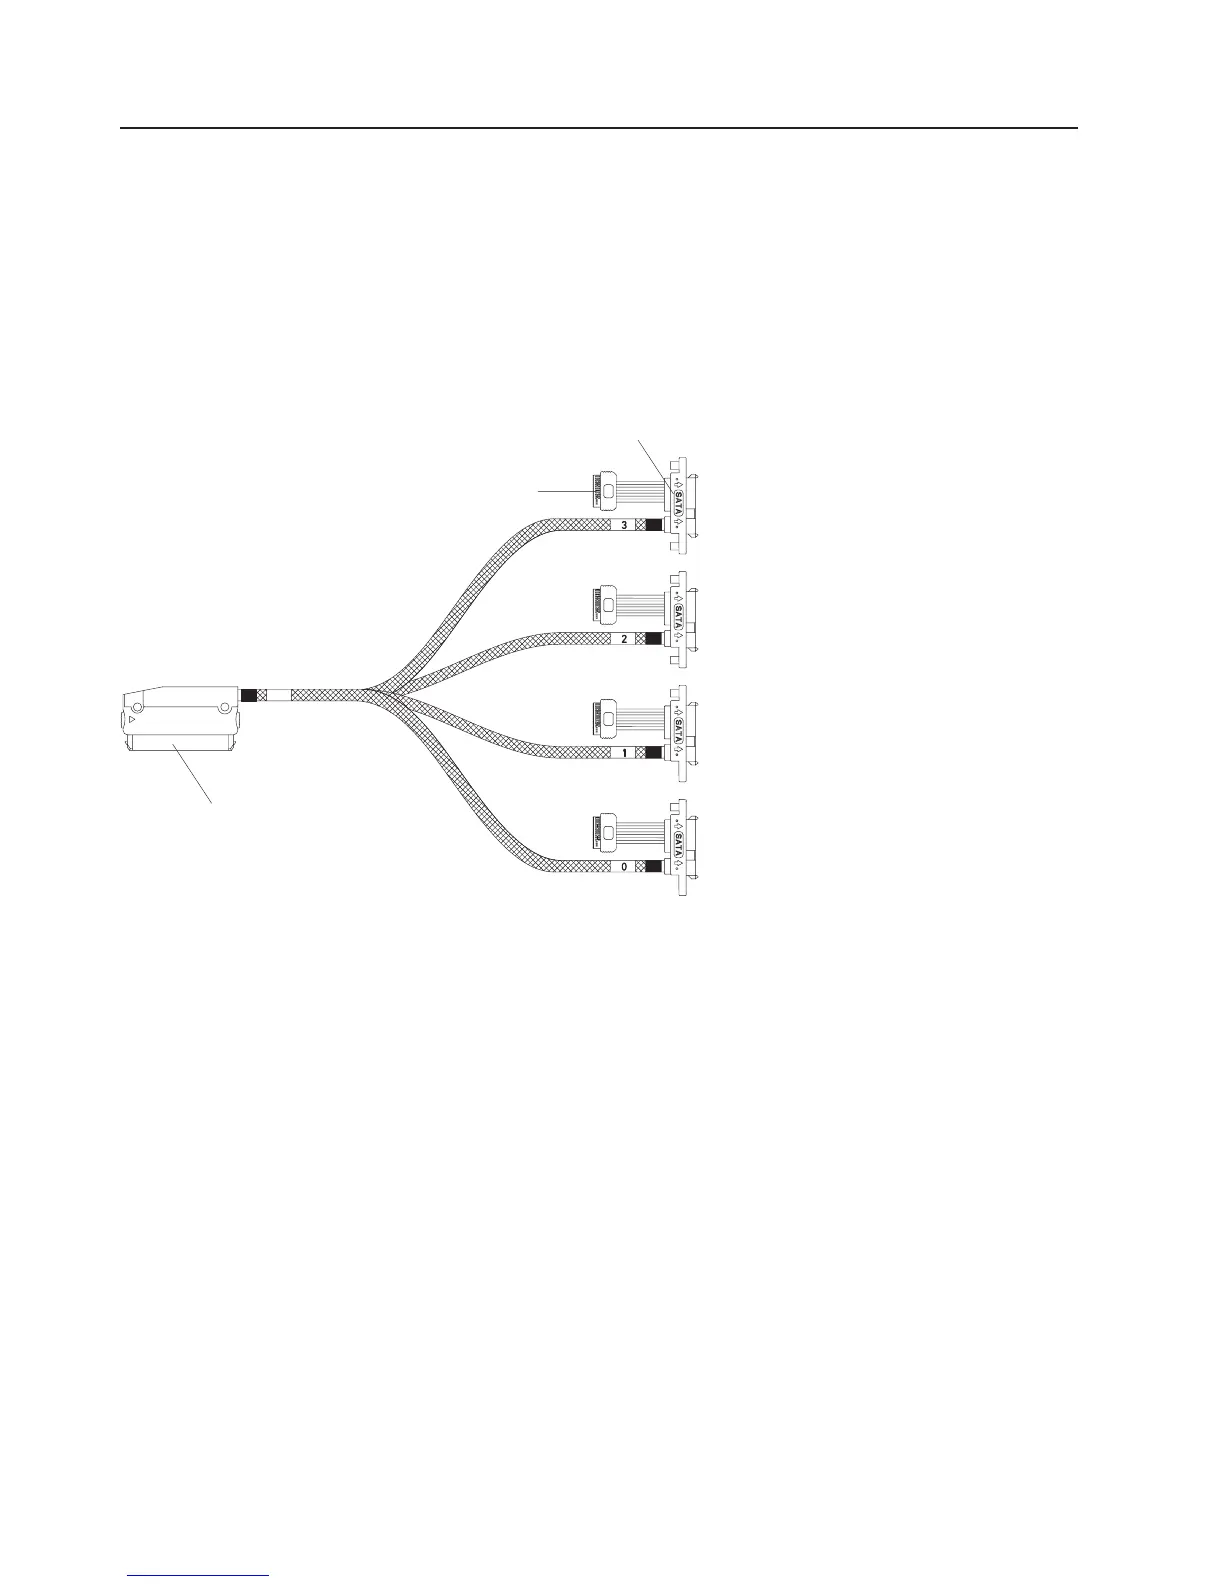
The following is an illustration of the optional 4-drop combination signal and power
simple-swap SATA cable for cabling the ServeRAID-8s controller card in
simple-swap SATA servers:
To install the optional 4-drop combination signal and power simple-swap SATA
cable, complete the following steps:
1. Read the safety information that begins on page v and “Installation guidelines”
on page 7.
2. Turn off the server and all attached devices; then, disconnect all power cords
and external cables.
3. Unlock and remove the side cover (see “Removing the side cover” on page
10).
4. Remove the front system fan assembly:
a. Disconnect the fan assembly cable from the system board and make a
note of where the cable was connected for later installation.
b. Press and hold the drive cage release tab on the side of the drive cage;
then, rotate the drive cage out of the chassis until the retaining tab on top
of the cage locks into place.
c. Pull out on the front system fan assembly release tabs (at the blue dots);
then, rotate the fan assembly away from the drive cage slightly.
d. Remove the cables from the slots on the fan assembly and remove the fan
assembly from the drive cage.
Power connector
Drive backplate connector
ServeRAID-8s controller connector
Figure 1.
28 System x3200 Type 4362 and 4363: Installation Guide

 Loading...


