ServeRAID-8s
single-drop cable
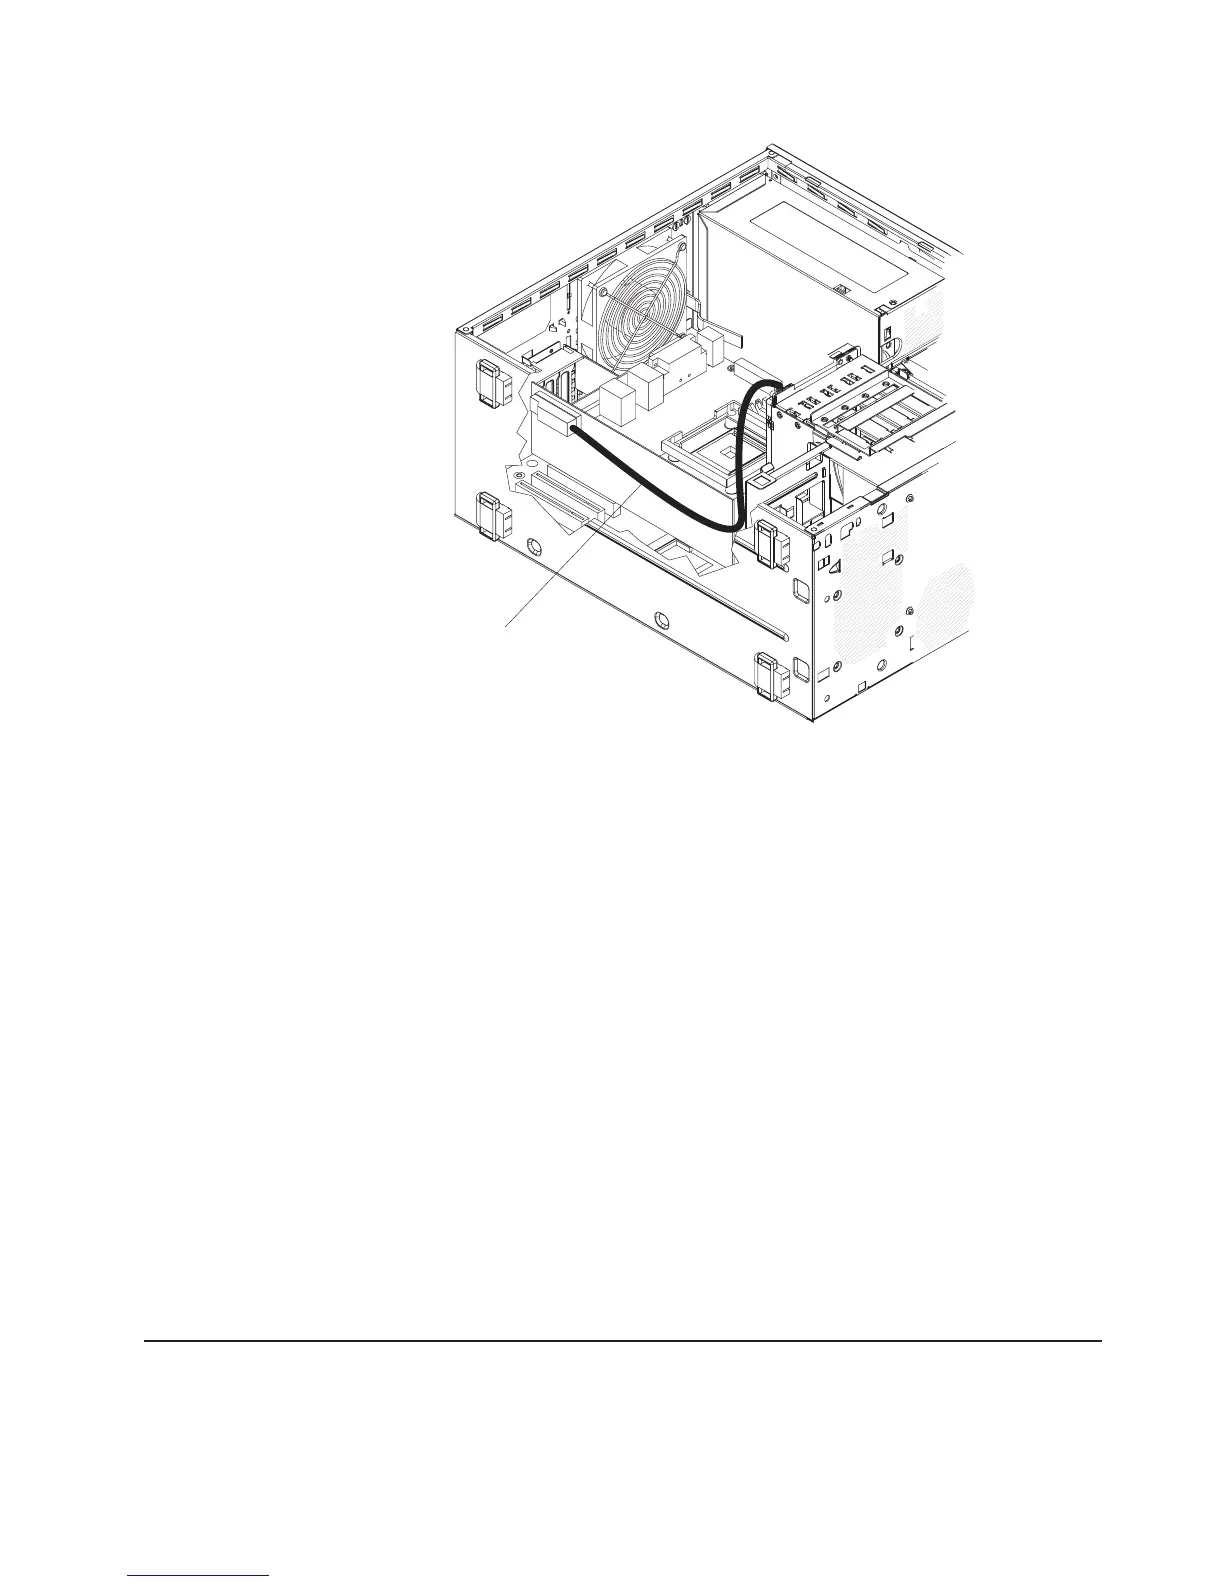
7. Replace the front system fan assembly.
a. Insert the fan assembly retaining tab over the right edge of the hard disk
drive backplane; then, rotate the fan assembly toward the backplane. Do
not fully close the fan assembly.
b. Route the single-drop signal cable through one of the slots on the edge of
the fan assembly; then, route the hard disk drive power drop cable through
the other slot on the edge of the fan assembly. Ensure that the cables will
not be pinched between the fan assembly and the hard disk drive
backplane when the fan assembly is installed.
c. Rotate the fan assembly toward the backplane until the release tabs are
fully engaged.
d. Rotate the drive cage back into the server until it stops; then, press and
hold the retaining tab on top of the drive cage while rotating the drive cage
into the chassis until it locks into place.
8. Reconnect the fan assembly cable to the system board.
Note:
Before you continue, check all internal power cables to make sure that
they are connected to the system board and other optional devices.
9. Install the side cover (see “Reinstalling the side cover” on page 34).
10. Lock the side cover.
11. Reconnect the external cables and power cords; then, turn on the attached
devices and turn on the server.
Completing the installation
To complete the installation, you must reinstall the two-piece bezel, reinstall the side
cover, connect all the cables and, for some devices, run the Configuration/Setup
Utility program. Follow the instructions in this section.
Chapter 2. Installing optional devices 31

 Loading...


