Note: You might have to reconfigure the disk arrays after you install hard disk
drives. See the RAID documentation on the IBM ServeRAID Support CD for
information about RAID controllers.
If you have other devices to install or remove, do so now. Otherwise, go to
“Completing the installation” on page 135.
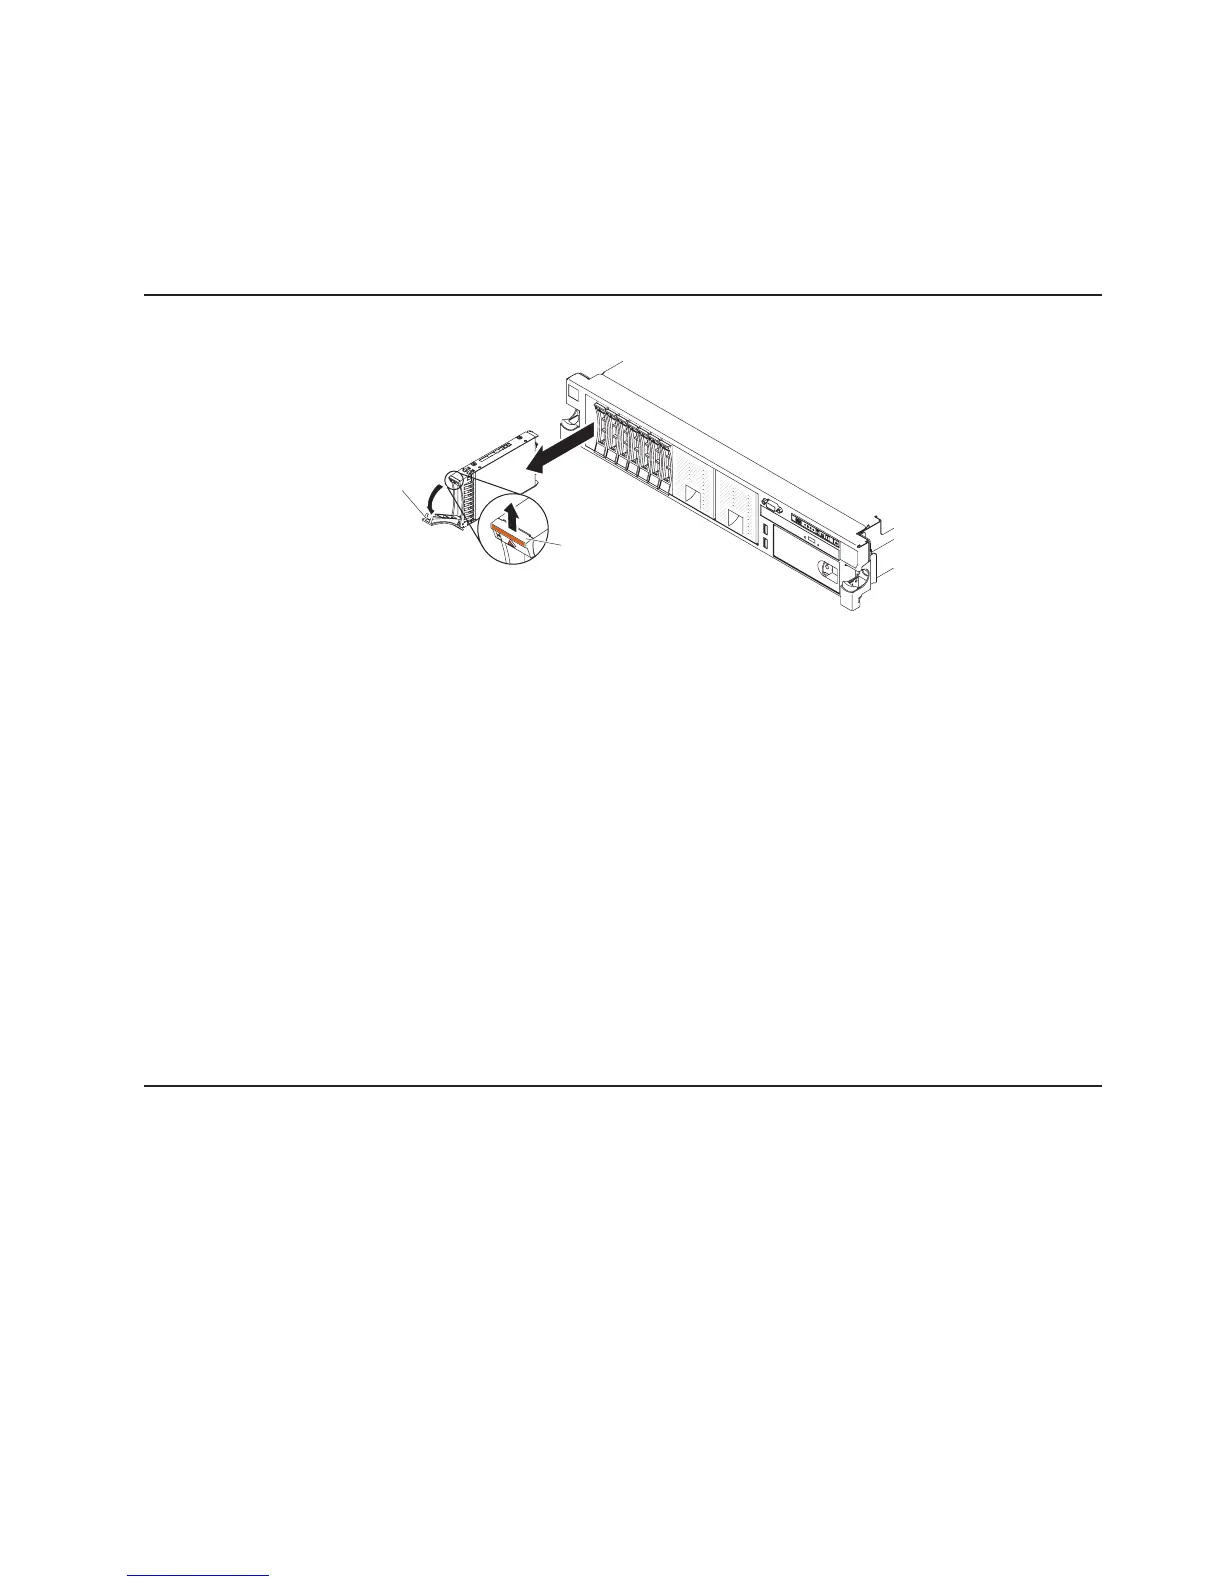
Removing a hard disk drive
Latch
Handle
To remove a hot-swap hard disk drive, complete the following steps:
1. Read the safety information that begins on page vii, “Installation guidelines” on
page 40, and “Handling static-sensitive devices” on page 42.
2. Press up on the release latch at the top of the drive front.
3. Move the handle on the drive to the open position (perpendicular to the drive).
4. Pull the hot-swap drive assembly out of the bay approximately 25 mm (1 in.).
Wait approximately 45 seconds while the drive spins down before you remove
the drive assembly completely from the bay.
Note: You might have to reconfigure the disk arrays after you remove a hard
disk drive. See the RAID documentation on the IBM ServeRAID Support CD for
information about RAID controllers.
If you have other devices to install or remove, do so now. Otherwise, go to
“Completing the installation” on page 135.
Installing a SAS/SATA 8 Pac HDD option
If the server is a 16-drive-capable model with eight hard disk drive bays installed,
you can install an IBM System x3650 M4 Hot-swap SAS/SATA 8 Pac HDD option.
See http://www.ibm.com/servers/eserver/serverproven/compat/us/ for a list of
supported optional devices. To order a SAS/SATA 8 Pac HDD option, contact your
IBM marketing representative or authorized reseller.
The SAS/SATA 8 Pac HDD option kit contains the following components:
v One 2.5-inch hard disk drive backplane
v One SAS expander adapter
v Two M3 x 5 screws
v Two SAS signal cables which attached to the expander adapter
Chapter 2. Installing optional devices 67

 Loading...


