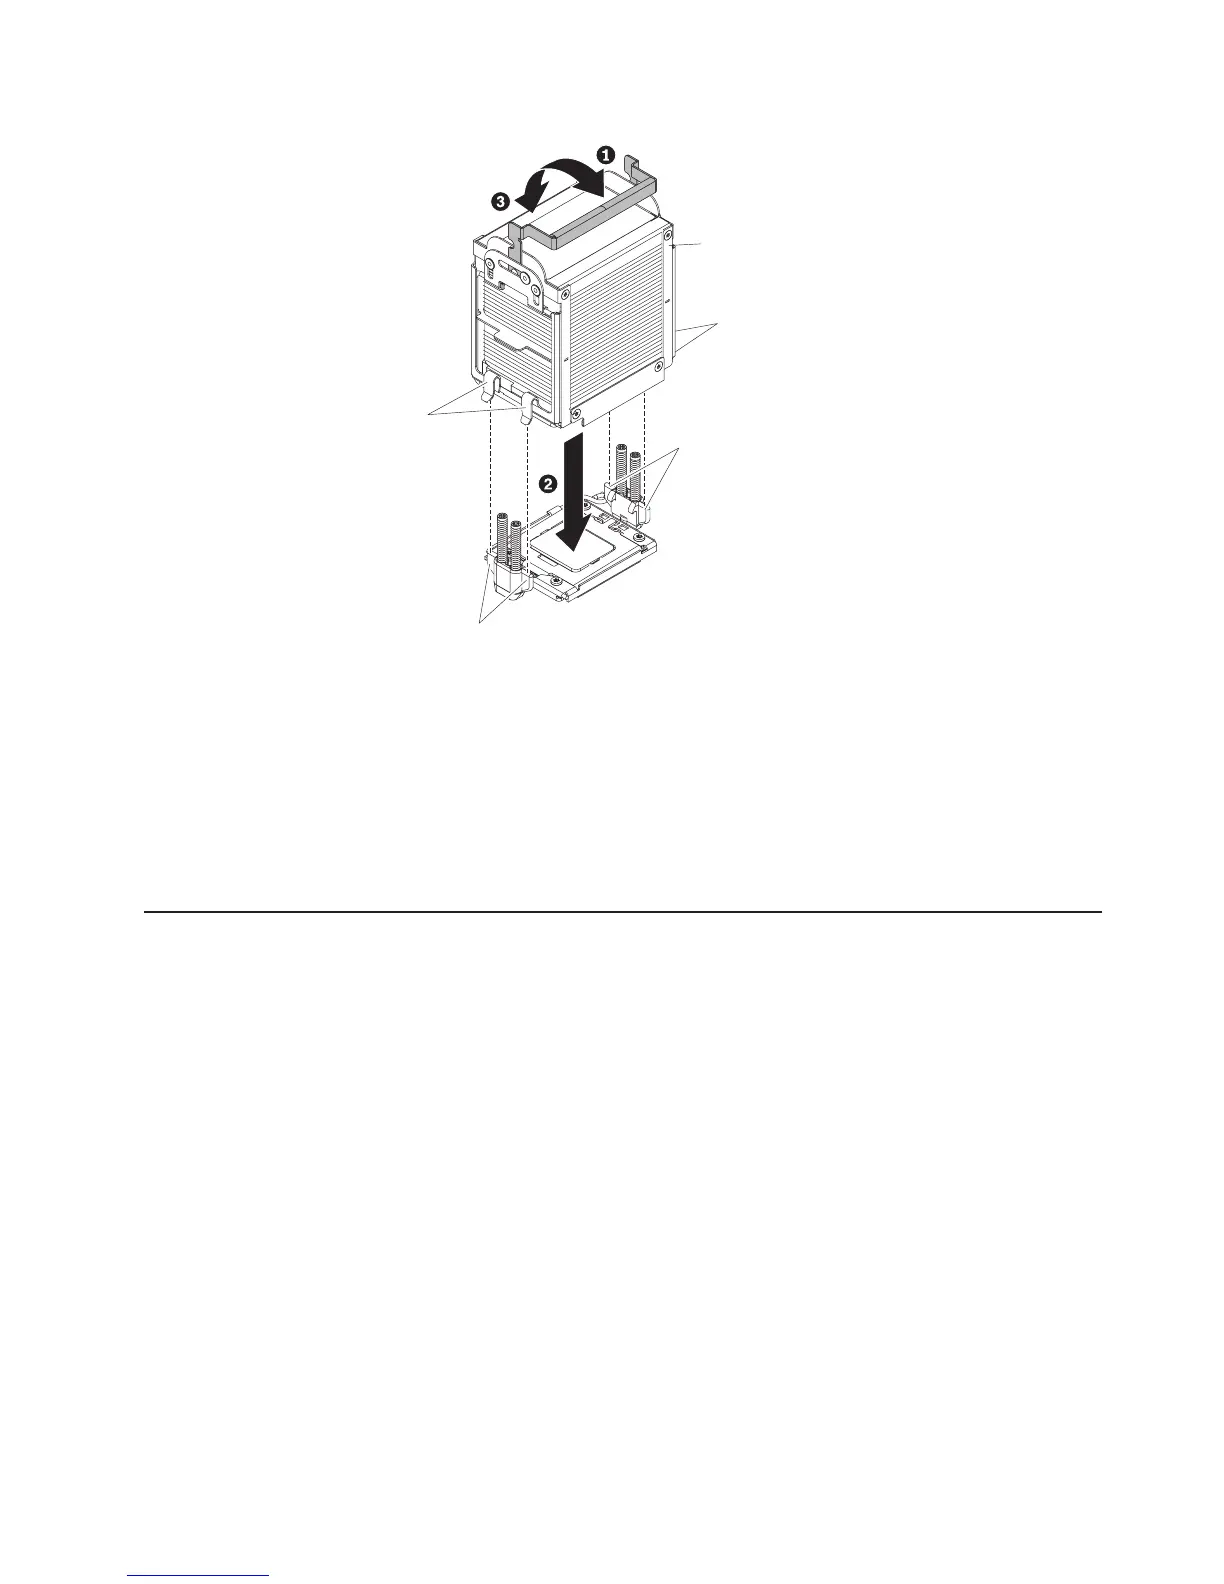
Heat sink
Clips
Tabs
Tabs
Clips
12. Remove the heat sink from its package and rotate the heat-sink handle to the
fully open position.
13. Remove the cover from the bottom of the heat sink.
14. Position the heat sink above the microprocessor and align the clips of the heat
sink with the tabs next to the microprocessor socket.
15. Press on the top of the heat sink and rotate the lever to the closed position.
If you have other devices to install or remove, do so now. Otherwise, go to
“Completing the installation.”
Completing the installation
To complete the installation, complete the following steps:
1. If you removed the front bezel, slide the bezel onto the front of the server
chassis.
2. If you removed the top-cover bracket, reinstall it. Slide the blue latches into the
locked position.
3. Place the top cover over the top of the server.
4. Slide the top cover forward; then, press down on the cover handle until it clicks
into place.
5. Connect the cables and power cords to the rear of the server. For more
information, see “Connecting the cables.”
Connecting the cables
Notes:
1. Be sure to turn off the server before you connect any cables to or disconnect
any cables from the server.
2. For additional cabling instructions, see the documentation that comes with the
optional devices. It might be easier for you to route any cables before you install
certain optional devices.
Chapter 2. Installing optional devices 59

 Loading...