18
FROST PROTECTION
The boiler has built into its control system the facility to protect
the boiler only against freezing.
If the ow temperature falls below 5
o
C the boiler will re until the
ow temperature exceeds 19
o
C. The pump will stay running for
a further 2 minutes.
Central heating systems tted wholly inside the building do
not normally require frost protection as the building acts as
a 'storage heater' and can normally be left at least 24 hours
without frost damage. However, if parts of the pipework run
outside the building or if the boiler will be left off for more than a
day or so, then frost protection for the system is recommended.
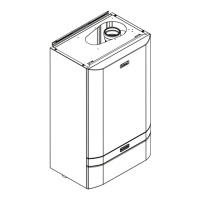
AIR INLET
Combustion air can be drawn in via the grille situated on the top of boiler assembly or ducted in from outside of the building in
which the boiler is installed using the air inlet kit.
IMPORTANT NOTE. If combustion air is drawn from within the boiler room, ensure no dust or airborne debris can be
ingested into the appliance. Dusty concrete ooring should be sealed to reduce the presence of dust. Ideally where
possible duct the air supply into the boiler room from a clean source outside the boiler room/building.
An air inlet collar kit is available as an optional extra for tting to the boiler.
1000kW (note - refer to diagrams in Frame 16 for reference)
1. Assemble the 2 pairs of ue manifold T pieces (long legs
point upwards), ensuring the seals are tted and lubricated
using the seal lubricant provided.
2. Push the assembled T pieces into the boiler connections
ensuring the seals are tted and lubricated using the seal
lubricant provided.
3. Unpack and position the rst header assembly at the rear
of the right hand modules, when viewed from the back.
4. Use the adjustable feet to both level the unit and
position the unions adjacent to their respective module
connections.
5. Connect each header ow & return exible hose
connection to the appropriate module male thread
using the bre washer provided. Note: A number of
adjustments are available within the header assembly to
help align connections. These must be secured after any
adjustments.
6. Connect each exible gas header pipe to the appropriate
module male thread. Note: A number of adjustments
are available within the header assembly to help
align connections. These must be secured after any
adjustments.
7. Unpack the second header assembly. Remove any
blanking plates from the side to mate with the rst header
assembly. Remove the ue header support frame by
removing the 6 nuts and bolts. Position the header
assembly at the rear of the left hand modules, when
viewed from the back.
8. Use the adjustable feet to level the unit, position the unions
adjacent to their respective module connections and align
with the adjacent header.
9. Bolt the 5” ow & return headers pipes of the 2 header
assemblies together using the gaskets and fasteners
provided.
10. Connect each header ow & return exible hose
connection to the appropriate module male thread
using the bre washer provided. Note: A number of
adjustments are available within the header assembly to
help align connections. These must be secured after any
adjustments.
11. Connect each exible gas header pipe to the appropriate
module male thread. Note: A number of adjustments
are available within the header assembly to help
align connections. These must be secured after any
adjustments.
12. Ret the ue header support frame using the 6 nuts and
bolts.
13. Secure the ue manifolds to the header frames with the 4
support brackets provided. Note: The frame that supports
the ue manifold & gas header can move forwards or
backwards for adjustment.
14. Fit the bottom caps to the ue manifolds & secure with the
locking bands provided. Use locking bands to secure the
ue manifold T pieces together. Note: The bottom caps
must be connected to a drain via water traps using plastic
components only.
15. Assemble the 2 ue elbows to the Y piece ensuring the
seals are tted and lubricated using the seal lubricant
provided. Fit this assembly to combine the outlets of the 2
ue manifolds. Secure using the locking bands provided.
16. An air vent point is provided in the top of both ow
headers. An automatic air vent must be tted to the boss
nearest the end from which the water ow will be taken.
17. If the header kit used includes isolation valves, a pressure
relief valve MUST be tted to the 1” boss provided on the
exible ow pipe of each module.
18. A 1” boss is provided on the underside of the exible
return pipe to enable a drain valve to be tted. Remove
any blanking plates from the side to mate with the second
header assembly.
19. The header thermistor MUST be tted to the boss provided
on the header ow pipe nearest to the end from which the
ow water will be taken.
20. Link the 2 vertical gas headers using the gas manifold
provided
INSTALLATION
17
CONT'D WATER AND GAS HEADER INSTALLATION
20
- Installation & Servicing
 Loading...