iDirect Satellite Router Installation and Commissioning Guide 35
iDX Release 3.3
Peaking the Antenna
To Peak The Antenna
1. Ensure that the antenna is pointed off the marked heading by at least 20 degrees in
azimuth.
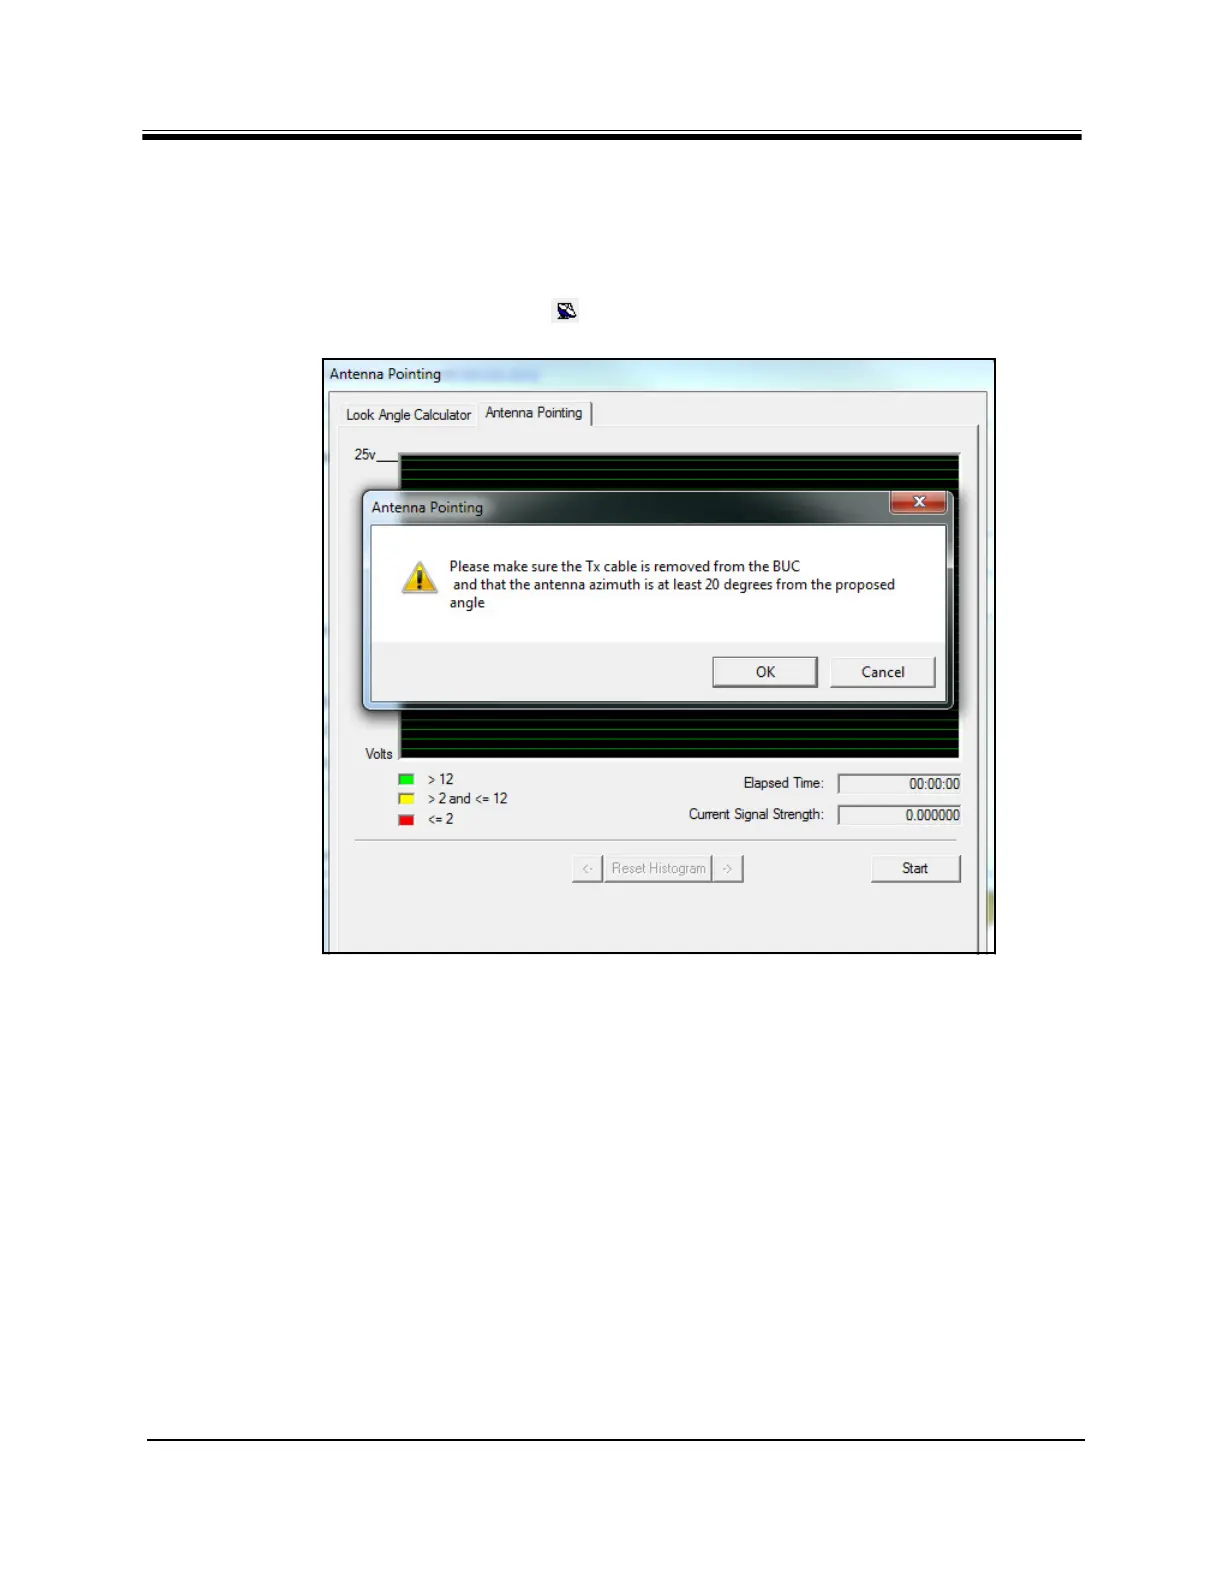
2. In the iSite T
ree View, right-click the Remote and select Align AntennaAntenna
Pointing. Alternately, click the icon in the tool bar. The Antenna Po
inting dialog box
appears. See Figure 22.
Figure 22. Starting Antenna Pointing
3. Click the Antenna P
ointing tab.
4. Click the St
art button.
5. A warning appears asking for confirmation that
the BUC TX input is disconnected, and that
the antenna is pointed off the proposed angle. If both are true, observe the voltmeter and
click OK.
6. Verify that the BUC voltage is disabled by obs
erving the voltage drop on the voltmeter.
With no received signal, DC voltage drops to zero for about ten seconds, until the PWM
and histogram display start. After that, the voltmeter indicates approximately 0.4 V of
PWM output. See Figure 23.
7. Return the antenna azimuth to the position mark
ed during course alignment. Slowly
sweep the reflector a few degrees either side of the course azimuth while observing the
peak indicators. The signal trace of the histogram progressively turns from red, to yellow,
and then to green as downstream carrier signal strength increases. See Figure 23.