-31-
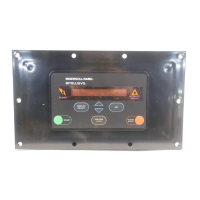
FIELD INSTALLATION OF SEQUENCER INTERFACE I SSR®
10-40 HORSEPOWER UNITS WITH INTELLISYS
TM
(FOR CONNECTION OF COMPRESSORS WITH INTELLISYS
TM
TO STANDARD INGERSOLL-RAND SEQUENCER)
THE PURPOSE OF THESE INSTRUCTIONS IS TO IDENTIFY THE COR-
RECT PARTS REQUIRED WHEN INSTALLING A STANDARD INGERSOLL-
RAND SEQUENCER AND WIRING IT TO AN INTELLISYS COMPRESSOR.
A DEVICE CALLED A SEQUENCER INTERFACE I IS USED ALONG WITH
OTHER COMPONENTS BETWEEN THE COMPRESSOR AND SEQUENCER
TO MAKE THE COMPRESSOR WORK PROPERLY.
SAFETY
Lock and tag the main power disconnect in the
open position. Isolate the compressor from the
compressed air system by closing isolation
valve and vent pressure from the unit.
APDD 403A -91
INSTALLATION INSTRUCTIONS:
1. Remove the Intellisys Controller from the starter box or starter box mount.
Refer to the Compressor Operators Manual for procedure.
2. If the controller bottom cover is attached using tamper-proof screws a
new controller is required (reference note 1). Refer to controller replace-
ment instructions in the compressor operators manual.
3. If the controller bottom cover is attached with phillips head screws the
EPROM is replaceable (reference note 2). Refer to EPROM replacement
instructions below.
4. Locate the area inside the starter box where the Sequencer Interface I
(P/N39813274) is to be mounted (see figure 1). Mark the mounting holes.
Drill #25 diameter pilot holes for the #10-32 self-tapping screws (en-
closed units), or 1/4" dia. clearance holes for the #10-24 screws (open
units). Mount Sequencer Interface I to the starter box using screws
provided in the kit.
5. Connect the modular cable (P/N39547880) between the communication
port jack on the Squencer Interface I and the communication port jack
on the compressor starter interface board (see figure 2). Route cable and
secure away from primary voltage wiring/components.
6. Connect 115 V. A. C. wiring between the Sequencer Interface I and the
starter interface board as shown in the wiring diagram (figure 2).
7. Connect wiring from terminals #1-#5 on the Sequencer Interface to
corresponding terminals #TB-1 through #TB-5 on the sequencer block.
It is recommended that conduit be used to connect the sequencer to the
compressor starter box/Sequencer Interface I to assure continuous
grounding between components.
8. The 115 V.A.C. wiring and the 5 wires connecting the Sequencer
Interface I to the sequencer should be separated from 5 V.D.C and other
low voltage wiring, as much as possible.
9. Install the automatic start/stop prom in the starter interface board.
INTELLISYS CONTROLLER EPROM REPLACEMENT (SEE NOTE 2)
1. Remove the Intellisys Controller from the starter box or starter box mount.
Refer to the Compressor Operators Manual for procedure.
2. Remove the aluminum bottom cover.
3. Remove the existing programmed EPROM (located on printed circuit
board in socket labeled U2).
4. Remove the new programmed EPROM (P/N39179585) from its packag-
ing, using care not to damage the pins on the EPROM.
5. Insert the EPROM into the socket labeled U2. Pin #1 on EPROM should
be located in the upper left corner for correct installation.
6. Replace the bottom cover.
7. Re-install the Intellisys Controller in the starter box or starter box mount.
OPERATION
1. Refer to Sequence Controller Instructions (APDD 405A-91) for se-
quencer operation.
-32-
 Loading...