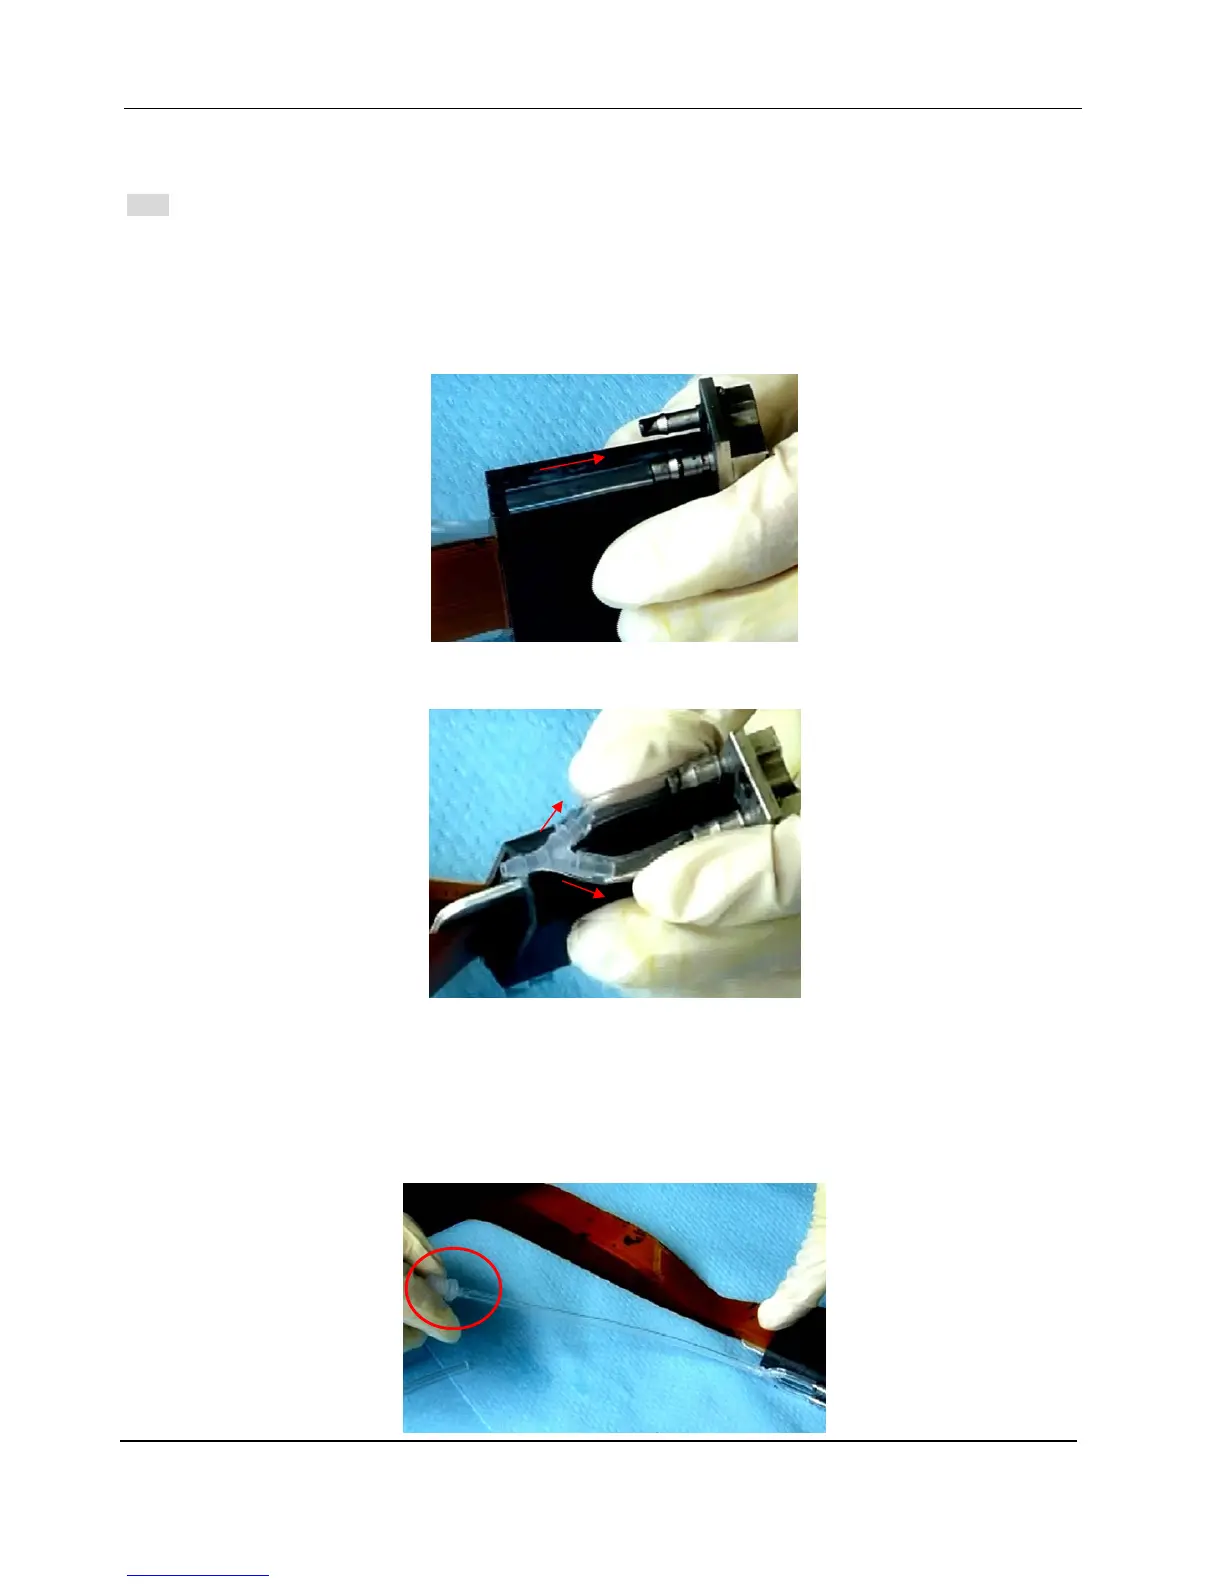
7-5 ASSEMBLE PRINT HEADS WITH INK TUBES
Note: The following procedures take water-based print heads as example; the installation procedures of installing
print heads on UV system are exactly the same, except that the ink tubes and connectors should be for UV ink.
1 Cut the long ink tube (Φ4) into 24 sections of short tubes whose length is about 3.8cm and 12 sections
of long tubes whose length is about 10cm.
2 Plug one short tube onto each ink inlet of print head. Make sure the tube gets to the bottome of the
inlet.
3 Then connect every two short tubes at the same side with a Y-shape connector. Make sure the tubes
get to the bottom of the connector’s two outlets. Please see the image below:
4 Install a long section of tube to the inlet of each Y-shape connector.
5 Now please differentiate the front and end sides of the print head. Check the two holes at the ends of
nozzle line; one is a long one, the other a round one. The side with the long hole is the front side of the
print head.
6 Install a luer connector and a luer lock on long tube at the end side of the print head.