Toyota/Lexus OBD1 Systems
CODE RETRIEVAL PROCEDURE
3140d 101
Check your vehicle thoroughly before performing any test. See
BEFORE YOU BEGIN on page 31 for details.
ALWAYS observe safety precautions whenever working on a
vehicle. See Safety Precautions on page 3 for more
information.
1. Locate the vehicle's Data Link Connector (DLC). See DATA LINK
CONNECTOR (DLC) on page 99 for connection location.
Some DLCs have a plastic cover that must be removed before
connecting the scan tool's cable connector.
2. Connect the scan tool cable (with the Toyota Connector Cable
Adaptor attached) to the scan tool, then connect the adaptor to the
vehicle’s DLC. Press the POWER/LINK
button to turn the
scan tool ON.
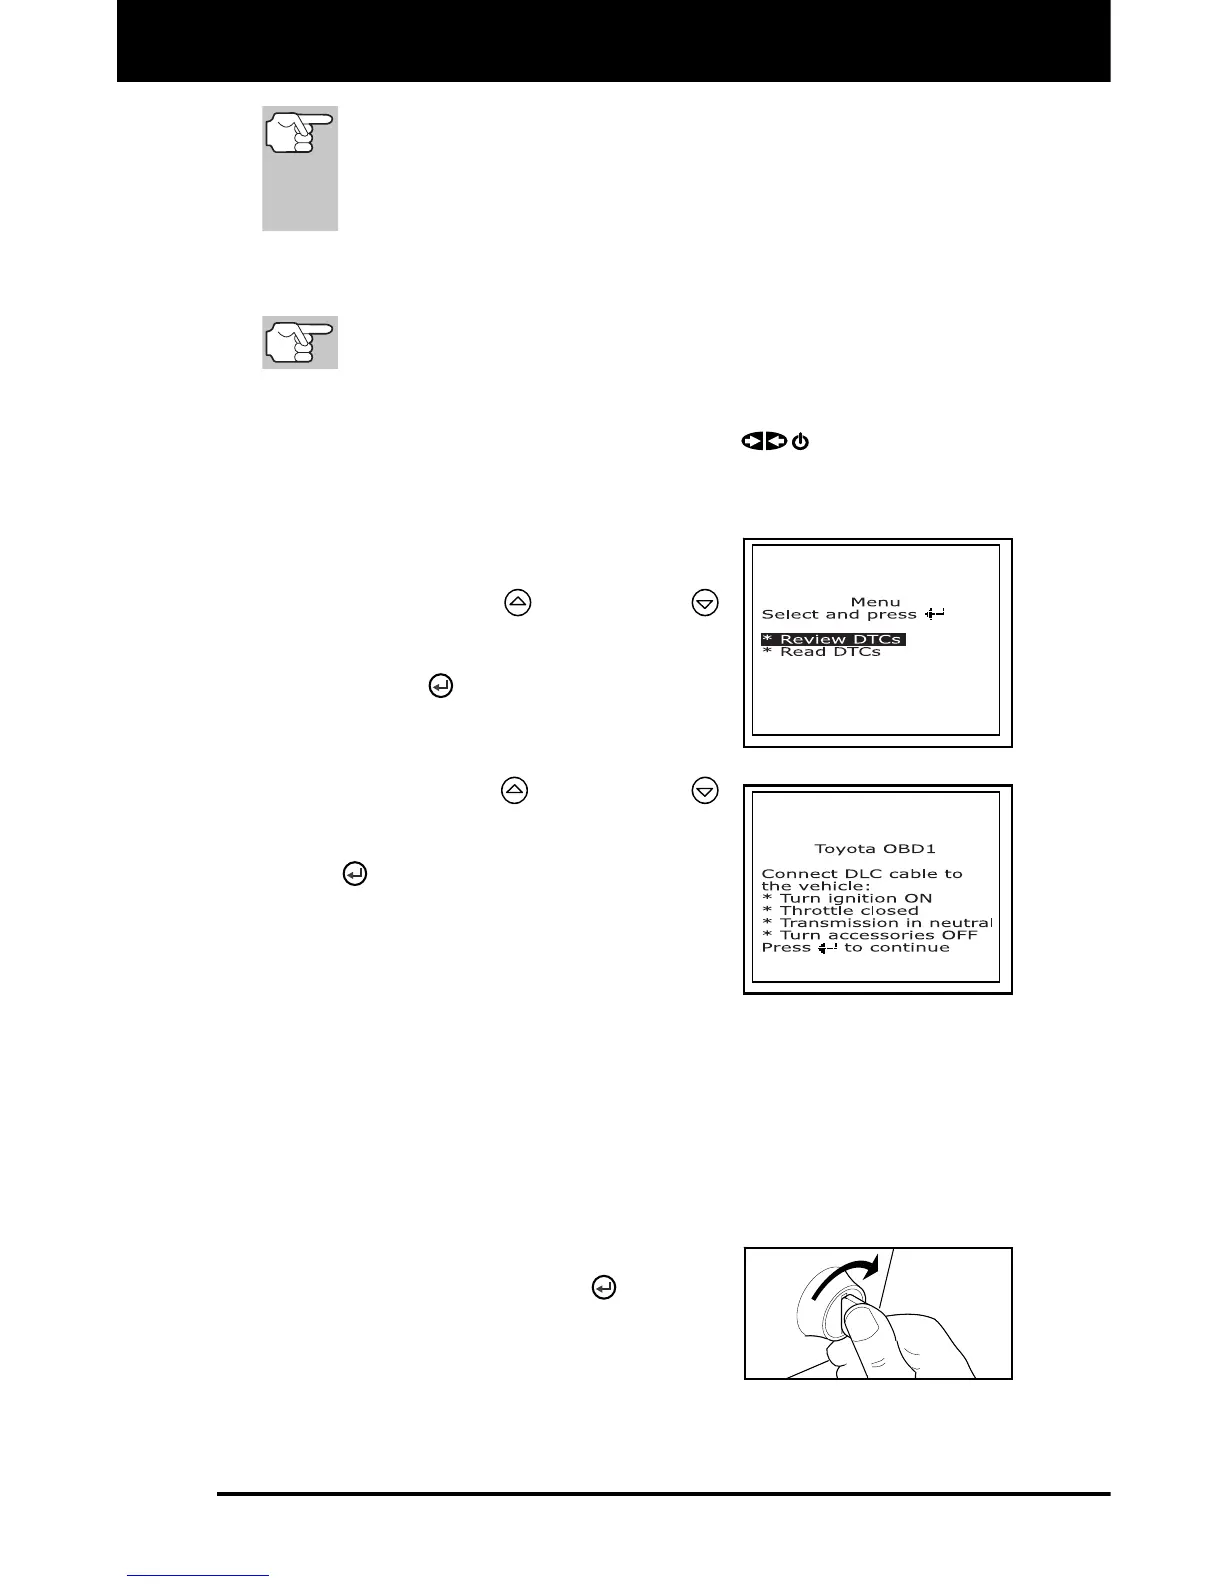
The Toyota OBD1 menu displays.
3. To view codes in the scan tool’s
memory:
Use the UP and DOWN
buttons, as necessary, to highlight
Review DTCs, then press the
ENTER
button.
4. To retrieve codes from the vehicle’s
computer:
Use the UP and DOWN
buttons, as necessary, to highlight
Read DTCs, then press the ENTER
button.
The LCD display shows instructions
to prepare the vehicle to retrieve
codes.
5. Do the following before proceeding to
step 4:
Turn ignition ON and start engine. Warm engine to operating
temperature. (Shut engine off after warm up).
Make sure throttle is closed.
Set gear lever in "park" (for automatic transmissions) or “neutral”
for manual transmissions.
Turn off all accessories.
6. Turn ignition ON. DO NOT start the
engine. Press the ENTER
button to
continue.
The scan tool will begin the code
retrieval process.