Chapter 6— Using Test and Service Mode
62 3400, 3440, and 3600 Bar Code Label Printer User’s Manual
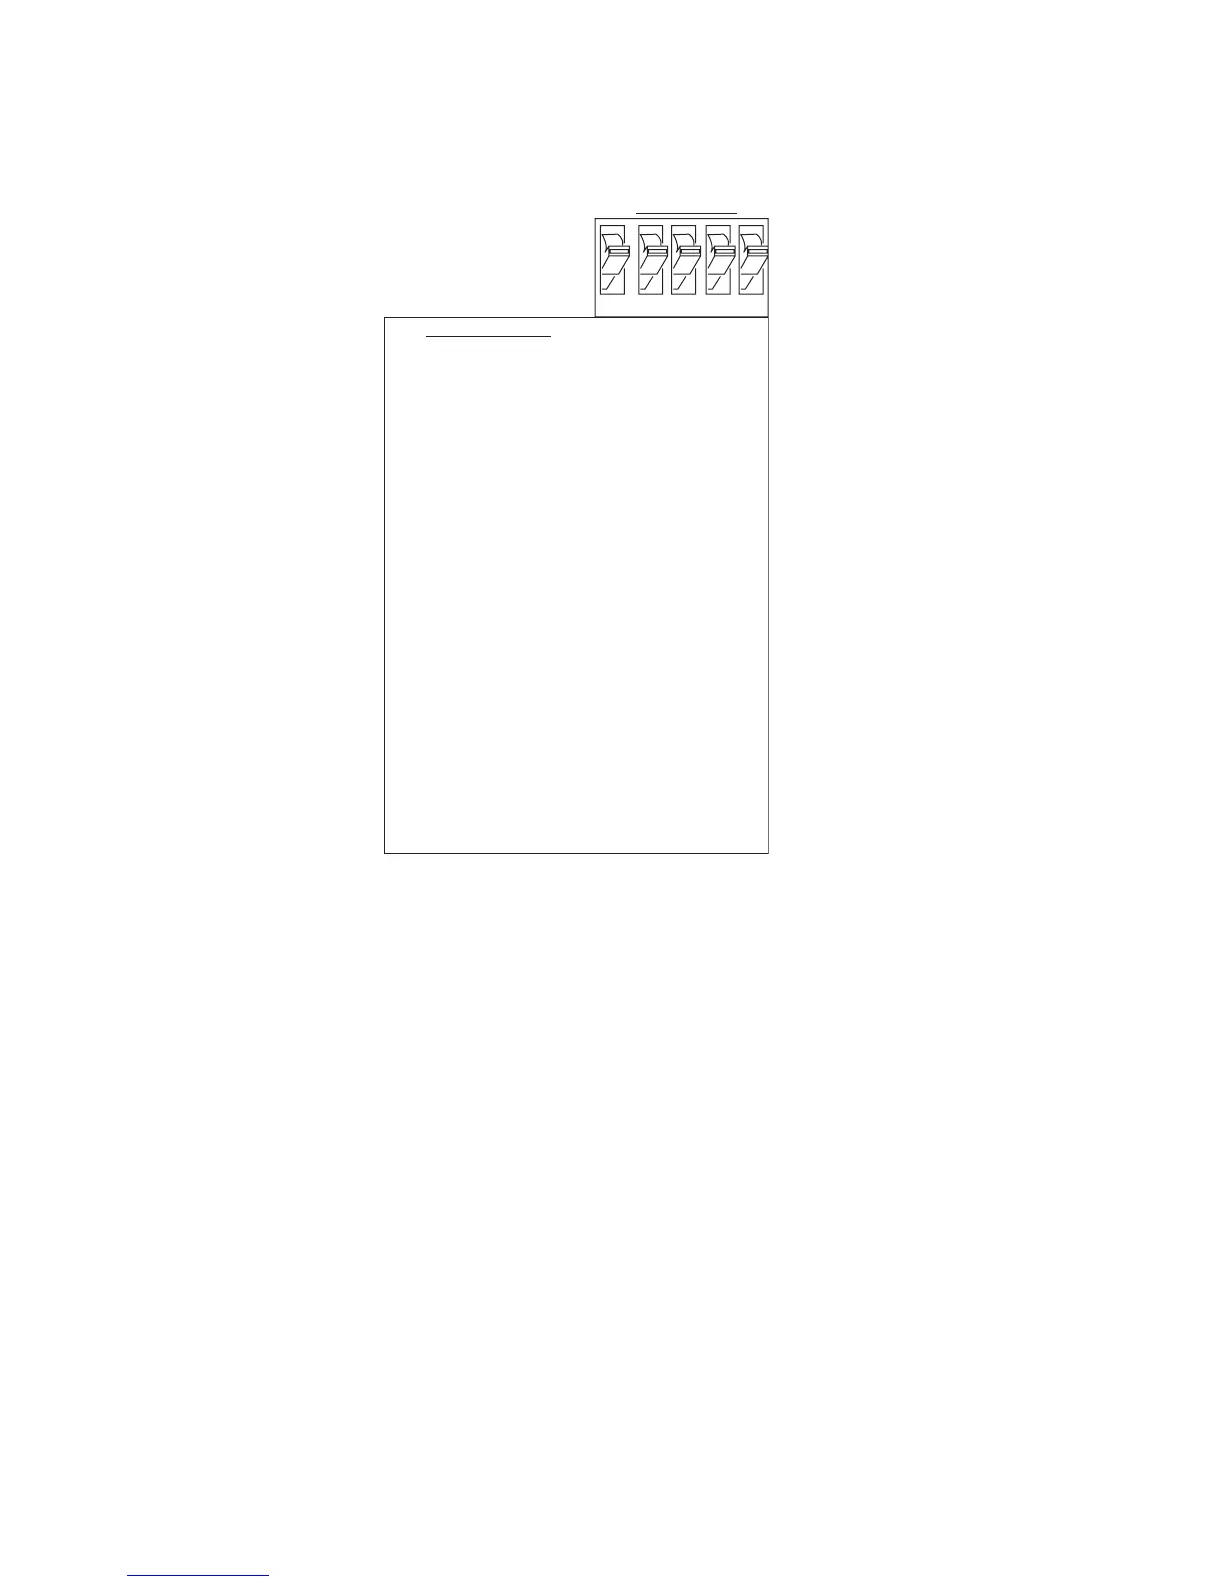
Dot Increments DIP Switch Settings
3XXXU.047
1
O
1
O
1
O
1
O
1
O
1
O
1
O
1
O
1
O
1
O
1
O
1
O
1
O
1
O
1
O
O
1
1
O
O
1
1
O
O
1
1
O
O
1
1
O
O
1
1
O
O
1
1
O
O
1
1
O
O
1
O
O
O
1
1
1
1
O
O
O
O
1
1
1
1
O
O
O
O
1
1
1
1
O
O
O
O
1
1
1
O
O
O
O
O
O
O
1
1
1
1
1
1
1
1
O
O
O
O
O
O
O
O
1
1
1
1
1
1
1
O
O
O
O
O
O
O
O
O
O
O
O
O
O
O
1
1
1
1
1
1
1
1
1
1
1
1
1
1
1
1
2
3
4
5
6
7
8
9
10
11
12
13
14
15
16
17
18
19
20
21
22
23
24
25
26
27
28
29
30
Bottom Bank
1 2 3 4 5
OFF
ON
# of dot increments
0 = OFF
1 = ON
To set the number of dot increments
1 In the top bank, turn the appropriate switches on or off for forward or
backward movement. See the Configuration DIP Switch Settings table
on page 61 for the appropriate DIP switch settings.
2 Go to the Dot Increments DIP Switch Settings table on page 62 and
scan down the # of Dot Increments column until you reach the number
of dot increments you want to adjust the command forward or
backward.
3 In the bottom bank turn on the switches that have a 1 in their column.
Turn off all other switches.
4 Press the Feed/Pause button and the printer prints the software
configuration label and stops at the new location.
For example, you print a label and discover that it does not extend far
enough from the tear bar. You need to move the label rest point forward
10 dot increments (0.05 inch) so that the printer feeds more label out
when it is done printing. Find 10 in the # of Dot Increments column. It
shows a 1 in the columns of DIP switches 2 and 4, and a O in the columns