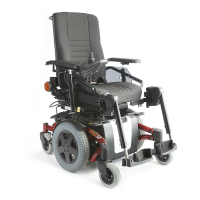
Invacare®TDX®SP2Series
Invacarerecommendsalwaysreplacingbothsetting
screwssimultaneouslytoensurethatthemobility
deviceworksperfectly.
Removingsettingscrew
1.Liftthemobilitydeviceupononesideandplacea14
cmhighwoodenblockunderthebatterycasesothat
thewheelsareoffthegroundandcanrotatefreely.Use
properliftingtechniques.
2.Repeatsameprocedureonothersideofmobilitydevice.
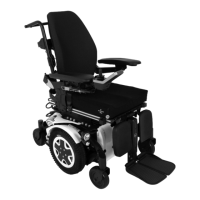
3.Removebothanti-tipsystemprotectivecaps.The
protectivecapsonanti-tipsystemwilleitherbeheld
usingascreworacabletiedependingonthemobility
device'sdateofmanufacture.
4.
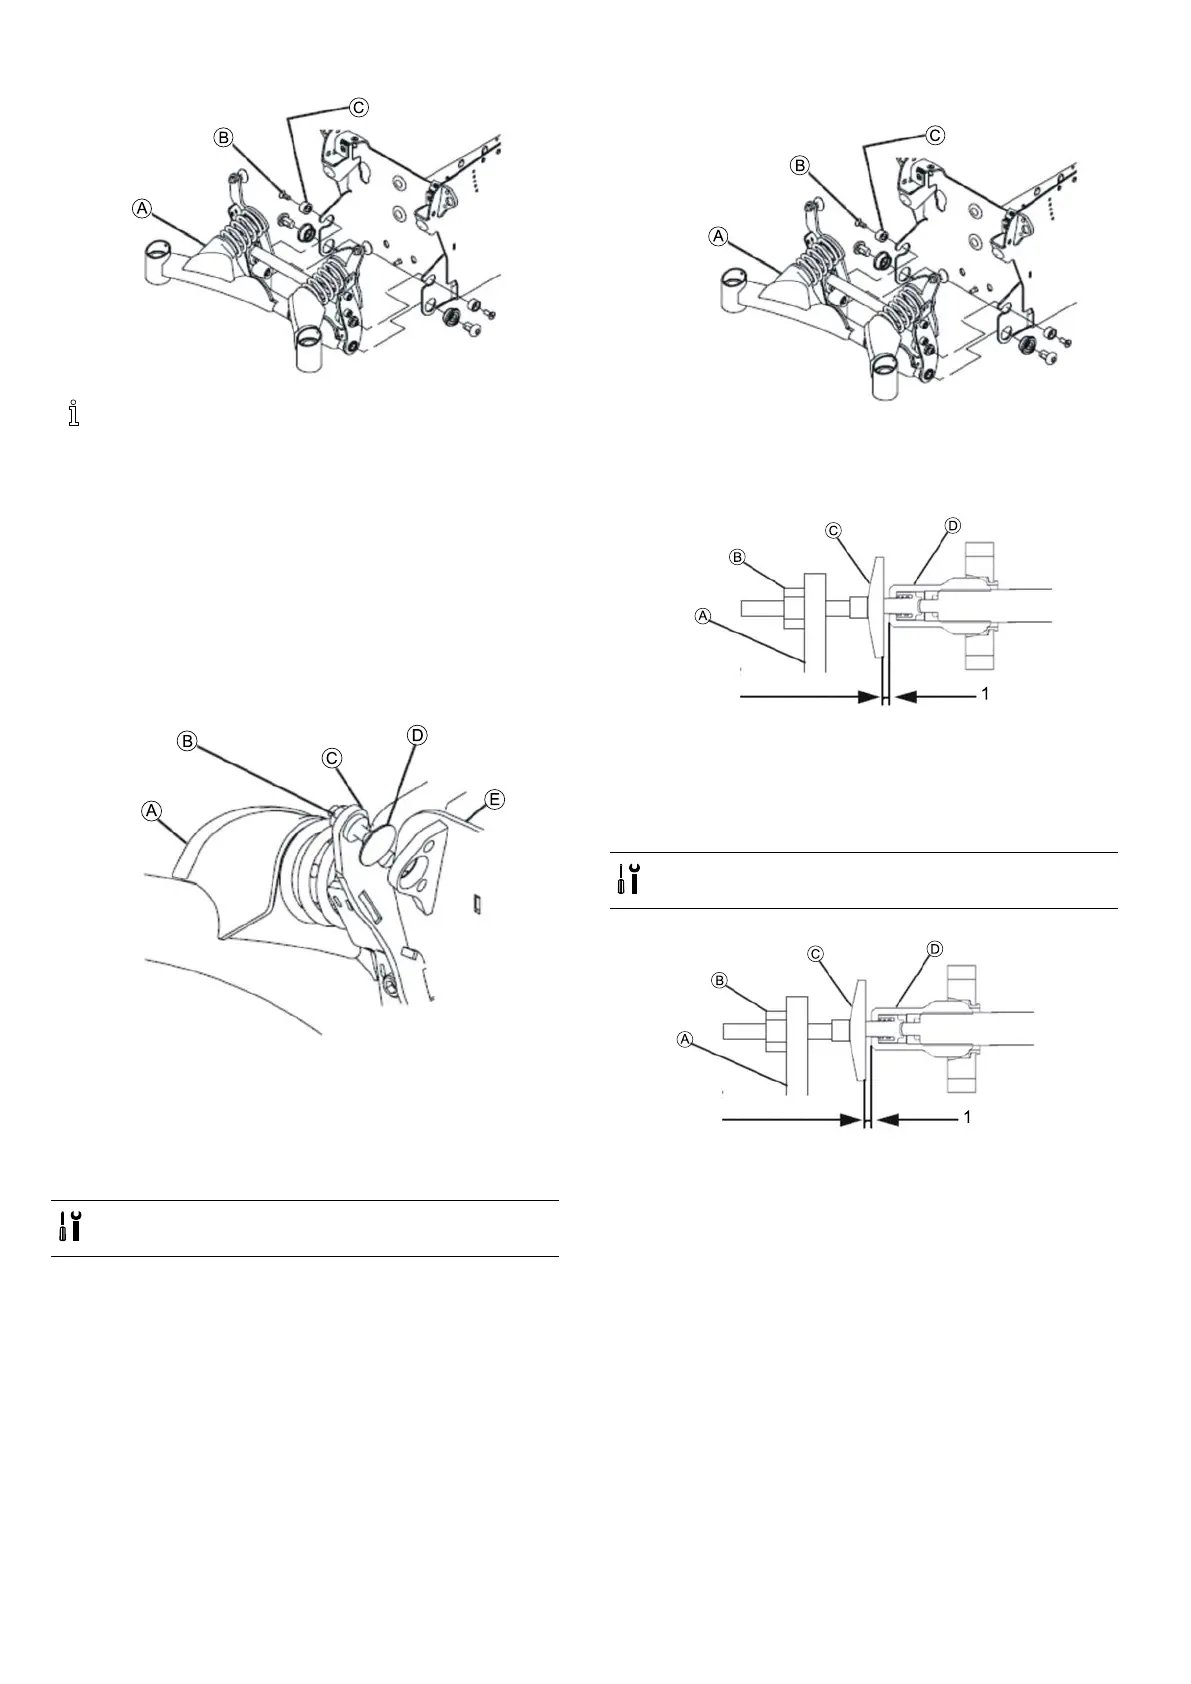
LoosentwoscrewsBandremovetogetherwithwashers
C.
5.LoosenandremovelocknutBofsettingscrewD.
6.RotatesettingscrewDtowardsbatterycaseuntilyou
canremoveitfromitsholderC.
Installingsettingscrew
•1/4”wrench
•Feelergaugewith2mm
1.ScrewnewsettingscrewDintoholderC.
2.
InserttwoscrewsBtogetherwithwashersC.
3.Tightenscrews.
4.Removewoodenblockfromundermobilitydevice,so
thatallcastersareincontactwithoor.
5.
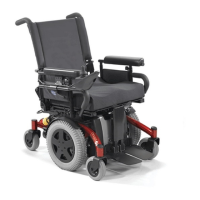
RotatesettingscrewCuntilthereisaspaceof2mm
(1)betweenitandthegascylinderD.
6.InstalllocknutBandtighten.
7.Installtwoprotectivecaps.
Adjustingsettingscrew
•1/4“wrench
•Feelergaugewith2.0mm
1.Removebothprotectivecapsofstabilitylocksystem.
Theyareheldusingascreworacabletiedependingon
themobilitydevice’sdateofmanufacture.
2.Ensurethatmobilitydeviceiscontactingoorwithall
itswheelsandcasters.
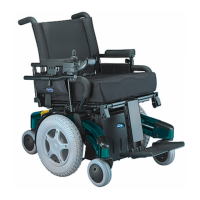
3.LoosenandremovelocknutB.
4.RotatesettingscrewCuntilthereisaspaceof2.0mm
(1)betweenitandgascylinderD.
5.InstalllocknutBandtighten.
6.Repeatforothersettingscrew.
7.Installtwoprotectivecaps.
161532486-L





 To Next Page