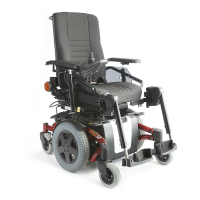
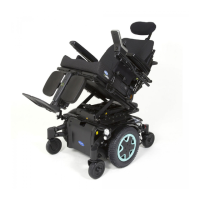
Invacare®TDX®SP2Series
•6mmAllenkey
•5/8“Allenkey
•7/8“Allenkey
•5/16“Allenkey
•Phillipsscrewdriversize2
•10mmsocketwrench
•1/2“socketwrench
•1/4“socketwrench
•5/16“socketwrench
•Torquewrench0-25Nm(orsimilar)
•Torquewrench10-80Nm(orsimilar)
•Twolongwoodenblocks,min.14x14x30cm
Removingsealingring
1.Removemotor/gearboxunit,asdescribedinchapter
8.14.2.
2.Usewrenchtoloosenandremovenut(2)including
washer.
3.Removescrew(2),whichsecuressealingring(3).
4.Carefullybendsealingringapartandremoveit.
Installingsealingring
1.Installsealingringsosquareholeforcarriagescrewis
oninsideofmobilitydevice.
2.Insertcarriagescrewthroughsealingring.
3.Installwasherandself-lockingnut.
4.Donottightennutcompletely,asmotororientation
mustbeadjustedduringinstallation.
6.4.4Replacingmotor/gearboxclutch
CAUTION!
Riskofcrushing
Motor/gearboxunitisveryheavy.Riskofinjury
tohands.
–Payattentiontoheavyweight.
•5/8“Allenkey
•7/8“Allenkey
•5/16“Allenkey
•6mmAllenkey
•Phillipsscrewdriversize2
•10mmwrench
•1/2“wrench
•1/4“wrench
•5/16“wrench
•Torquewrench0-20Nm(orsimilar)
•Torquewrench5-25Nm(orsimilar)
•Torquewrench10-80Nm(orsimilar)
•Twolongwoodenblocks,min.14x14x30cm
Removingmotor/gearboxclutch
1.Removingmotor/gearboxunit,asdescribedin6.4.2
Replacingmotor/gearboxunit,page21.
2.Loosenandremoveself-securingnut(3).
3.Removecarriagescrew(6),whichsecuressealingring
(5).
4.Carefullybendsealingringapartandremoveit.
5.Pullmotor(4)andgearboxunit(1)carefullyapart.
6.Removeclutchindividualparts(7).
7.Replaceclutch,ifnecessary.
Installingmotor/gearboxclutch
1.Installnewclutch(7)onmotoraxle.Payattentionto
positionofgroove.
2.Positionlockingring(5)onmotor(4)orgearbox(1).
3.Carefullyinsertmotorintogearbox.Payattentionto
positionofgrooveinaxleofgearbox.Ifnecessary,
rotatemotorandgearboxtocorrectposition.
4.Insertcarriageboltthroughlockingring.Donotforget
spacersleeve(2).
5.Installwasherandself-lockingnut.
6.Donottightenself-lockingnutcompletely,asmotor
orientationmustbeadjustedduringinstallation.
7.Installmotor/gearboxunit,asdescribedin6.4.2
Replacingmotor/gearboxunit,page21.
6.4.5Replacingcarbonbrushes
Alwaysreplaceallcarbonbrushesonbothmotors.
DuraWattmotorsaremaintenance-free,dueto
lifetimebrushes.
CAUTION!
Riskofcrushing
Mobilitydeviceisveryheavy.RiskofInjuryto
handsandfeet.
–Useproperliftingtechniques.
•5mmAllenkey
•6mmAllenkey
•10mmsocketwrench
•19mmsocketwrench
•Screwdriver
•Twolongwoodenblocks,min.14x14x30cm
22
1532486-L





 To Next Page