Invacare®TDX®SP2Series
10.Installallplugsandxcableswithcabletiesas
previously.Seealso6.7.16Cablerouting,page38.
11.Installrearshroudasdescribedin6.6.2Removingrear
shroud,page30.
12.Liftmobilitydeviceoffwoodenblocks.
13.Testallmobilitydevicefunctions.
14.Ifnecessary,carryoutadjustmentstosettingscrewon
thestabilitylocksystemasdescribedinAdjustingsetting
screw,page16.
6.6Shrouds
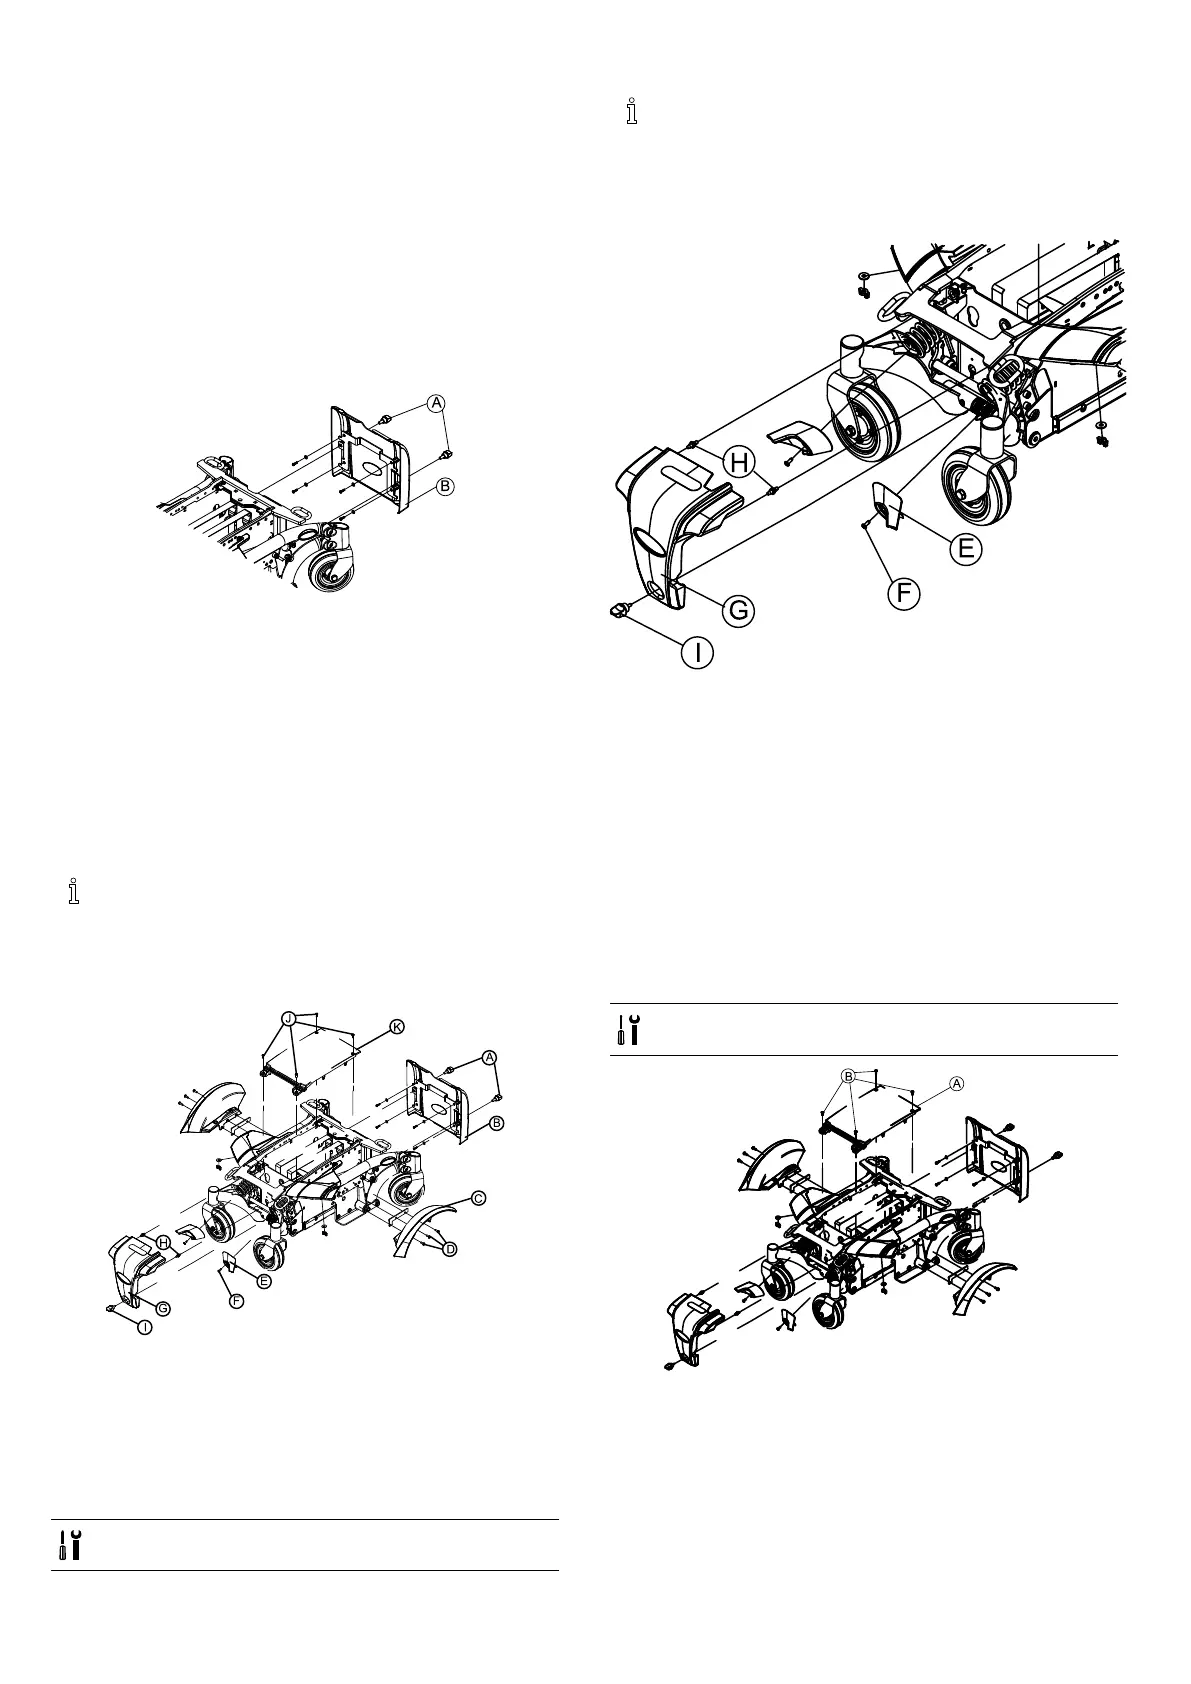
6.6.1Removingfrontshroud
Removingfrontshroud
1.Removelegrests.
2.RemovescrewsAonfrontshroudB.
3.Pullfrontshroudupwardsandremoveit.
Installingfrontshroud
1.Installpartsinreverseorder.
2.Tightenallscrewsnger-tight.
6.6.2Removingrearshroud
Rearshroudwithoutoperatinghourcounter
Thischapterexplainshowtoopenrearshroudifno
operatinghourcounterisinstalled.Theprocedure
foropeningtherearshroudwithanoperatinghour
counterinstalledisdescribedbelow.
Removingrearshroud
1.LoosenthumbscrewIonrearshroudG.
2.Removerearshroudfromframe.
Installingrearshroud
1.Installpartsinreverseorder.
2.Tightenallscrewsnger-tight.
Rearshroudwithoperatinghourcounter
•Phillipsscrewdriversize2
Thischapterexplainshowtoopentherearshroudif
anoperatinghourcounterisinstalled.Theprocedure
foropeningrearshroudwithnooperatinghour
counterinstalled,seebelow.
Removingrearshroud
1.LoosenscrewEonrearshroudC.
2.Carefullyloosenrearshroud.Payattentiontocableof
operatinghourcounter.
3.Takenoteofpositionsofcablesandsockets.Markplugs
andsocketsortakeaphotowithdigitalcamera.
4.Detachcableofoperatinghourcounterfromdrive
motor.
5.Removerearshroud.
Installingrearshroud
1.Installpartsinreverseorder.
2.Tightenallscrewsnger-tight.
6.6.3Removingtopshroud
•Size2Phillipsscrewdriver
Removingtopshroud
1.Removeseat.
2.UndothefourPhillipsscrewsBonthetopshroudA.
3.Removetopshroud.
Installingtopshroud
1.Installpartsinreverseorder.
2.Tightenallscrewsnger-tight.
301532486-L





 To Next Page