Invacare®TDX®SP2Series
7.Removenuts(3).
8.Replacestripfuse.
Installingmainfuse
1.Installpartsinreverseorder.
2.Testallfunctions.
Makesuretopresstwopartsoffuseholder
shroudtogetheruntilitsnaps.
Ifolderfuseholderversionisused,lock
fuseholderwithUL94V0cabletie.
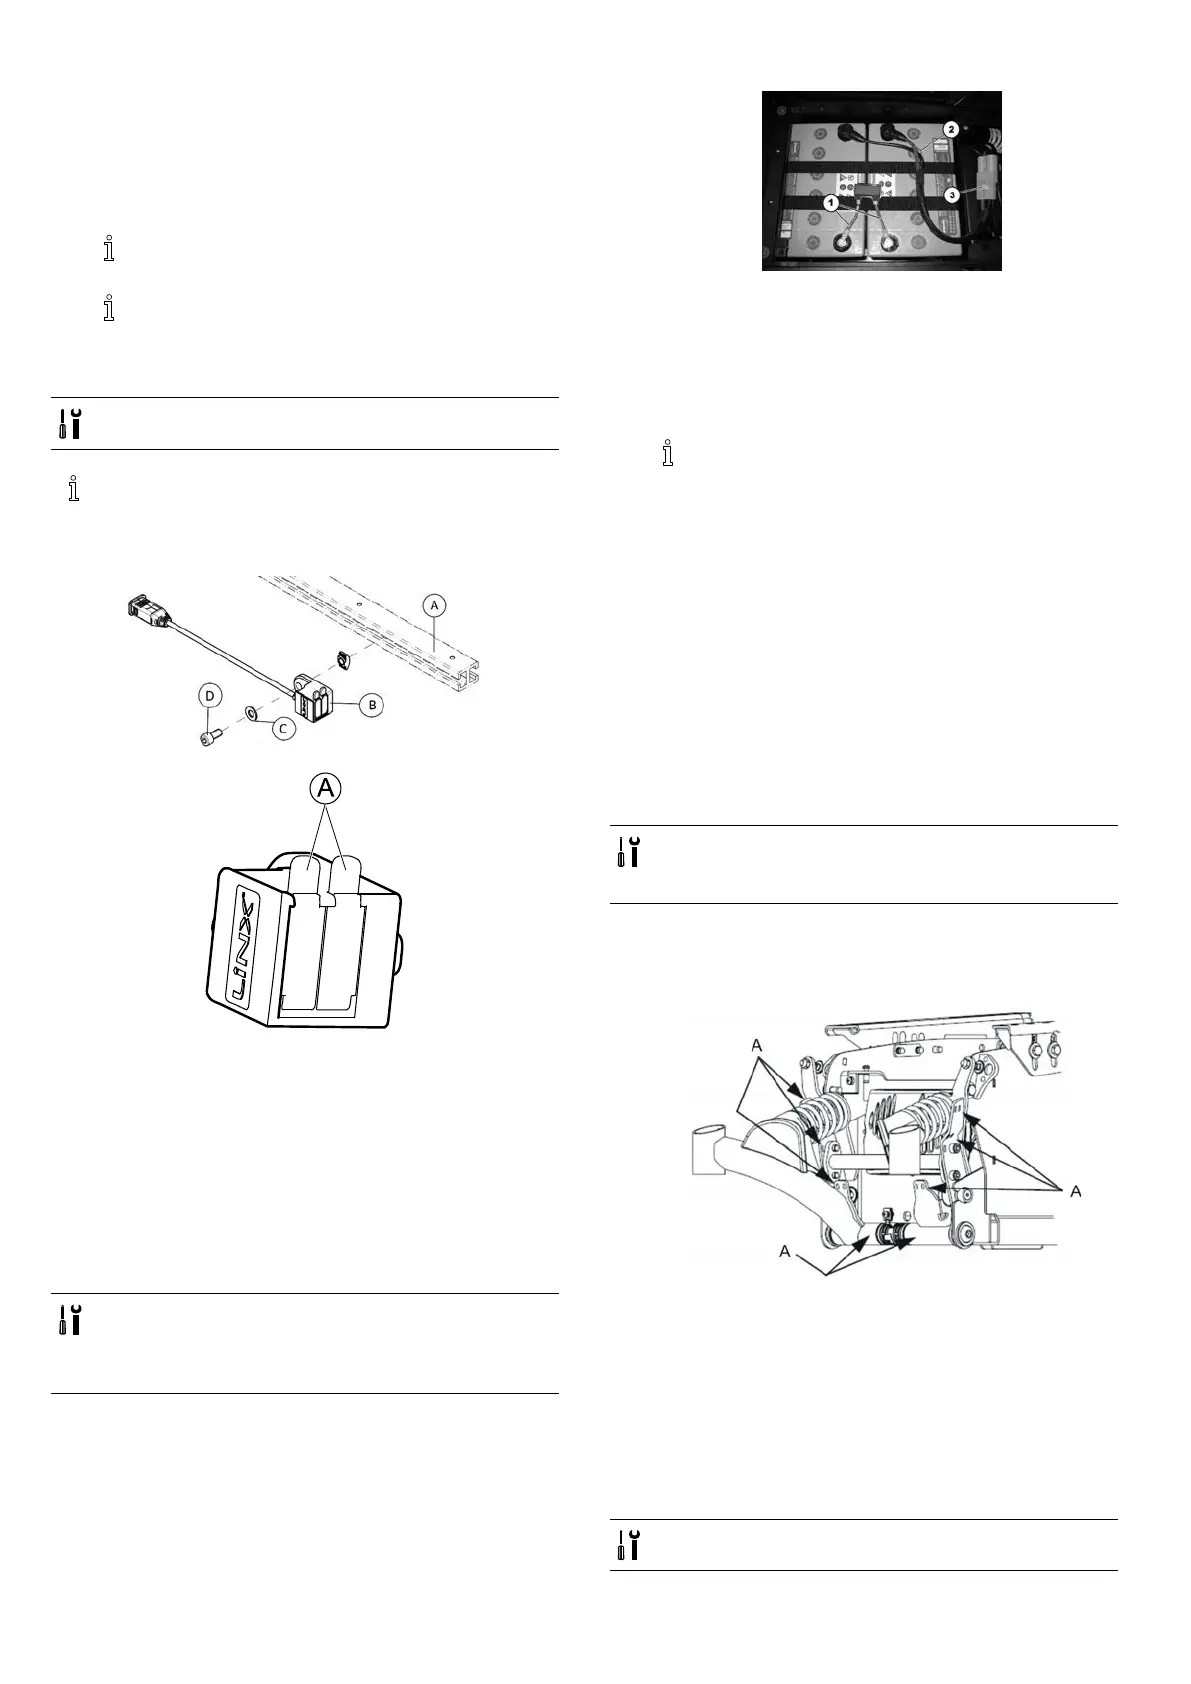
6.7.14ReplacingUSBcharger
•4mmAllenwrench
Whenchargeroverheats,itstopsworking.Railunder
theseatservestodissipateheat.
•AlwaysmountUSBchargerinrstthirdofthe
railoftelescopicseatframe.
RemovingUSBcharger
1.LoosenandremovescrewDincludingwasherC.
2.TakeoffUSBchargerBfromrailoftelescopicseat
frameA.
3.ReplaceUSBcharger.
InstallingUSBcharger
1.Installpartsinreverseorder.
6.7.15Checkingcable
•5/8“Allenkey
•Size2Phillipsscrewdriver
•Obliquepliers
•Cableties
1.
Removeshrouds,disconnectbatteryplugsandpull
batteriesoutofbatterycompartmentasdescribedin
6.7.5Makingbatteriesaccessible,page32.
2.Checkfusecable(1),batterycable(2)andbatteryplug
(3)forvisibledamageandcrushinglocations.
3.Replaceanydamagedcables.
4.
Thepositionoftheplugsisdifferentforother
electronicmodules.Theprocedureforchecking
isotherwiseidentical.Thepositionoftheplugs
isdescribedinrevision11ofthismanualorin
LiNXServiceManual”.
Checkallcablesforvisibledamageandcrushing
locations.Replaceanydamagedcables.
5.Pulleachplugcarefully.Plugshouldnotcomeoutof
socket.
6.Ifoneofplugsisloose,pressitbackintosocketwith
lightpressure.Plugmustengage.
7.Checkedtomakesurethatplugisnowrmlyinits
socket.Ifnot,repeatpreviousstep.
8.Installpartsinreverseorder.
9.Testallfunctions.
6.7.16Cablerouting
•Size2Phillipsscrewdriver
•Obliquepliers
•Cableties
1.Removerearshroudasdescribedin6.6.2Removingrear
shroud,page30.
2.Whenroutingcablesinrearsection,makesurethatrear
wheelstabilizersaremovable.
3.
FixcablewithcabletiesatlocationsmarkedA.
4.Makesurecablehasenoughplaysothatallmovable
partscanmovefreelywithoutstretching,clampingor
changcable.
5.Routecableinthesamemannerunderneathseatand
controlshroud.
6.8Lightingunit
6.8.1Replacingfrontbulb(conventionallightingsystem)
•Size2Phillipsscrewdriver
381532486-L





 To Next Page