For more details on the setup menu, refer to Chapter 6.
ACOUSTIC REFLEX TEST WINDOW
As in the case of the tympanometry test, if the requisite conditions are
detected, the test will begin automatically; alternatively, the start of the test
can be forced by pressing the Start acoustic reflex button.
The instrument will run the test according to the procedures and parameters
configured by way of the setup menu (see
Settings).
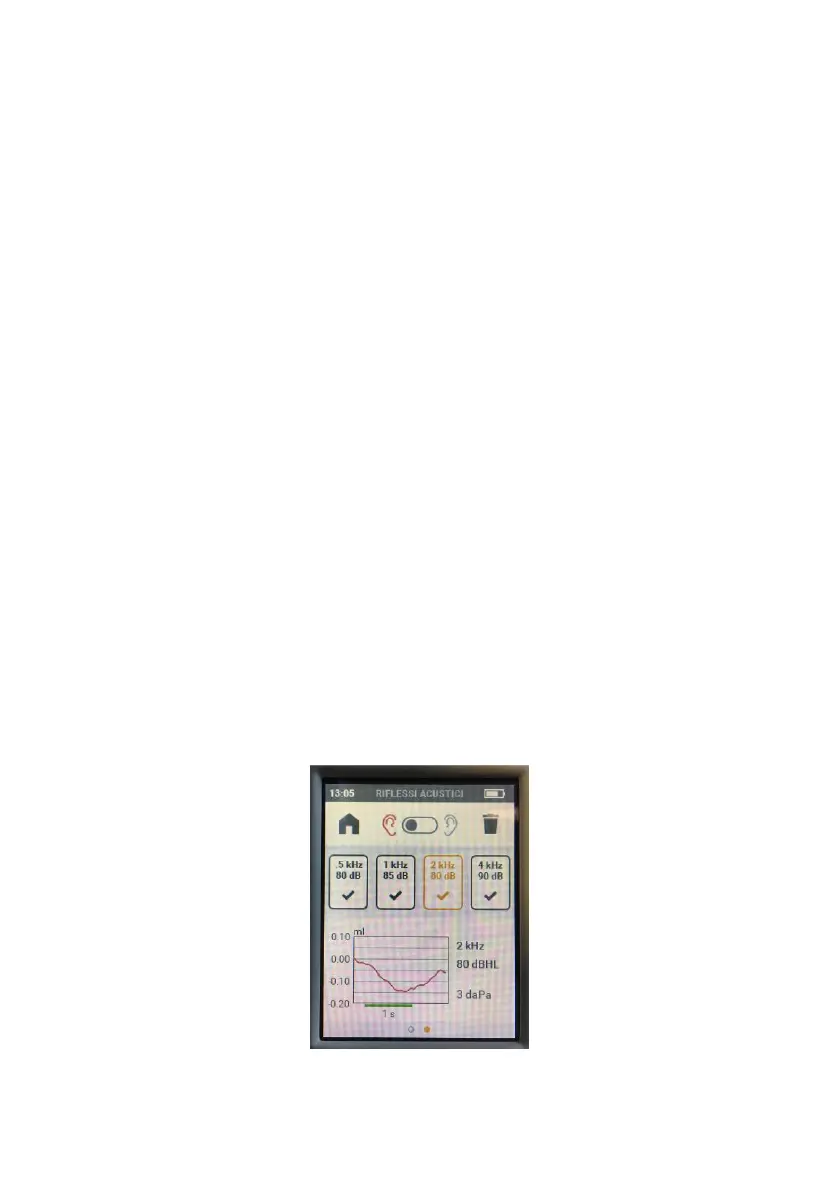
The central part of the screen is occupied by a graph that provides a real
time indication of the reflex curve obtained with a given stimulus signal.
The frequency and intensity of the stimulus associated with the reflex curve
are indicated to the right of the graph, along with the target pressure. The
green bar below the graph represents the stimulus on-time, in other words,
the duration for which the stimulus remains active.
The test finishes when the instrument has analyzed all frequencies at which
measurement of the acoustic reflex was programmed.
On completion of the test, a screen will appear showing the results and the
icons of the stimuli presented. A symbol in each of the icons will indicate
whether or not the acoustic reflex has been detected: in particular, a green
tick ✔ indicates that the reflex threshold has been found, whereas a grey
cross indicates that it has not been possible to identify the reflex threshold.
Pressing the relative buttons, the user can display the curve of the reflex
analyzed previously. The frequency and intensity of the stimulus associated
with the reflex curve are indicated to the right of the graph, along with the
target pressure.