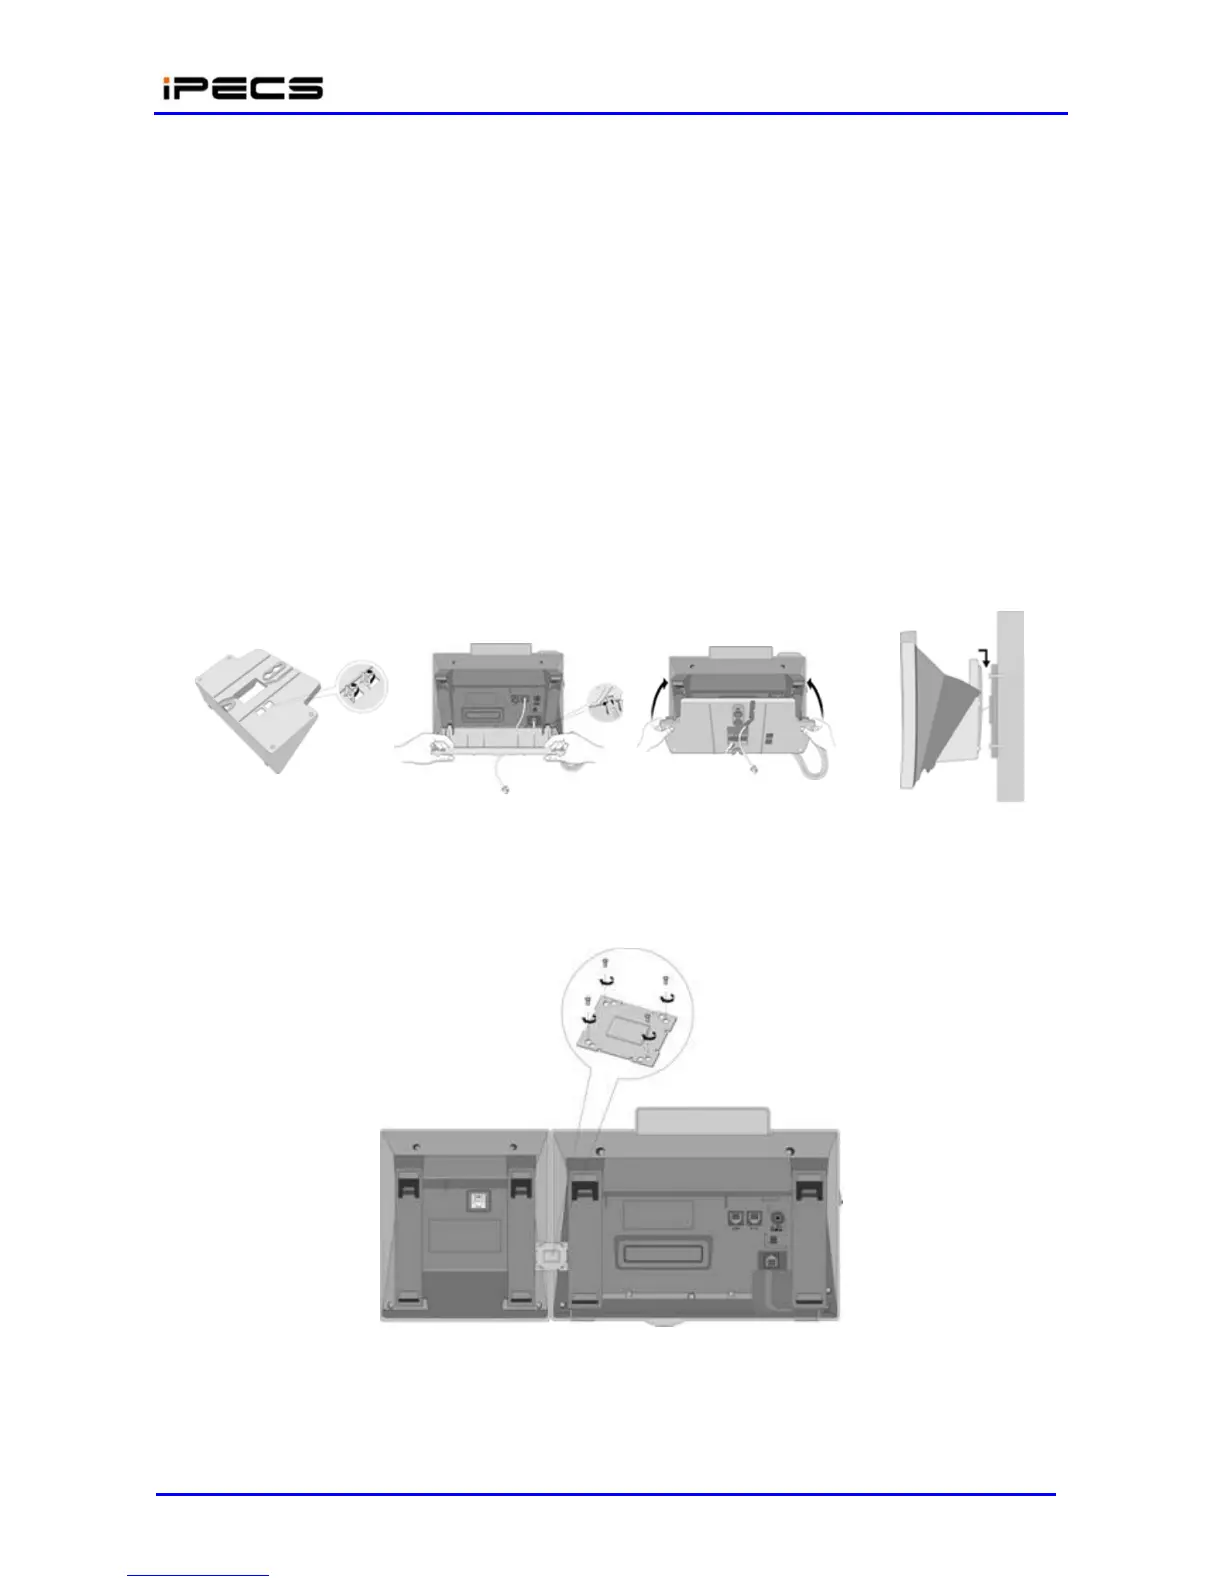
The LIP-24D/DH or LIP 7000 Phones can be mounted on the wall using the appropriate Wall
Mount Kit. The Wall Mount Kit is installed as described below and shown in Figure 4.5-6.
Using the Wall Bracket, mark and drill two (2) 7 mm holes for the plastic wall anchors
provided.
Insert the two (2) anchors into the holes and insert and tighten the 2 screws leaving about
6 mm (¼-inch) exposed. Refer to Figure 4.5-6.
Slide the Wall Mount bracket over the screws and tighten securely.
Connect a short Cat 5 cable, to the LIP-24D/DH or LIP 7000 series Phone and the wall
jack.
Mount the LIP-24D/DH or LIP 7000 series Phone onto the Wall Mount bracket.
Insert the Wall Mount handset hook to prevent the handset from slipping when wall
mounted. For the LIP-7000 series, the Handset hook is molded as part of the Wall Mount
bracket as shown in Figure 4.5-6.
Figure 4.5-6 LIP-7000 Wall Mount Installation
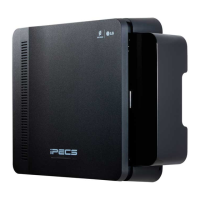
The DSS Console installation with the LIP-7000 series phone is shown in Figure 4.5-7.
Figure 4.5-7 LIP-7000 DSS Installation