47
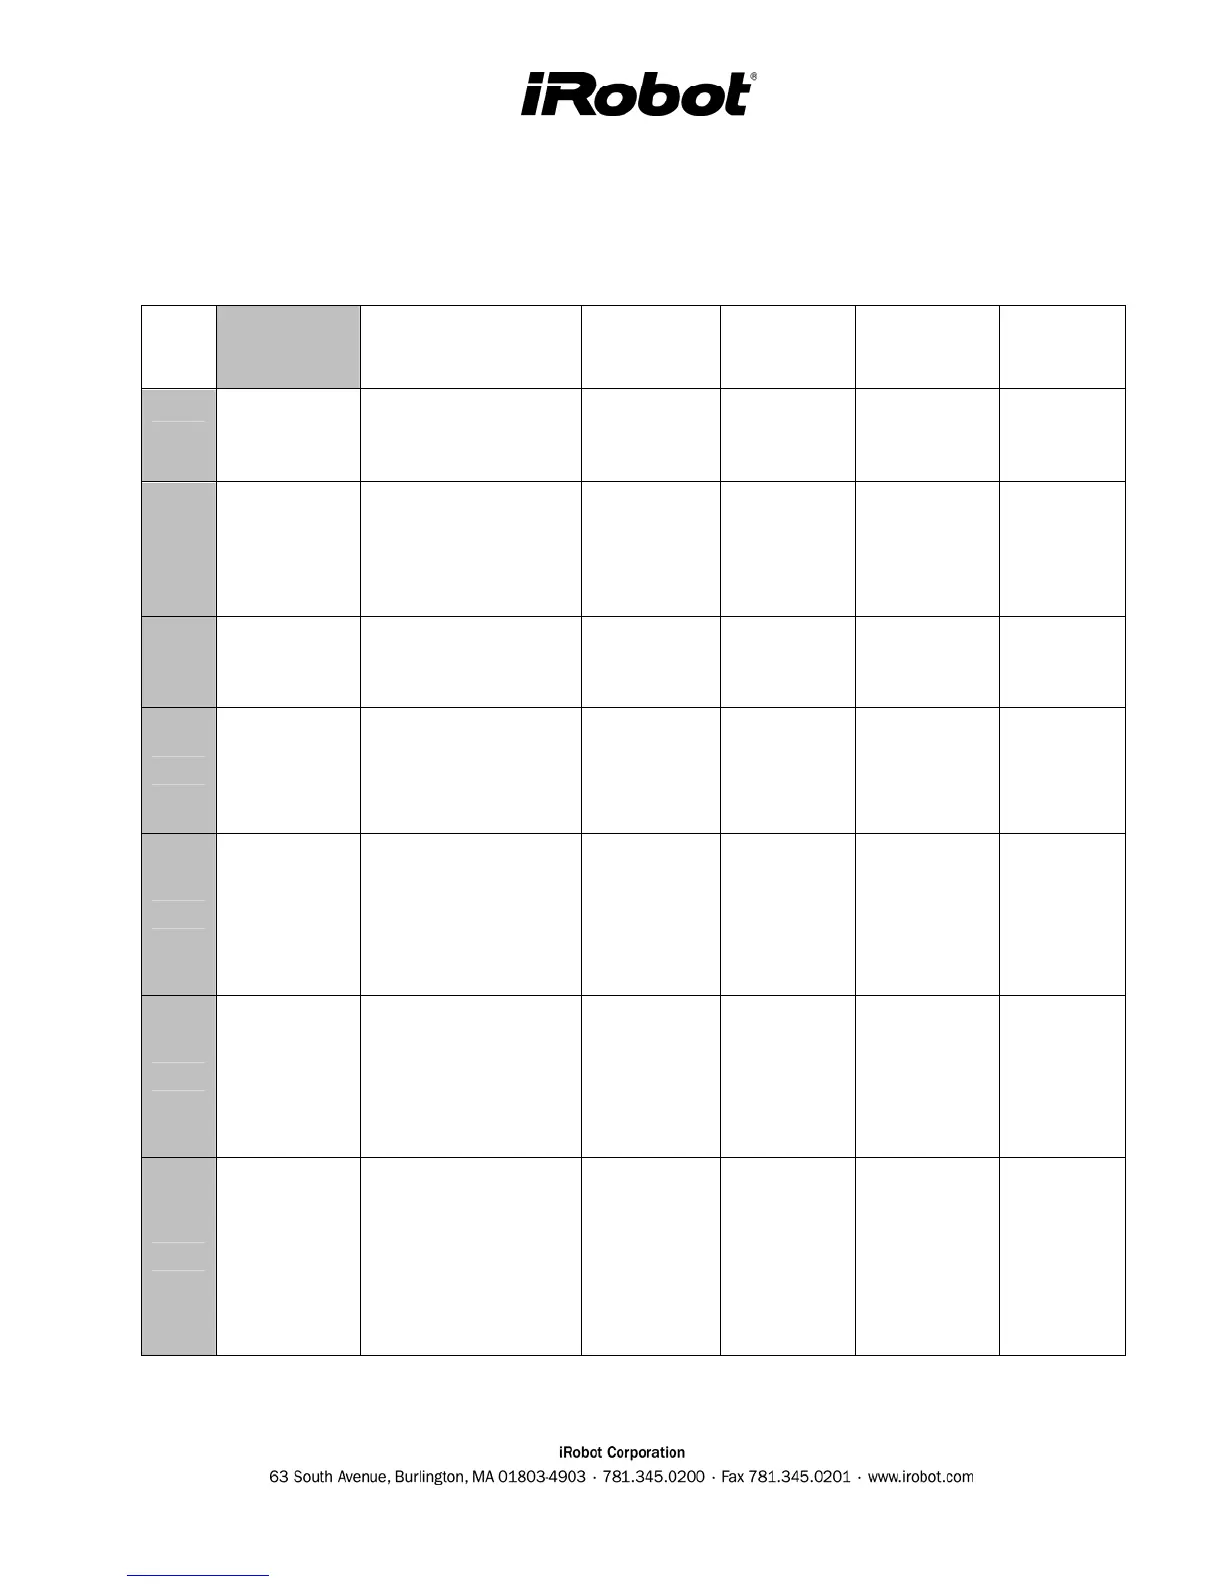
BUILT-IN-TEST CHART
The following chart describes how to use each built-in-test number. To PASS the built-in-test in
AUTO-ADVANCE mode, the user must perform the actions EXACTLY AS DESCRIBED.
Test Name Tester Action
Robot
Action
Spot
LED
Dock
LED
Check
Robot
LED
0
Panel LEDs
Check correct flashing
of LEDs. Press
CLEAN to advance to
the first test.
1
Buttons
(skipped if no
buttons)
Press and release
DAY, then HOUR,
then MINUTE, then
SCHEDULE and
finally CLOCK.
Day, Minute,
Clock button
is pressed.
Hour or
Schedule
button
pressed.
2
Bumpers
Press and release left
bumper. Press and
release right bumper.
Left bumper
pressed.
Right bumper
pressed.
3
Outer Cliff
Sensors
Briefly lift robot's left
side to simulate cliff-
left. Briefly lift robot's
right side to simulate
cliff-right.
Cliff-left
detected.
Cliff-right
detected.
4
Inner Cliff
Sensors
Briefly lift robot's left
side to simulate cliff-
front-left. Briefly lift
robot's right side to
simulate cliff-front-
right.
Cliff-front-
left
detected.
Cliff-front-
right
detected.
5
Outer Light
touch
Sensors
Briefly put your hand
in front of the left light
touch sensor to
simulate a wall. Then
do the same for the
right left touch sensor.
Left light-
touch
detected
Right light-
touch
detected
6
Front Light-
touch
sensors
Briefly put your hand
in front of the front-left
light touch sensor to
simulate a wall. Then
do the same for the
front-right left touch
sensor.
Front left
light-touch
detected
Front right
light-touch
detected