15
MECHANICAL ADJUSTMENT
STRETCH STITCH FEED BALANCE
To check:
1. Entertheself-diagnosticmode(seebelow).
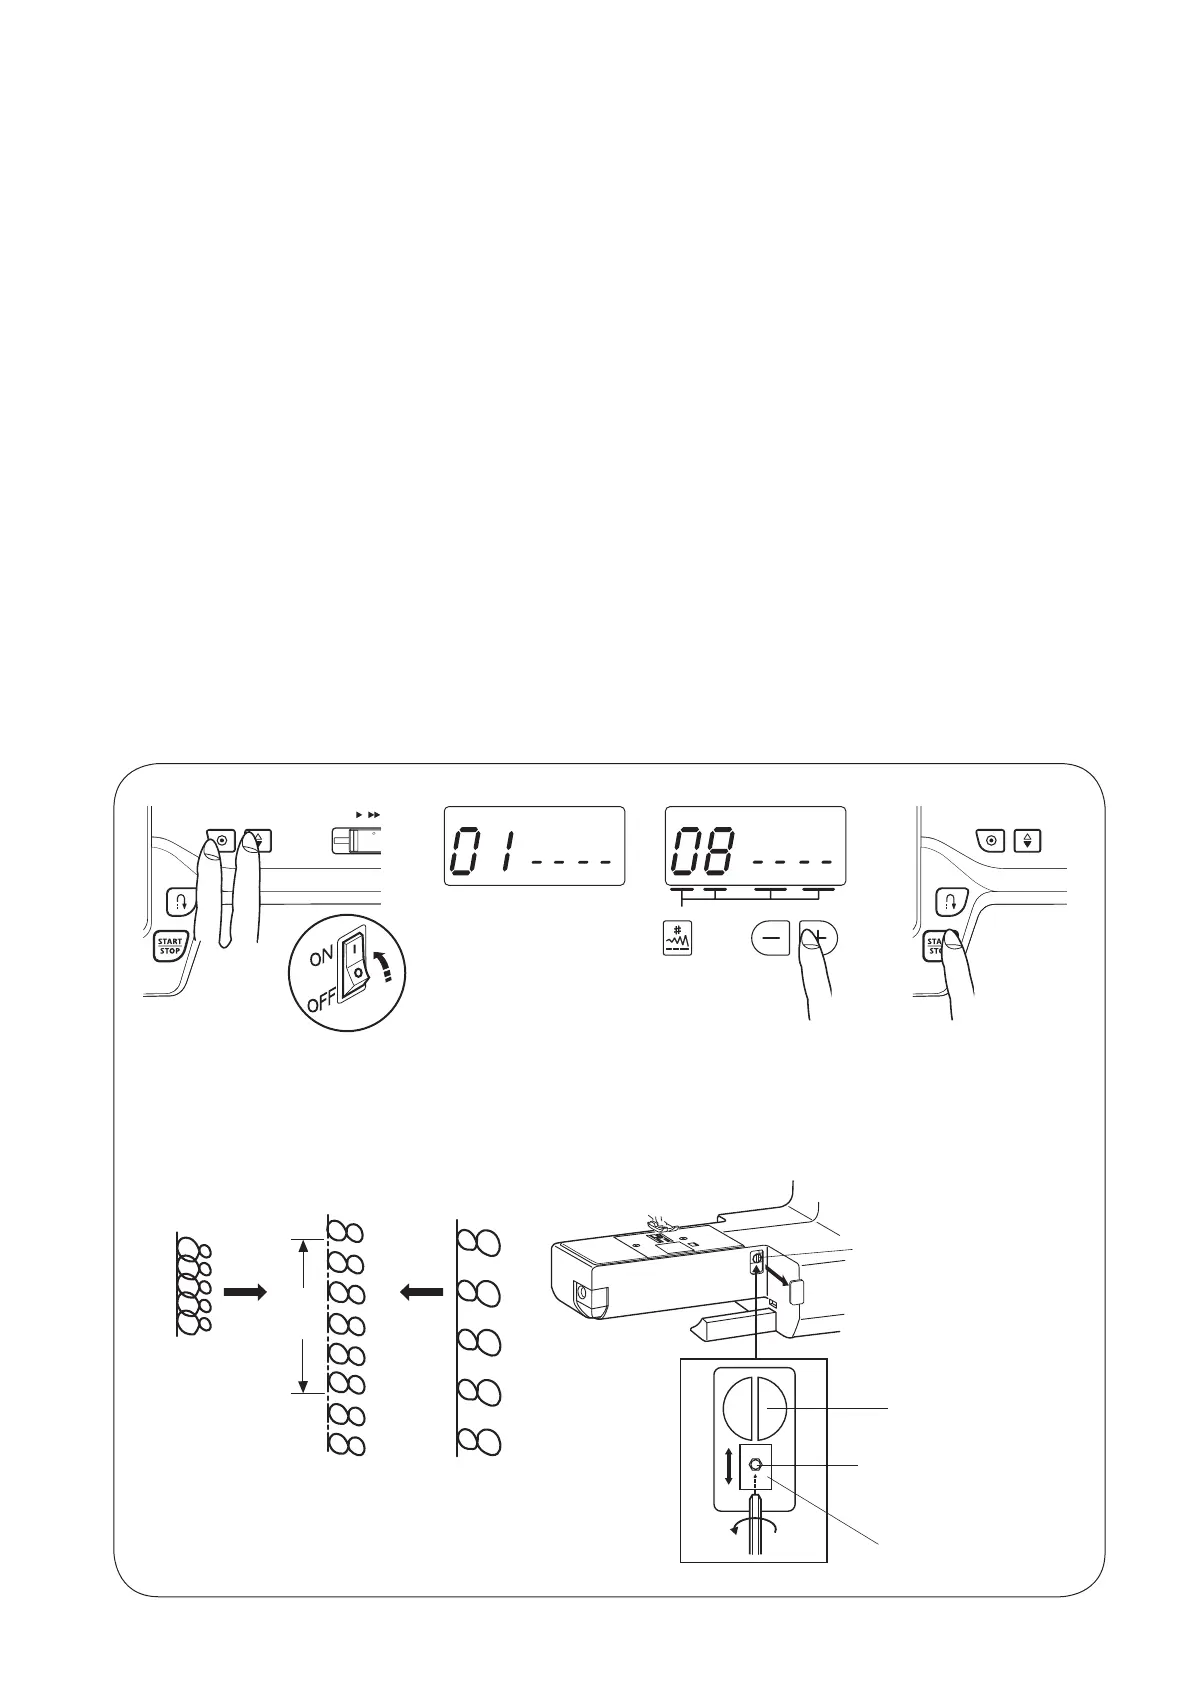
AttachtheSatinstitchfootF.Placeafabricunderthepresserfoot.Lowerthepresserfoot.
2. Pressthelockingstitchbuttontostarttestsew,andchecktheresults(thestandardgurelengthof5
piecesofgure8is33-39mm).
3. Ifstretchpatternsaredistorted,correctthemwiththefeedbalancingdial.
Ifstretchpatternsaretoodeformedandcannotbecorrectedwiththefeedbalancingdial,adjustasfollows.
To adjust:
1. Removethefeedbalancingdialcover.Turnthedialatstandardpositionasillustrated.
TurnthepowerswitchON.
Selectthestraightstitchandsetthestitchlengthat“0”.Placeafabricunderthepresserfoot.
Lowerthepresserfoot.(Donotsetbobbinandneedlethreads)
2. Turnthehexagonalsocketscrewtothelefttoloosenit.
Movethegearup(A)ordown(B)toadjustthefeed.
*Donotmovethegearrightorleftwhenadjusting.
Startthemachineandcheckthemovementofthefabric.
Adjustthehexagonalsocketscrewposition(gearposition)untilthefabricwillnotbefedwiththestitch
lengthsettingat“0”.
3. Tightenthesocketscrewandattachthefeedbalancingdialcover.
Entertheself-diagnosticmodeandtestsewagain.Checkthatthestandardlengthof5piecesofgure8is
33-39mm.Ifnot,turnthefeedbalancingdialtocorrectit.
36–39mm
Correct IncorrectIncorrect
Feedbalancingdial
(Standardposition)
Hexagonalsocketscrew
Feedbalancingdialcover
(A)
(B)
TO ENTER SELF-DIAGNOSTIC MODE:
Turnthepowerswitchonwhile
simultaneouslypressingauto-
lockbuttonandneedleup/down
button.
TheLCDdisplaywill
indicate“01”.
Pressthevaluesetkey
7timestodisplaythe“08”.
Pressthe
start/stop
buttontodisplaythe
“88”and
toenter
thestretchstitchtest
mode.
Gear
Thestandardgurelengthof5piecesofgure
8is33-39mm
 Loading...