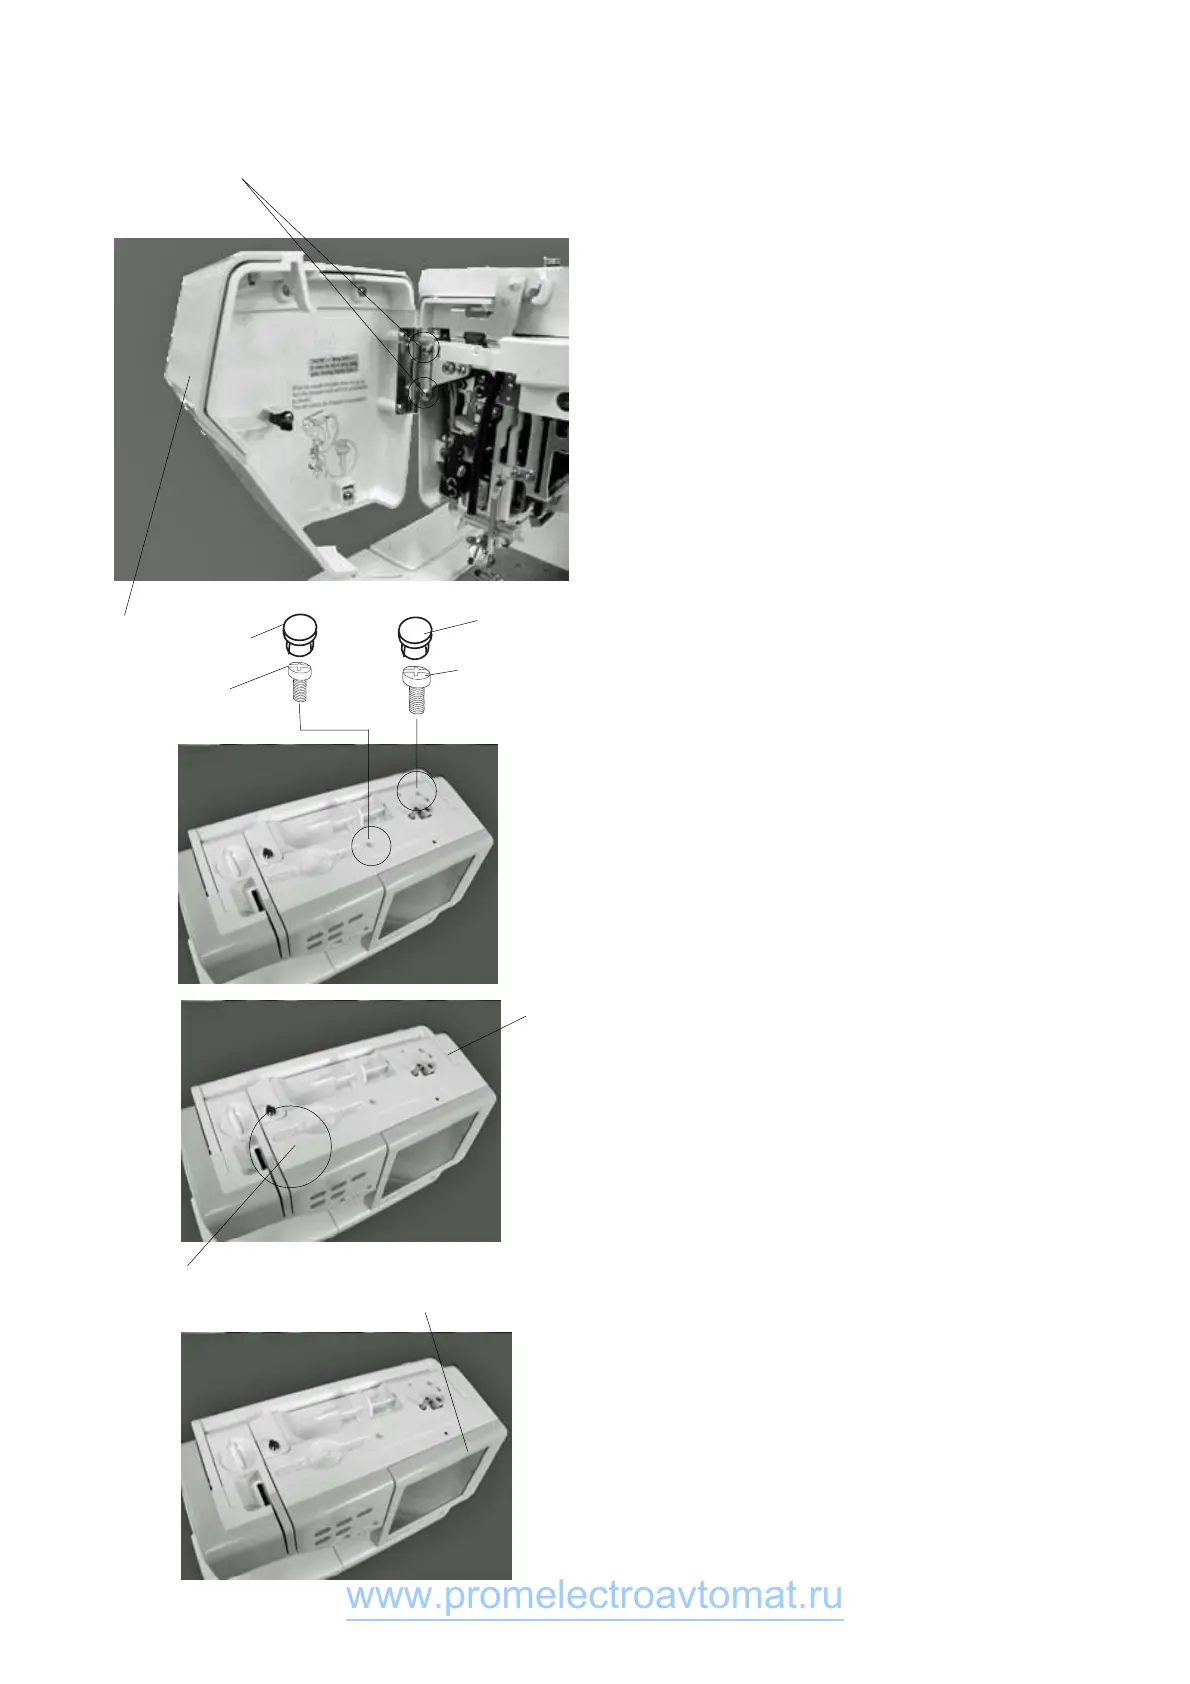
Changing External Parts (1)
To remove:
1 Remove the 2 screws (A) and remove the face cover
(1).
To attach:
2 Follow the above procedure in reverse.
Replacing the face cover
Replacing the top cover
To remove:
1. Open the face cover.
2. Remove the 2 caps (2) and their screws (B) and (C).
Raise the carrying handle (3) and remove the screw
(D).
3. Raise the top cover and disconnect the bobbin
winder connector (4). Remove the top cover sliding
towards the back.
Note: The pressure dial is removed with the top
cover.
To attach:
4. Raise the carrying handle and insert the top cover
guiding it in from the back.
5. Connect the bobbin winder connector to printed cir-
cuit board A.
6. Tighten the screws (B), (C) and (D).
7. Attach the caps.
(1)
(A)
(3)
(4)
(2)
(2)
(B)
(C)
(D)
1
www.promelectroavtomat.ru

 Loading...