25
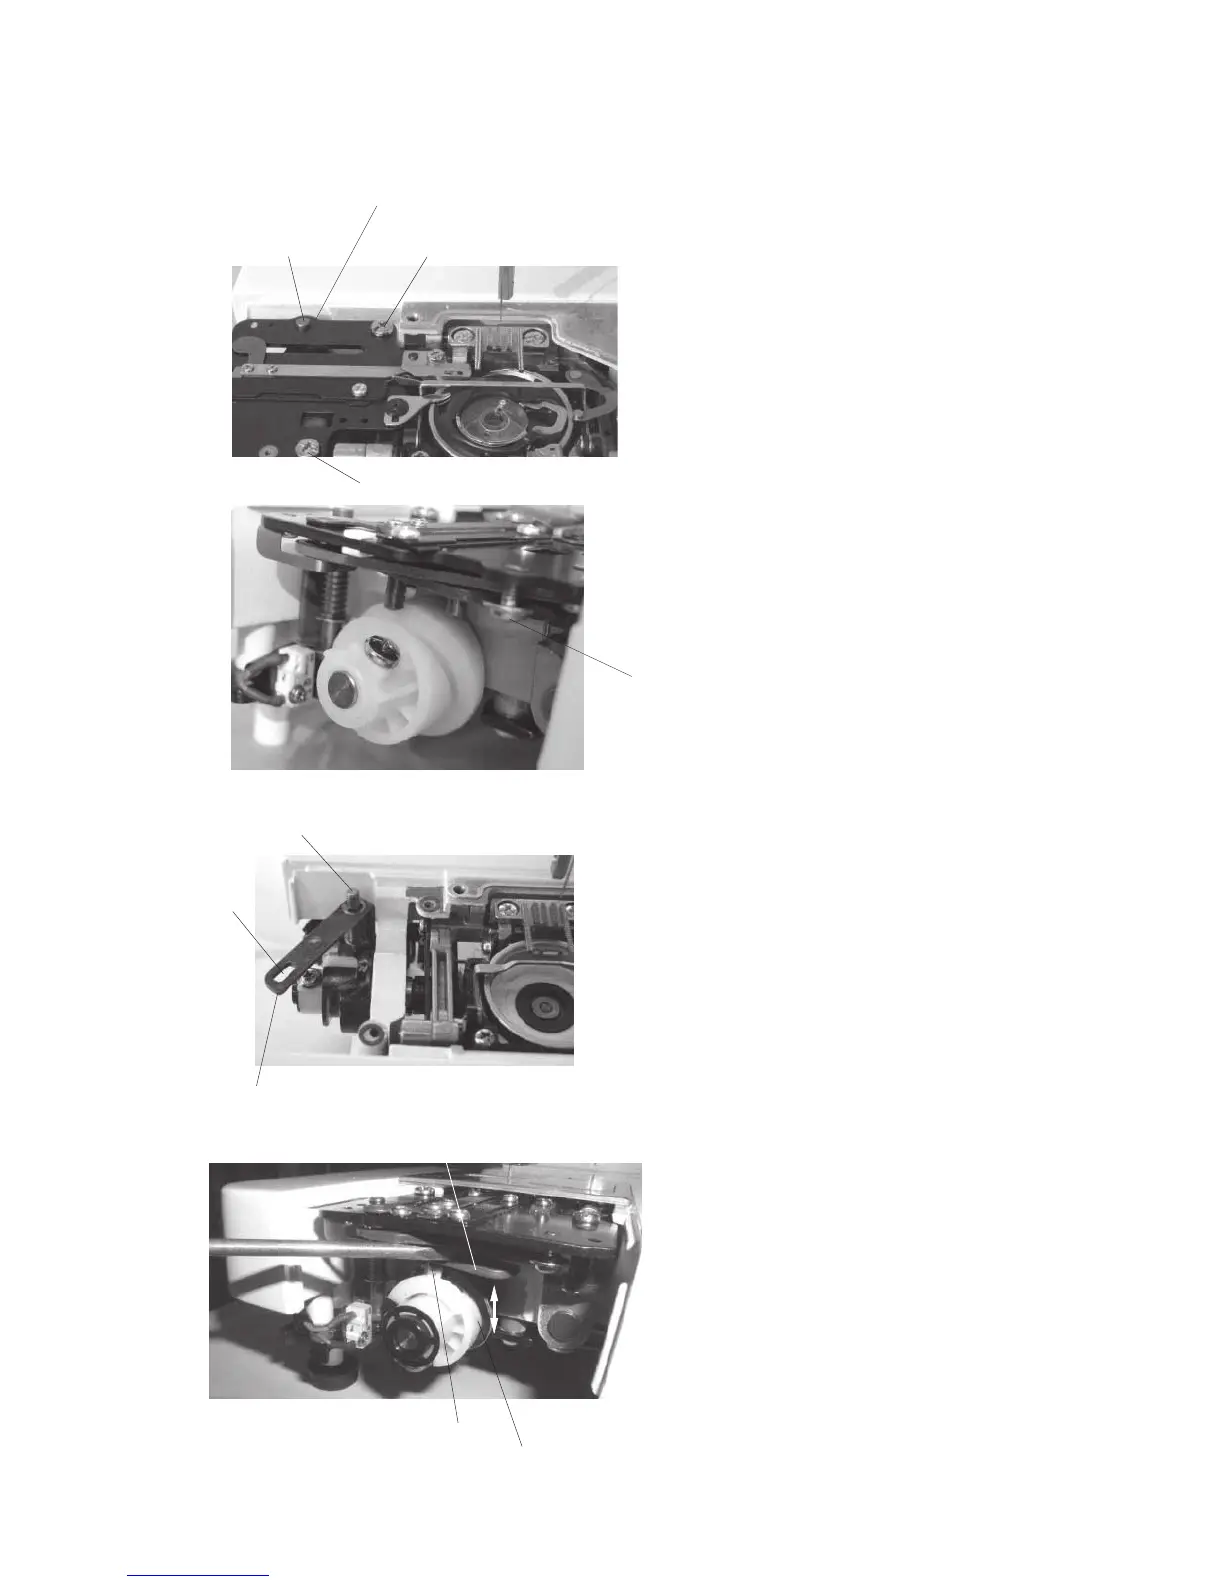
Setscrew (A)
Set screw (A)
Pin (B)
Hole
Pin (B)
Groove of the
sliding plate
Pin (C)
Driving arm (1)
Driving arm (1)
[To remove]:
1. Remove the needle plate, machine base and
auto thread cutter cover (refer to pages 2 and
3).
2. Remove the 2 setscrews (A) and remove the
auto thread cutter.
[To attach]:
3. Loosen the setscrew (D).
Insert the pin (B) into the hole of the auto
thread cutter.
Insert the pin (C) into the hole of the driving
arm (1).
Tighten the 2 setscrews (A), then tighten the
setscrew (D).
[To check the auto-thread cutter]
Set the needle bar at the lowest position.
Insert the pin (C) into the groove of the
cutter
driving cam by pushing down the driving arm (1).
Turn the hand wheel toward you to move the
sliding plate back and forth.
When the sliding plate returns from the rightmost
position, the driving arm (1) should be released
and returns to the “UP” position.
* After installing the auto thread cutter, adjust the
position of the sliding plate (refer to page 25).
TO REPLACE AUTO THREAD CUTTER
(Old type)
Hole of auto thread cutter
Setscrew (D)