Dismantling (Cont'd)
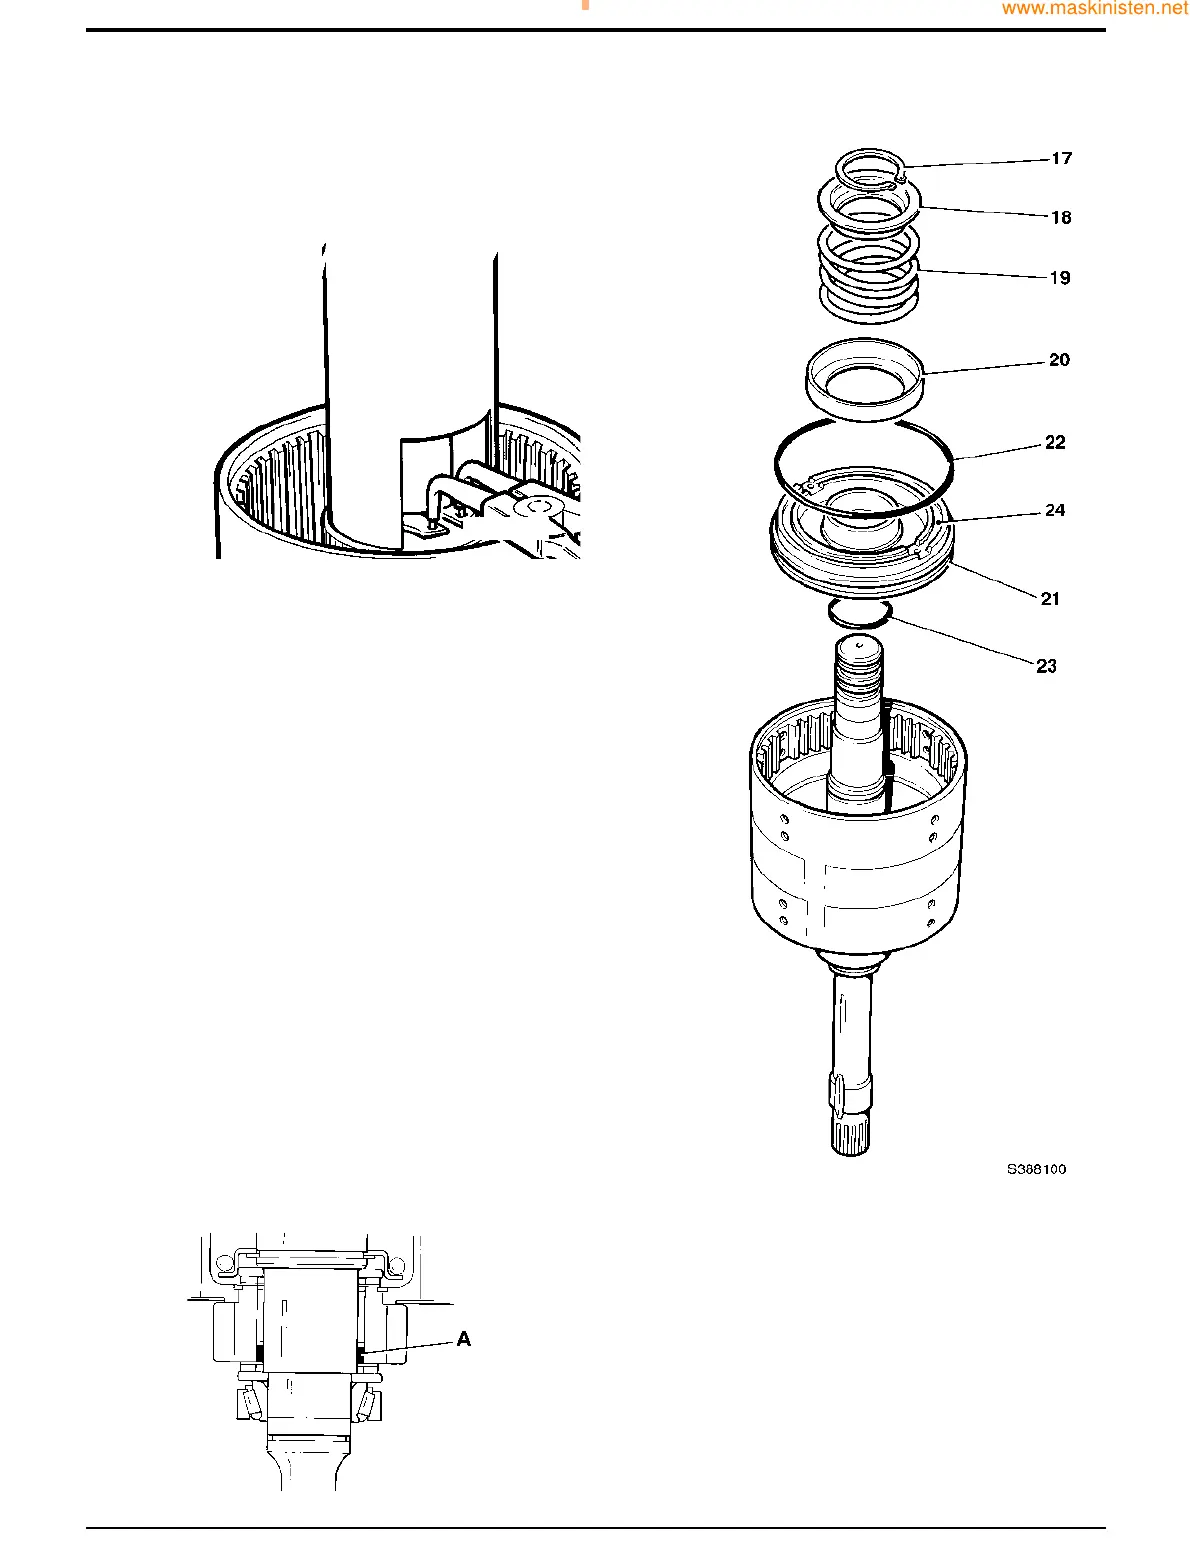
12 Position clutch assembly in a suitable press to
compress the piston spring then remove circlip 17.
13 Lift off spring retaining plate 18.
14 Remove spring 19 and oil baffle plate 20.
15 Turn the assembly over and knock the clutch shaft on a
wooden block to loosen the piston 21.
Note: If the piston does not loosen, hand pump air down the
shaft oil inlet hole.
16 Remove the piston 21. Remove and discard the piston
'O' ring 22 and shaft 'O' ring 23.
17 Make sure that the piston liner 24 is secure and is a
tight fit on the piston.
18 Dismantle the opposite clutch assembly (torque
converter end) by repeating steps 1 to 17 and
observing the following notes.
Note: The clutch shaft has only one piston ring seal 1 fitted
at this end.
Note: Spacer A is fitted on the clutch shaft after the needle
roller bearing 7. The spacer may be fitted at either end of the
needle roller bearing.
62 - 3
Section F Transmission
9803/7130
Section F
62 - 3
Issue 1
Reverser Unit
S204090
S145000